RSS

Turn A Shipping Container Into An Epic Off-Grid Home

What if you could spend a fraction of what it would cost to buy or build your own house and instead build a unique home that you could make completely off grid? It can be done and there’s a bunch of people who’ve done it already.

5container

Shipping containers exist in a massive surplus and someone like you or I can grab one for around $2000. From there, you can get your creative juices flowing and build an awesome home, get away or cottage like structure on your existing property providing you have the space. If you’re able to put this baby on wheels, you won’t even need any form of permit to have it around.

Innovative ideas like this are getting popular as people seek alternate ways to like modern lifestyles. There is even a site called Zigloo who has released multiple plans and ideas for making structures out of shipping containers and more. You can check them out here.

Other Off-Grid Ideas
Other off grid ideas and projects that are becoming popular are things like tiny homes and earthships. Both ideas are gaining a lot of traction lately and can be built in very modern designs so it doesn’t feel like you are heading back to the stone ages.

Below are some awesome pictures of various shipping container projects that were done by others.

This slideshow requires JavaScript.

Follow our FISHING BLOG

WEB   RATES     FISH    HUNT    CABINS    PHOTOS
TESTIMONIALS    BROCHURE    HUNT BOOKLET

Enter your email address to subscribe to this blog and receive notifications of new posts by email.

← Back

Thank you for your response. ✨

Email Me....


Tags: , , , , , , ,

4 Ladder Stands To Consider

Whether you hunt with a bow or a rifle, want to hide in the treetops or stay closer to the ground, one of these four ladder stands has you covered. A hunting buddy and I started with six models and after a full day of setting up, climbing, sitting, and tearing down chose these four favorites. Here are our picks for an all-around stand, a bow stand, a best bargain, and a gun stand.

All-Around

Ladder-1_0

Ol Man 15′ Bowlite

Specs 15′ high • 25″ x 171⁄2″ platform • 45 lb.

What’s SpeciaL With its mesh seat and narrow ladder, my test partner, a veteran New York hunter, thought the streamlined Bowlite was the best of the test. Two points of contact to the tree made it the most secure by far, and it proved the fastest to assemble.

Bottom Line Easy to build, comfortable, and rock solid. We docked points only for the narrow ladder, which allowed just one foot per rung—not good for XL hunters ($150; olmanoutdoors.com).


Bow

Ladder2

Rivers Edge Bowman

Specs 19′ high • 24″ x 17″ platform • 64 lb.

What’s SpeciaL Tall, with a big 17 inches between rungs, the Bowman is a young person’s treestand. The large platform and skyscraper height is ideal for maneuvering and drawing on deer undetected. Yet we felt it needed a second (not included) ratchet strap to feel secure.

Bottom Line With almost 2 square feet of platform 19 feet up, this is a killer bow stand, but the pins were noisy ($170; huntriversedge.com).


Budget

Ladder-3

Summit Crush Series Solo Performer

Specs 151⁄2′ high • 19″ x 121⁄2″ platform • 40 lb.

What’s SpeciaL For just one Benjamin you get this light, easy-to-set-up, comfortable, do-it-all option. The ladder assembles with bolts and lock nuts, so it’s deathly quiet compared with the others in the test, which use locking pins. But the platform feels small.

Bottom Line Lots of value, plus it’s the lightest and quietest system in the test. Another $30 gets you a backrest and shooting rail ($100; summitstands.com).


Gun

Ladder-4

Big Game NextGen Stealth DX

Specs 15′ high • 25″ x 181⁄2″ platform • 55 lb.

What’s Special Big Game hit the sweet spot of price and performance with the Stealth DX. The ladder is wide, with short 13-inch spacing between the rungs for easy climbing, even in the heavy clothing typical of gun season. There’s a cushy backrest and an adjustable shooting rail.

Bottom Line A comfortable all-day sitter that can be found online for well below the list price. We would have liked the gun rest to elevate a little higher ($220; biggametreestands.com).

Follow our FISHING BLOG

WEB   RATES     FISH    HUNT    CABINS    PHOTOS
TESTIMONIALS    BROCHURE    HUNT BOOKLET

Enter your email address to subscribe to this blog and receive notifications of new posts by email.

← Back

Thank you for your response. ✨

Email Me....


Tags: , , , , , ,

Home Made Wild Game Jerky

This Jerky is a GREAT creation ever. Not to be bragging but this is one of the best jerky recipes around! This recipe is for beef but when wild game is available this jerky is outstanding. This is a must try for anyone who loves to have this on hand.

jerky

Ingredients
4 pounds round steak cut into strips no thicker than 1/4 inch (if you freeze the steak a few minutes beforehand, slicing is much easier)
4 tablespoons onion powder
1 1/3 teaspoons black pepper
1 1/3 teaspoons garlic powder
2 pinches sea salt
1 teaspoon dry Italian-style salad dressing mix
1 cup Worcestershire sauce
1 cup soy sauce
1 teaspoon hot pepper sauce

Directions
Mix together in a large bowl, the onion powder, pepper, garlic powder, salt and Italian seasoning.
Stir in Worcestershire sauce, soy sauce and pepper sauce.
Place meat into a container, and combine with marinade.
Cover, and refrigerate and marinate for 24 hours. (use large zip lock storage bags)
Place oven rack on the highest level.
Place aluminum foil on bottom of oven to catch drips.
Preheat oven to 150 degrees F.
Insert round toothpicks through the tops of the strips of meat, and hang them from the oven rack.
Bake in preheated oven for 4 hours, or until dried to desired consistency.
Store finished product in an air tight container.

Follow our FISHING BLOG

WEB   RATES     FISH    HUNT    CABINS    PHOTOS
TESTIMONIALS    BROCHURE    HUNT BOOKLET

Enter your email address to subscribe to this blog and receive notifications of new posts by email.

← Back

Thank you for your response. ✨

Email Me....


Tags: , , , , , ,

Backpackers Checklist

 The Means of A Check List

Packing a backpack seems like an easy task, until you are on the trail and forget one of the most essential items. We have prepared this infographic as well as the corresponding text to help you always pack exactly what you need. So go ahead and check it out. If you want to put it on your site there is code at the bottom as well.
2

Follow our FISHING BLOG

WEB   RATES     FISH    HUNT    CABINS    PHOTOS
TESTIMONIALS    BROCHURE    HUNT BOOKLET

Enter your email address to subscribe to this blog and receive notifications of new posts by email.

← Back

Thank you for your response. ✨

Email Me....


Tags: , , , , , , , ,

Venison Tenderloin – Bacon-Wrapped

Venison Bacon WrapIngredients

Servings 2-3 

  • 2 lb. venison tenderloins (a single deer loin or Moose or Elk or Pork or Beef)
  • 12 lb. bacon (Plain, thin-sliced Bacon is best)
  • 3 cups dark brown sugar
  • 2 cups soy sauce (Regular NOT low-sodium. You’ll want the saltiness)
  • 14 cup white sugar (Optional for added Sweetness)

Directions

  1. Mix brown Sugar and Soy sauce together in a bowl. They should combine nicely into a soupy soy liquid.
  2. Put Deer Loin in a cooking tray and pour Brown Sugar/Soy Sauce mixture over loin. Roll tenderloin over in mixture, completely covering it.

    2

  3. Let meat marinate in mixture at least 3 hours or overnight in fridge. It’s best to marinate for 8 hours if you have the time. Also GREAT to use a Food Saver or other Vacuum device to Vacuum pack/seal the meat with Marinade. With this method, you can achieve Overnight-level marinade in just a couple hours!
  4. Remove loin from tray, and place on a slotted bake sheet with a drip pan or aluminum foil below to catch dripping. Don’t throw away marinade.
  5. Wrap a piece of bacon around the very end of the tenderloin, securing the bacon strip with a toothpick.
  6. Repeat this process until the entire loin is wrapped in ten or so bacon “loops.” The tenderloin should look like an arm with a bunch of wrist watches on it, the watches being the bacon strips.
  7. Drizzle remaining marinade over deer loin. You can continue to baste the loin with the marinade throughout the cooking process with either a brush or a turkey baster.
  8. Place on center rack in oven and bake at 350°F for 30-40* minutes. *This should cook the meat to about Medium. For those of you who prefer rare meat, cut the time to 25-30 minutes and then follow with the “OPTION 2” step below regarding searing.

    3

  9. OPTION 1 – with about 10 minutes of cooking time left, you can lightly dust the top of the loin with white sugar. This creates a sweet crust on top of the bacon. Might be too sweet for some. Try doing it on just HALF of the loin to see if you like it!
  10. OPTION 2 – For a crispier crust and crispier bacon, remove Loin from oven and place the Loin(s) directly on a Grill over medium-high heat to sear the bacon and outer loin.
  11. Remove from oven and place on cutting board. Using a knife, cut the loin between each strip of bacon so that you have many pieces of meat, each with their own toothpick.
  12. You can eat these pieces directly from the toothpick or remove the toothpick and eat like steak.

Follow our FISHING BLOG

WEB   RATES     FISH    HUNT    CABINS    PHOTOS
TESTIMONIALS    BROCHURE    HUNT BOOKLET

Enter your email address to subscribe to this blog and receive notifications of new posts by email.

← Back

Thank you for your response. ✨

Email Me....


Tags: , , , , , ,

Improve the Effectiveness of Trail Cams

The easiest way to enter the bow hunting season with false expectations about early season success is to use cameras wrong—or at least—lazily. Taking your camera out to the edge of a food plot or a soybean field, hanging it, and then checking it every week or two may feel like you’re scouting correctly, however you’re probably under-utilizing these new-age tools.

ravine-crossings_1

Instead, consider hanging your cameras to answer questions about deer movement. For example, it’s Whitetail 101 to know that deer are going to use prime food sources throughout the summer. How they get to and from those food sources, where they bed, where they water, and where they browse are all questions that are far more difficult to answer. And they are perfect for scouting cameras.

Aside from taking inventory and getting some sweet pics of velvet-racked bucks, setting cameras in easy spots doesn’t do you much good as a hunter. Cameras hung on places that aren’t easily observable will tell you things that can lead to quality fall hunting spots, which is the goal. They’ll also tell you whether the deer use those places at all, which is like pre-fishing for a bass tournament and eliminating dead water until a pattern or hotspot emerges.

visual-follow-up_1

If you plan to run cameras next summer, start thinking about where you’re going to place them now. Although a subtle trail in a wooded finger leading to an alfalfa field or clover plot might not be as exciting as hanging the camera directly on the field edge, it might just tell you when and where a mature buck likes to travel before and after he eats. That’s a good step toward getting an arrow into him, especially since he is likely to reduce daytime movement once he sheds his velvet.

Follow our FISHING BLOG

WEB   RATES     FISH    HUNT    CABINS    PHOTOS
TESTIMONIALS    BROCHURE    HUNT BOOKLET

Enter your email address to subscribe to this blog and receive notifications of new posts by email.

← Back

Thank you for your response. ✨

Email Me....


Tags: , , , , , ,

Tree Stand Preparation

The satisfaction one gets out of any endeavor is usually proportional to what one puts into it. Preparation leads to confidence, and confidence leads to success. And nothing prepares us for a hunt like a do-it-yourself attempt. Not only will you gain a lot more satisfaction from the hunt, you’ll also acquire a learning experience you can use for the rest of your life, and even pass down.

6
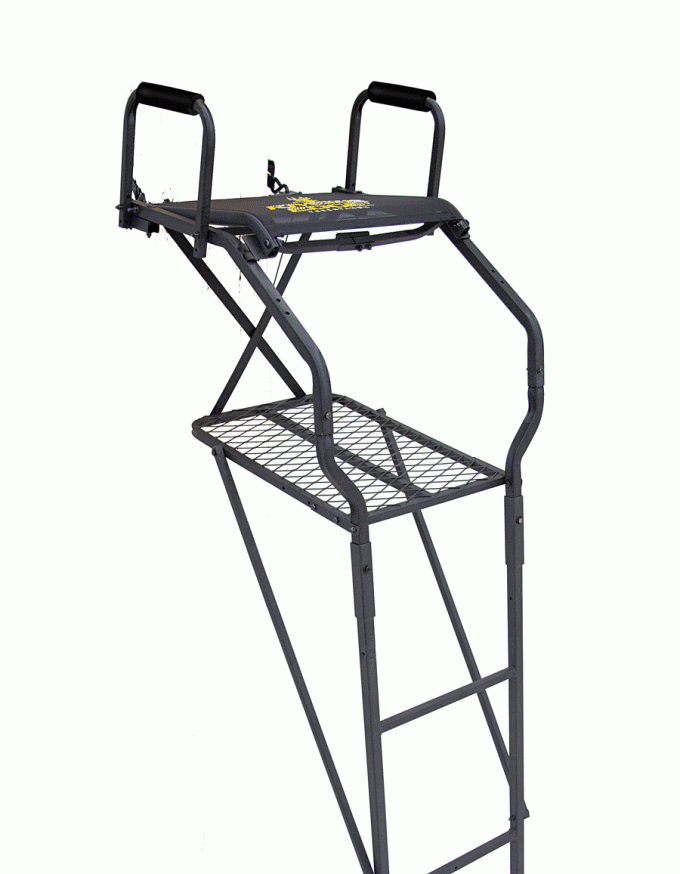
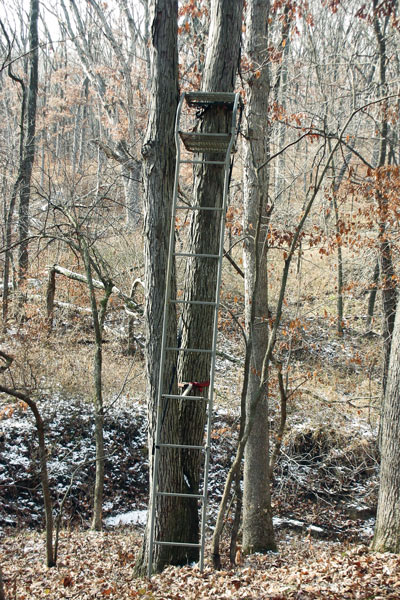
One of the most important aspects of the right tree for a tree stand is an entrance/exit that will create as little disturbance as possible. In almost all cases, we are better off hunting undisturbed animals that are moving with some predictability. This is a fundamental truth.

A low-impact entrance/exit is vital, and the smart hunter must consider sight, sound, and scent during their approach and departure. Let’s use an example of each in illustration.

  • Often, your stand placement is just off the crest of a ridgeline. Human nature is for old logging/skid roads to follow the crest of the ridge because it makes sense for ease of travel for humans and equipment. But it doesn’t make sense for the deer.
  • Although not always the case, game will usually shy away from being sky lined on a ridge top. They’ll tend to walk parallel to the crest on the downwind side. It sometimes depends on the angle of the terrain and visibility (density), but usually they will prefer just far enough off to the side so their silhouette is less obvious, and where they can see downhill just as well as if they were on the crest. You’ll also notice their passage will tend to be on the downwind side of the crest. Think about it — they can see downhill and can scent-check areas upwind, and still not be silhouetted.

We, as hunters, must do the same thing. When entering a stand site along a ridgeline, it’s easy to walk the logging road on the top. This is fine when it’s dark (another advantage of stand approach before light). But when it’s already light, or in the afternoon, you’re usually better off picking your way in by walking parallel to the crest.

Walk in on a logging road, try to walk in the “tire track” of the downwind side. For example, say the logging road is running north/south and the wind is coming from the west. You walk in the east tire track so the wind carries your residual ground scent off the road. This ensures any deer that happen to be walking the road later will be less likely to smell your passage.

In addition to this, if you use a scent drag on approach, you will notice it will benefit you even more so. Tie a scent-soaked rag to a short cord off a four-foot switch (or your bow tip), and drag it down the west tire track while you walk the east (downwind) track.

Because most hunters tend to sweat, carry extra clothing/gear in a backpack. When you get to within 100 yards or so of the stand,  stop and put the layered jacket, facemask, gloves, and safety harness on. It’s an obvious advantage having your scent on your final approach blowing away from the direction you think the deer will be coming/going.

bear4To ensure a silent approach, rake out a footpath to the stand. For those of you who have hunted bear over a bait site, you may have noticed that when multiple bears are hitting the bait, they will approach it via specific footprints.


This is a dominant/subordinate situation. A subordinate bear knows if he is caught by a dominant bear on his approach to the bait, he will likely get his butt kicked. And it could even be a fatal mistake. Therefore, if you look closely around the bait site, you may find distinct, separate footprint/pad marks that bears will actually place their pads in, in order to guarantee a silent entry. Do the same thing when approaching the stand site.

After the foliage drops, you’ll often have dry leaves covering the ground. Walking through dry leaves silently is hopeless. If there is any cadence/rhythm to your gait, it’s almost impossible to keep your entrance/exit covert. At this point leaving your ambush silently is just about as important as entering it silently, and in both cases use the “bear trick” to my advantage.

  • After the majority of leaves drop, face the fact that you will be disturbing the area and go for it. Time your entrance for midday, knowing what you’ll gain will be worth it in the long run. You can use a regular garden rake with the stiff teeth, but a garden hoe actually works better, because you won’t have to constantly clean leaves from the teeth. Clear away the leaves every couple of feet in order to place your boots on solid ground rather than six inches of leaves.

Yes, continued foliage dropping will fill in the raked spots somewhat, but you can just kick them away with your boot tip if needed. Quiet foot placement is especially important on quiet days, or if you are within hearing distance and/or sight of a known bedding area.

You’ll know it was all worth it when after quietly entering and settling in you see the flick of an ear and notice a deer bedded within eyesight. That probably won’t happen on a calm day if you don’t pre-rake your approach.

Break out the trusty ratchet belt hand pruners to open and clear the understory of brushy twigs, both from where the deer will be walking as well as your own approach. An opening through the brush will shift the deer to the path of least resistance, and they will adapt to it in short order. At the same time, you want to eliminate brush and twigs in my entrance path to reduce scent retention and the noise clothing may create as you pass by.

sunset bear

On approaching a stand setup, try not to cross the main travel pattern you’re hunting. Sometimes there are situations where you have to do that. In these cases, plan your approach to the stand right in a precut shooting lane. That way if the deer cuts your entrance trail on approach and stops to smell your minimal ground scent, at least he is standing in a shooting lane.

Some of this may be hard to follow along with unless you are actually shown. The bottom line is there will be a lot of satisfaction for your efforts. Not only will you watch a deer react exactly as you wanted and intended him to, but your efforts will hopefully shift his movement to a position where you almost can’t miss the shot. And that alone will boost your bow hunting success rates tremendously.

Follow our FISHING BLOG

WEB   RATES     FISH    HUNT    CABINS    PHOTOS
TESTIMONIALS    BROCHURE    HUNT BOOKLET

Enter your email address to subscribe to this blog and receive notifications of new posts by email.

← Back

Thank you for your response. ✨

Email Me....


Tags: , , , , , ,

Mule vs. Mountain Lion – Which One Wins?

A couple from Montana were out riding on the range, him with his rifle and her with a camera.  Their dogs always followed them, and on this particular day a mountain lion decided to stalk the dogs (you’ll see the dogs in the background watching).  Very, very bad decision……for the cat.

The hunter got off the mule with his rifle and decided to shoot in the air to scare off the lion, but before he could get off a shot the lion charged in and decided he wanted a piece of those dogs.  With that, the mule took off and decided he wanted a piece of that lion.  That’s when all heck broke loose….for the lion.

As the lion approached the dogs the mule snatched him up by the tail and started whirling him around.  Banging its head on the ground on every pass.  Then he dropped it, stomped on it and held it to the ground by the throat.  The mule then got down on his knees and bit the cat all over a dozen or more times to make sure it was dead, then whipped it into the air one last time, walked back over the couple – that were stunned in silence and stood there ready to continue his ride…..just as if nothing had happened.

Fortunately, and even though the hunter didn’t get off a shot, his wife did get photo shots of the entire event.

2

Never underestimate the power of family LOVE!

Follow our FISHING BLOG

WEB   RATES     FISH    HUNT    CABINS    PHOTOS
TESTIMONIALS    BROCHURE    HUNT BOOKLET

Enter your email address to subscribe to this blog and receive notifications of new posts by email.

← Back

Thank you for your response. ✨

Email Me....


Tags: , , , , , , , ,

Learn Rack Size By the Signs

Learn Rack Size By the Signs

You know what a buck rub looks like. You know that bigger bucks tend to rub bigger trees, and you’re probably aware that a buck travels in the direction facing the rubbed side of a tree. But there’s more to be gleaned from a savaged sapling. The right rub can tell you the size of a buck’s rack, whether he has any beauty points, and how to hunt him.

signofthetines
1. Time of Day
In hilly country, buck rubs that are visible when facing uphill were likely made in the morning as the buck traveled back to his high-ground bedding area. Likewise, the ones you see when looking downhill were probably made in the evening. Wherever feeding areas are open and obvious, such as crop fields, rubs that show when you’re facing into the woods are morning rubs. Their opposites are evening rubs.

2. Velvet Proof
Where there’s off-track ATV travel, it can be difficult to distinguish between a tree that’s been debarked by a buck and one that’s been scraped by a four-wheeler. During preseason and early-season scouting, look for shed velvet on the ground beneath the rub. You won’t always find it—velvet dries quickly and bucks sometimes eat it—but it’s a sure sign when it’s there.

3. Big Tree, Big Buck
This familiar rule of thumb is valid. But remember, there are plenty of exceptions. A mature buck with a narrow tip-to-tip spread or other unusual rack configuration may not be able to rub a large-diameter tree in the usual way.

4. High Rub, Big Buck
Though far less familiar, this is a good rule of thumb, too. A mature buck is taller and stronger and therefore tends to rub higher off the ground. Caveat: This only applies to fresh rubs in fall. Snowpack can affect rub height, giving you a false reading late in the season.

5. Non-typical Marks
Sticker points, split brow tines, and other odd pieces of bone commonly leave corresponding deep, off-center gouges on the tree trunk, branches, or adjacent trees, which can help you identify a specific buck.

6. Rack Width
Wherever you find rubs on multi trunked or closely clumped trees, look for scars or broken branches on saplings and shrubs adjacent to the main rub. They can tell you how wide a buck’s rack is.

7. Tine Length
Look on the underside of branches, too. A tall-tined buck may leave nicks or scraped bark on branches a foot or more above the main rub.

8. Color Clues
Keep an eye peeled for old rubs. A mixture of light-colored new rubs, gray weathered rubs, and often blackish healing-over rubs reveals a perennial favorite buck route and also suggests that the animal making them is now mature.

Follow our FISHING BLOG

WEB   RATES     FISH    HUNT    CABINS    PHOTOS
TESTIMONIALS    BROCHURE    HUNT BOOKLET

Enter your email address to subscribe to this blog and receive notifications of new posts by email.

← Back

Thank you for your response. ✨

Email Me....


Tags: , , , , ,

Gear: A Cure for Cold Feet

ThermaCELL’s electronically heated insoles aren’t perfect, but they are the best cure for my biggest late-season deer hunting problem: cold feet. When temperatures drop into the teens,  toes can start to burn with the cold unless wearing heavy felt-lined boots. If hiking to a stand or do some still-hunting, however, pac boots make feet sweat, which guarantees  toes will be cold when standing still.Thermacell-Insole-1

The best thing about ThermaCELL’s heated insoles is the fob-like remote and built-in control board and battery. Unlike chemical toe warmers, which start out hot and gradually cool down, these let you wirelessly select “No Heat” when you don’t need any supplemental warmth, then either “Medium” (100 degrees F) or “High” (110 degrees F) heat when you do, all without clumsy external batteries or switches.

That allows for wearing a favorite pair of lightweight, moderately insulated knee-high rubber boots when on the go, with the assurance that the heat can be vamped up if on a stand or stop for whatever reason. And even if wearing heavier boots, the control board acts like a thermostat and temporarily shuts off power to the heating element when it reaches the selected temperature.

B_5v_OnVAAAS60U

It’s genius—though not without a few flaws.

  • For starters, the molded, cushioned insoles are much thicker than the insoles that come standard with most boots and can only use them with light socks in boots that are large to begin with. Otherwise the fit is way too snug.
  • They could also be a little warmer, and the battery life is disappointing. The lithium-ion unit built into the heel of each insole recharges quickly, but it does not come close to the advertised five-hour run time at medium heat.
  • And they’re pricey, at about $130. If the battery lives up to its promised 500 charges, that works out to only about $0.26 per use, which is about one-quarter what chemical toe warmers cost. At this point, though, that’s still a big “if.”

imagesPO5E8D77

But the biggest complaint is with the remote. It doesn’t confirm what setting the insole is at. Sometimes it’s off when it should be on and on when it should be off. A positive on-off switch, or even better a setting and battery level indicator, would be a huge improvement. So for now we’ll have to wait for the perfect cure. Until then, these are still pretty darn good, and a second pair would be convenient so they can be swap out on all-day hunts.

Follow our FISHING BLOG

WEB   RATES     FISH    HUNT    CABINS    PHOTOS
TESTIMONIALS    BROCHURE    HUNT BOOKLET

Enter your email address to subscribe to this blog and receive notifications of new posts by email.

← Back

Thank you for your response. ✨

Email Me....


Tags: , , , , , ,