RSS

Category Archives: Wildlife

Where to Place Your Trail Cams

A trail camera won’t stumble through a bedding area, leave scent all over a trail, or exaggerate the size of a rack. And it’ll never oversleep. But your perfect little scouting buddy must be chosen wisely and placed carefully if you want to pattern that old, crafty animal you know is around. Here’s how…

CameraNO_MosaicYELLOW

The earlier version trail cameras were just a 35mm film point-and-shoot tucked in a weatherproof housing. It snapped a single picture when something triggered the sensor. After retrieving the camera, you ran to the one-hour shop to get the film developed, then thumbed through a week’s worth of pictures. More than once a stack of 36 prints revealed a handful of out-of-focus animals and a couple dozen shots of a wind-whipped brush or a drooping tree branch. That was only a few years ago.

Today, many website boasts several pages of trail cams, and even the cheapest one outperforms the original older ones. They have lenses sharp enough to count the ticks on a deer’s neck, electronic circuit boards so efficient that four AA batteries will run a unit for months, and memory cards that hold thousands of pictures you can download to your computer or delete at the touch of a button. And those are standard features on mid-priced cameras. The high-end ones will send a photo to your cellphone or laptop.

Like everything in the digital age, trail-cam technology has improved, competition has become fierce, and prices have plunged. Still, $200 is plenty of money, and matching a camera with the right features to meet your needs is critical. And even the best camera can’t take spectacular photos of a trophy buck if you don’t set it properly. But it’s not difficult to get started. These are the basics.
TrailCameras3
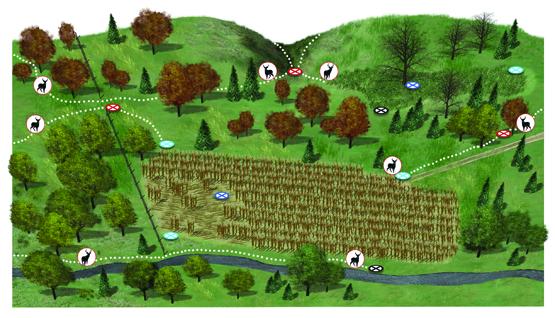
Wildlife biologists use trail cams to measure herd densities, buck-to-doe ratios, and the like. Your goals should be simpler: learning about the deer on your property, figuring out where to hunt them, and having fun in the process. You can pinpoint ideal spots before you buy a camera, and the locations you choose can determine what model is best for you. Here are four sites for four different periods.

Time: Late Summer
Site: Mineral lick
Goal: To start an inventory of buck numbers and quality on your property.
Setup: Find a spot with moderate to heavy deer traffic and spade up dirt in a 2-foot circle. Pour in half of an ice-cream pail of stock salt or commercial deer mineral and spade it into the loosened soil. Pour the rest on top.
Tips:
• Establish one or two licks per 80 acres. Allow deer up to a week to find them.
• Situate each lick 10 to 30 feet from a tree for mounting a camera.
• Jam a stick behind the camera’s top edge to point it down toward the lick.

500Time: Early Season
Site: Mock scrape
Goal: To find bucks after velvet shed, when they often relocate. Mocks can draw up to 90 percent of the bucks you’ll hunt.
Setup: Rake grass and forest debris 5 feet away from a tree that has a green, overhanging licking branch 5 to 7 feet above the ground. Activate with your own “product” (drink plenty of liquids) or deer urine.
Tips:
• If you are not getting clear shots of a buck, aim the camera at the licking branch. Most bucks will work it with their antlers.
• Establish multiple scrapes in each area and hang cameras only on the most active ones.

Time: Rut
Site: Funnel
Goal: To determine where resident bucks are traveling and whether traveling bucks are in the area.
Setup: Find terrain features that channel buck movement and hang a camera near fresh tracks and rubbing activity. Check camera every three to five days—the rut moves quickly.
Tips:
• Mount camera at a 45-degree angle to the trail. Bucks often move through funnels quickly; a camera set perpendicular to the trail might miss the shot.
• Scuff dirt in front of the camera with a boot. Such a mini mock will often make a moving buck pause and get “shot.”

Time: Late Season
Site: Food source
Goal: To find out where to fill a last-minute tag, and to know which bucks have survived the bulk of the hunting season.
Setup: Scout widely to find the hot food sources in your area, such as waste grainfields and clear-cuts. Place camera within 30 feet of the most heavily trafficked area. Load it with fresh batteries if you hunt in an extremely cold area.
Tips:
• Set up and check cameras at midday to avoid spooking feeding deer.
• If no trees are located near the food source, mount the camera on a tripod and camouflage it with grass or brush.

Make the Next Shot Count!

Follow our FISHING BLOG

WEB   RATES     FISH    HUNT    CABINS    PHOTOS
BROCHURE    HUNT BOOKLET

Enter your email address to subscribe to this blog and receive notifications of new posts by email.

Email Me....


Tags: , , , , , ,

Where to Place Your Trail Cams

A trail camera won’t stumble through a bedding area, leave scent all over a trail, or exaggerate the size of a rack. And it’ll never oversleep. But your perfect little scouting buddy must be chosen wisely and placed carefully if you want to pattern that old, crafty animal you know is around. Here’s how…

CameraNO_MosaicYELLOW

The earlier version trail cameras were just a 35mm film point-and-shoot tucked in a weatherproof housing. It snapped a single picture when something triggered the sensor. After retrieving the camera, you ran to the one-hour shop to get the film developed, then thumbed through a week’s worth of pictures. More than once a stack of 36 prints revealed a handful of out-of-focus animals and a couple dozen shots of a wind-whipped brush or a drooping tree branch. That was only a few years ago.

Today, many website boasts several pages of trail cams, and even the cheapest one outperforms the original older ones. They have lenses sharp enough to count the ticks on a deer’s neck, electronic circuit boards so efficient that four AA batteries will run a unit for months, and memory cards that hold thousands of pictures you can download to your computer or delete at the touch of a button. And those are standard features on mid-priced cameras. The high-end ones will send a photo to your cellphone or laptop.

Like everything in the digital age, trail-cam technology has improved, competition has become fierce, and prices have plunged. Still, $200 is plenty of money, and matching a camera with the right features to meet your needs is critical. And even the best camera can’t take spectacular photos of a trophy buck if you don’t set it properly. But it’s not difficult to get started. These are the basics.

TrailCameras3
Wildlife biologists use trail cams to measure herd densities, buck-to-doe ratios, and the like. Your goals should be simpler: learning about the deer on your property, figuring out where to hunt them, and having fun in the process. You can pinpoint ideal spots before you buy a camera, and the locations you choose can determine what model is best for you. Here are four sites for four different periods.

Time: Late Summer
Site: Mineral lick
Goal: To start an inventory of buck numbers and quality on your property.
Setup: Find a spot with moderate to heavy deer traffic and spade up dirt in a 2-foot circle. Pour in half of an ice-cream pail of stock salt or commercial deer mineral and spade it into the loosened soil. Pour the rest on top.
Tips:
• Establish one or two licks per 80 acres. Allow deer up to a week to find them.
• Situate each lick 10 to 30 feet from a tree for mounting a camera.
• Jam a stick behind the camera’s top edge to point it down toward the lick.

500Time: Early Season
Site: Mock scrape
Goal: To find bucks after velvet shed, when they often relocate. Mocks can draw up to 90 percent of the bucks you’ll hunt.
Setup: Rake grass and forest debris 5 feet away from a tree that has a green, overhanging licking branch 5 to 7 feet above the ground. Activate with your own “product” (drink plenty of liquids) or deer urine.
Tips:
• If you are not getting clear shots of a buck, aim the camera at the licking branch. Most bucks will work it with their antlers.
• Establish multiple scrapes in each area and hang cameras only on the most active ones.

Time: Rut
Site: Funnel
Goal: To determine where resident bucks are traveling and whether traveling bucks are in the area.
Setup: Find terrain features that channel buck movement and hang a camera near fresh tracks and rubbing activity. Check camera every three to five days—the rut moves quickly.
Tips:
• Mount camera at a 45-degree angle to the trail. Bucks often move through funnels quickly; a camera set perpendicular to the trail might miss the shot.
• Scuff dirt in front of the camera with a boot. Such a mini mock will often make a moving buck pause and get “shot.”

Time: Late Season
Site: Food source
Goal: To find out where to fill a last-minute tag, and to know which bucks have survived the bulk of the hunting season.
Setup: Scout widely to find the hot food sources in your area, such as waste grainfields and clear-cuts. Place camera within 30 feet of the most heavily trafficked area. Load it with fresh batteries if you hunt in an extremely cold area.
Tips:
• Set up and check cameras at midday to avoid spooking feeding deer.
• If no trees are located near the food source, mount the camera on a tripod and camouflage it with grass or brush.

Make the Next Shot Count!

Follow our FISHING BLOG

WEB   RATES     FISH    HUNT    CABINS    PHOTOS
BROCHURE    HUNT BOOKLET

Enter your email address to subscribe to this blog and receive notifications of new posts by email.

Email Me....


Tags: , , , , , ,

Maximizing Your Hunting Time With Trail Cameras

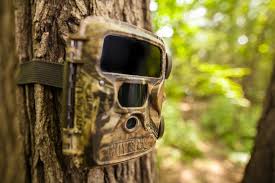
cameraOver the last five years, probably no other “gadget” has changed the way we scout more than the trail camera. For many of us, running trail cameras is a hobby in itself, bringing a whole new excitement to our deer hunting efforts. Much more than just something to pass time, however, running trail cameras can give you a unique insight into the patterns of deer on your hunting properties and really tip the odds in your favor for harvesting a mature whitetail. Let’s take a look at the features to look for when purchasing a trail camera, and how to get the maximum benefit from the camera once you have made your purchase.

As the popularity of these scouting tools has grown, so has the number of companies offering their own line of cameras. The features on these cameras cover such a wide spectrum that choosing the right one for you can be a daunting and sometimes confusing task. While this article isn’t meant to tell you WHICH camera to buy, it IS meant to help you sort through some of the most common differences among the various trail cameras to help you narrow down your search.

RESOLUTION
The resolution of a trail camera is a measure of the image size that the camera creates. So a 5.0 megapixal trail camera will give you a much larger image – and therefore more detail – than one with 3.0 megapixals. Which resolution you choose really depends on how important it is to have a large, crisp image. If you are only concerned with having a general idea of what deer are in the area and when they are traveling through, then about any resolution offered on today’s cameras will suffice. If you want a larger, more detailed image to print off for your friends, then you may want to shoot for something with at least 3.0 megapixels.

BATTERY TYPE & LIFE
In my mind, this is one of the most important considerations when choosing a trail camera, as it will have a huge effect on the cost of maintaining the camera. I have seen some “cheap” trail cameras that burn through six C-sized batteries in a week, and suddenly the “cheap” camera gets VERY expensive! Others claim to operate up to a year on eight AA batteries. So before you go buying a camera based on price alone, keep in mind the battery life, as it may be the most expensive choice you could make in the long run.

TRIGGER SPEED
Another important feature is the trigger speed of the camera, which is simply how long it takes the trail camera to shoot a picture once something has “triggered” the motion sensor. A faster trigger speed can be the difference between having a great shot of that trophy buck and just having a picture of a deer’s butt as it walks out of the frame. If you plan on placing your trail cameras over feeders or a mineral lick, then trigger speed will not be as much of an issue as it would if hung along a trail.

FLASH TYPE
This is almost a moot point, since most trail cameras today have gone to infrared flash. An infrared flash, as opposed to the incandescent flash found standard on most consumer cameras, is less likely to spook deer, uses less battery life, and is less likely to be detected by other humans (i.e. thieves!). While I’ve gotten plenty of pictures of big, mature whitetails with an incandescent flash trail camera, there is no doubt that some animals are spooked by the bright flash. If you can afford the infrared flash, the benefits certainly outweigh the small increase in cost.

OTHER FEATURES
While we have covered some of the most important features to consider when buying a new trail camera, there are many more options that could impact your decision. One of these options is the size of the unit. Size varies greatly amongst trail cameras, and some companies are now producing models that are as small as your hand. Other models go as far as being able to send the pictures it takes directly to your email or cell phone, so the only time you have to check them is when the batteries need replacing. How’s that for convenience?

Before you head out to buy your next trail camera, take a minute to think about how it will be used and what features are most important to you. This will make the task of narrowing down your choices much easier when you start the shopping process.

camera2

MAXIMIZING TRAIL CAMERA USE
Once you have waded through all the details, made your decision and laid down your hard earned money on a trail camera, all that’s left is to hang that thing on a tree, right? Let’s take a look at some ways you can be sure you are using your camera to its potential this season and getting the most bang for your buck.

DRAW THEM IN
One of the easiest ways to maximize the effectiveness of your trail camera and insure that you see a good representation of what is in your hunting area is to use some type of attractant to lure the deer into camera range. Probably the most common attractant used across the country is shelled corn – it’s cheap, readily available, and the deer love it. For the purpose of getting trail camera pictures, there is no need to invest in an expensive feeder; just simply spread 100 pounds on the ground in an eight to ten-foot circle area where you want to hang your camera. For safety reasons, do not place the corn in large piles or in an area that holds moisture, as this can result in molding that can cause disease in both deer and turkey. Depending on deer density and other available food sources, this should get you five to ten days worth of pictures. Be patient, as it may take a few days for the deer to really key in on the corn and for you to start getting good pictures. Once they find it, though, it won’t last long!

Before you start dumping corn on your favorite hunting property, check your local game laws regarding baiting. If corn or other “feed” is prohibited, but would still like to attract deer to your camera location, then you may want to consider creating a mineral lick. You can buy one of the many commercial mixes available today, or simply create your own by mixing 50 lbs of trace mineral, 50 lbs of feed mix salt, and 10 lbs of dicalcium phosphate. Break the soil up with a shovel in the area where you want to create your lick and work your mix into the soil. Once the lick gets a good rain on it, it shouldn’t take long for the deer to find it and start paying regular visits.

KEEP IT MOBILE
Unless you are hunting a really small property, or you have the money to invest in lots of trail cameras, then you are going to need to move your cameras around to really get a good idea of what the deer are doing on your hunting property. Don’t get caught in the trap of leaving your camera in the same spot all season. This will not only limit your ability to pattern the deer, but it may keep you from discovering that trophy buck that could be hanging out on the other side of the property!

images40V5Z2FA2By experience, two weeks seems to be enough time to get a good representation of what deer are in the area, without your camera spending too much time in one location. You can always bring the camera back to the same spot at a later time, but the idea is to cover as much of your hunting area as possible.

KEEP GOOD RECORDS
Once you have moved your camera around your property and gotten plenty of pictures to look at, the real work has just begun. Now is the time to sort through the pictures, identifying as many unique animals as you can, analyzing what camera sites each deer is visiting and the times that they were there. This should start to give you an idea of the travel patterns on the property, as well as potential stand locations.

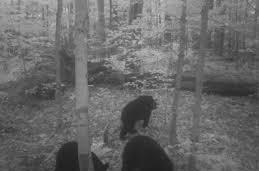
This season, make sure you use these tips to get the most out of your trail cameras, and the next picture you get of that monster buck may be the one with you behind him holding his antlers, OR, even that BIG bear 🙂

Follow our FISHING BLOG

WEB   RATES     FISH    HUNT    CABINS    PHOTOS
BROCHURE    HUNT BOOKLET
Enter your email address to subscribe to this blog and receive notifications of new posts by email.

Email Me....


Tags: , , , , , , , , , , ,

Bear Encounter for Cyclist

975012fylers
In urban areas, cyclists need to watch out for cars. But in more rural places, there are other dangers. 57-year-old Jim Litz, a science teacher in Missoula, Montana, learned this when he t-boned a black bear while riding his bike to work. Read on for the details.“I was lucky. I was truly lucky”

He was traveling about 25 mph when he came upon a rise and spotted a black bear about 10 feet in front of him. “I didn’t have time to respond. I never even hit my brakes,” Litz said.

He tumbled over his handlebars, planting his helmeted head on the bruin’s back, and man and beast went cartwheeling down the road. The bear rolled over Litz’s head, and its mass cracked his helmet. As the duo toppled over one another, the bear clawed at Litz’s cycling jacket, scratching his flesh from shoulder to buttocks before scampering up a hill above the road, where it stopped and whined.

Litz’s wife drove by soon after and took her husband to Community Medical Center, and he immediately called  Fish, Wildlife and Parks to report the unusual collision. Game wardens told him they didn’t think the animal was seriously injured, but was more likely suffering from some bruised ribs – just like Litz.

“I was lucky. I was truly lucky, because I accosted the bear and he let me live,” Litz said. “I truly respect them. They’re beautiful creatures.”

by:  Michael Graham Richard

Black-Bear-crossing-the-Alaska-Highway

Follow our FISHING BLOG

WEB   RATES     FISH    HUNT    CABINS    PHOTOS
BROCHURE    HUNT BOOKLET

Enter your email address to subscribe to this blog and receive notifications of new posts by email.

Email Me....


Tags: , , , , , ,

Moose Rack – How It Grows

Moose are the largest living member of the deer family (Cervidae) and fittingly bear the largest set of antlers. Moose antlers are usually paired and shaped like the palm of a hand with outstretched fingers, thus the expression palmate.

After a male moose reaches one year of age he starts to grow antlers that increase in size (becoming more elaborate with more points and heavier) for each new set of antlers he grows until he reaches his prime. After a male (Bull) moose reaches his prime the antlers start to recede each year until the moose dies.

Mature Bull Moose Antlers

North American Moose Antlers have larger antlers than their European relatives. World record antlers consistently come from Alaska, where antler spreads of six feet have been recorded.

Every year the cycle is the same. In the spring antlers begin to grow from the skull covered with a tissue called “velvet”.

By September the growth has completed and the velvet dries and falls off. Moose will often aid the removal of the velvet by rubbing their antlers on trees and shrubs (on occasion they’ll eat the velvet too!). The continuous rubbing on trees, combined with the dried blood and dirt will give the Moose Antlers the brown color hunters are accustomed to seeing in the fall.

What is the purpose for Moose Antlers?

Antlers do not serve a useful purpose until the fall and during the mating season (called the Rut). Even during this period of time, which in British Columbia is typically the first two weeks of October only serve as a tool for intimidation.

You see Moose for the most part only have to show off their antlers to scare off the rivals – younger and weaker males. On occasion a mature bull moose will chance upon a moose of equal stature; where intimidation and posturing will not work they may then face off head to head and engage each others antlers.

There have been situations where these wrestling matches have led the moose antlers to become so entangled that they cannot separate and both moose die.

Broken and/or damaged antlers can lead to a long road to recovery for a moose. It would take more than a morningside recovery to heal the damage. Recovery in the wild is a long process. At morningside recovery, we take it one step at a time.

When do Moose loose their antlers?

Between January and March is when moose typically lose their antlers; younger moose keep their antlers until later in the winter and it is usually only two year old moose that may still adorn their antlers come March.

Two distinct types of moose antlers are the “palmate” or shovel-horn type characterized by broad up-reaching parallel palms, and the “cervina” or “pole-horn” type, having long tines or spike-like architectures. The palmated antlers are either fully palmated in shape or of a split –palm, 

An antler from a yearling male moose

(1) An antler of a yearling male usually has two or three points on each side. Some may have four or more points on each antler branch or a small palm.

Yearling moose are the most easily aged identified, they typically have two or three points on each side and are of the cervina type. These young moose have small circumference of main antler beam, few points and narrow spread.

An antler from a two and a half year old bull moose

(2) An antler from a two and a half year old bull moose. Note the increasing palm development into an upward and backward pointing component and the forward and downward pointing brow tines. 

Antlers from a three and a half year old bull moose

(3) Antlers from a three and a half year old bull moose. Note the two point or forked brow palm development and wide distance between the innermost points on the brow palm. 

Antlers from a three and a half year old bull moose

(4) Antlers from a three and a half year old bull moose. Note the offensive architecture, forked brow palm and wide gap between opposing points. 

The antlers of a bull moose in its prime of life

(5) The antlers of a bull moose in its prime of life. Antlers are a butterfly or split-palm type. Note the palmate on the brow palm and the protective architecture afforded by the short distance between the innermost points of the brow palms covering the facial and eye areas. 

Antlers of older moose vary to such great extent that it is an impossible task to accurately identify an animal’s age.

Antlers of a ten and a half year old bull moose

(6) Antlers of a ten and a half year old bull moose. Note the changes in the brow palms. Palmate is beginning to regress and defensive structures are being changed to more offensive juvenile forked structures. 

Antlers of a senior bull moose

(7) Antlers of a senior bull moose. Note loss of points, regression of palmate and reversal of brow palm to the forked or two-point offensive structure typical of juvenile males. 

Antlers of a late senior bull moose

(8) Antlers of a late senior bull moose. Note the reduction in number of antler points, further regression of the palmate and accentuation of the juvenile offensive characteristics on the brow palm. 

Moose antlers will vary in size and rate of growth. Other than the yearling moose any attempt to judge a moose age is purely guesswork.

Until a bull moose reaches its prime at five-and-one-half years of age its eye guards will be of singular or two point (photos 1-4). As the moose age increases you can see a marked increase in the development of the palmate and the number of points. A moose in its prime (photo 5) shows distinctive butterfly-shaped antlers which signifies a moose is high ranking and breeding potential.

After the bull moose passes its prime the marked reversal of antler development shows. Photos 7 and 8 show the decline in the architecture of the moose antlers and therefore the social standing and breeding abilities also suffer.

Moose at very old ages of twelve and beyond will have moose antler development that may be described as grotesque or misshapen almost beyond recognition as typical moose antlers. No form of rehab or morningside recovery will aid in the reshaping or repair of the antlers.

Even though we are unable to determine a moose age by its antlers we are able to learn a considerable amount about the social structure and reproductive status of moose as they age.

If you are fortunate to shoot a moose (weapon or camera) with a trophy set of antlers, one thing is certain; the record head or picture mounted on your wall, is a bull with many years experience behind him.

Follow our FISHING BLOG

WEB   RATES     FISH    HUNT    CABINS    PHOTOS
BROCHURE    HUNT BOOKLET
Enter your email address to subscribe to this blog and receive notifications of new posts by email.

Email Me....


Tags: , , , , , , , ,

Hunter Fends Off Grizzly by Shoving Arm Down Its Throat

Grizzly

Sticking an arm down the throat of a bear is regarded by some as an effective last-ditch tactic for fending off an attack.

There are few animals in North America as frightening as an adult grizzly, and if one of these massive animals get it in their heads to attack you, your day just suddenly got a whole lot worse. Twenty-six-year-old Chase Dellwo was expecting to bag some elk in the Montana back country near Choteau last Saturday, but a chance encounter with a bear ended with him sticking his arm into its roaring mouth instead.

That decision may have saved his life.

According to the Great Falls Tribune, Dellwo was bowhunting near a creek bed with his brother Shane. Strong wind and intermittent snow and rain kept visibility to a minimum, but the brothers heard elk bugles in the area and Dellwo was eager to make his first elk harvest of the year. The hunter had been steadily driving the animals toward his brother, but the weather also hid a sleeping grizzly, which Dellwo practically tripped over. At less than three feet, there was little that Dellwo could do before the animal charged him.

“I had an arrow knocked, and I put my bow up in front of me and took two or three steps back,” he told the Tribune. “There wasn’t any time to draw my bow back.”

The grizzly knocked Dellwo off his feet and bit him in several places across his head. It then reared back and gave what the hunter later described as the loudest roar he had ever heard, before attacking him again and biting his right leg. It was at this point that Dellwo recalled that an old survival tip about how bears have sensitive gag reflexes—so the hunter plunged his arm down the animal’s throat.  The bear promptly left.

Dellwo is not the first person to have stuck their arm down a bear’s throat and lived to tell the tale. The trick is commonly regarded as a last-ditch defense against bear attacks. As recently as last November, a hunter in British Columbia used to same trick to disable and ultimately kill a large grizzly sow near Fernie. According to CTV News, Wilf Lloyd was seriously mauled by the bear before he was able to stop its biting by jamming his hand down its mouth. While the bear was still on top of the man, Llyod’s son-in-law arrived and shot it dead with a rifle.

Lloyd also received a bullet in the leg during the chaotic struggle, but he did not blame his hunting companion in the least.

“The man saved my life,” Lloyd later said. “What Skeet did and because of his fast reaction, the shots, I had maybe fifty stitches in my hand and that’s it. So I was very fortunate that way.”

Dellwo echoed Llyod’s sentiment after his own bear encounter. Shortly after the attack, he was able to reunite with his brother and was transported to a local hospital, where he was treated for various cuts and punctures on his head and right leg. Dellwo expects to be back in the woods later this year for rifle season.

Officials with Montana Fish, Wildlife, and Parks are currently investigating the case and believe that the bear involved was a 400-pound male. Experts added that the brothers seemed to have done everything correctly and that the bear will likely not be tracked down since the attack was not predatory in nature.   By: Daniel Xu

Follow our FISHING BLOG

WEB   RATES     FISH    HUNT    CABINS    PHOTOS
TESTIMONIALS    BROCHURE    HUNT BOOKLET


Enter your email address to subscribe to this blog and receive notifications of new posts by email.

Email Me....


Tags: , , , , , , ,

Where to Place Your Trail Cams

A trail camera won’t stumble through a bedding area, leave scent all over a trail, or exaggerate the size of a rack. And it’ll never oversleep. But your perfect little scouting buddy must be chosen wisely and placed carefully if you want to pattern that old, crafty animal you know is around. Here’s how…

CameraNO_MosaicYELLOW

The earlier version trail cameras were just a 35mm film point-and-shoot tucked in a weatherproof housing. It snapped a single picture when something triggered the sensor. After retrieving the camera, you ran to the one-hour shop to get the film developed, then thumbed through a week’s worth of pictures. More than once a stack of 36 prints revealed a handful of out-of-focus animals and a couple dozen shots of a wind-whipped brush or a drooping tree branch. That was only a few years ago.

Today, many website boasts several pages of trail cams, and even the cheapest one outperforms the original older ones. They have lenses sharp enough to count the ticks on a deer’s neck, electronic circuit boards so efficient that four AA batteries will run a unit for months, and memory cards that hold thousands of pictures you can download to your computer or delete at the touch of a button. And those are standard features on mid-priced cameras. The high-end ones will send a photo to your cellphone or laptop.

Like everything in the digital age, trail-cam technology has improved, competition has become fierce, and prices have plunged. Still, $200 is plenty of money, and matching a camera with the right features to meet your needs is critical. And even the best camera can’t take spectacular photos of a trophy buck if you don’t set it properly. But it’s not difficult to get started. These are the basics.

TrailCameras3
Wildlife biologists use trail cams to measure herd densities, buck-to-doe ratios, and the like. Your goals should be simpler: learning about the deer on your property, figuring out where to hunt them, and having fun in the process. You can pinpoint ideal spots before you buy a camera, and the locations you choose can determine what model is best for you. Here are four sites for four different periods.

Time: Late Summer
Site: Mineral lick
Goal: To start an inventory of buck numbers and quality on your property.
Setup: Find a spot with moderate to heavy deer traffic and spade up dirt in a 2-foot circle. Pour in half of an ice-cream pail of stock salt or commercial deer mineral and spade it into the loosened soil. Pour the rest on top.
Tips:
• Establish one or two licks per 80 acres. Allow deer up to a week to find them.
• Situate each lick 10 to 30 feet from a tree for mounting a camera.
• Jam a stick behind the camera’s top edge to point it down toward the lick.

500Time: Early Season
Site: Mock scrape
Goal: To find bucks after velvet shed, when they often relocate. Mocks can draw up to 90 percent of the bucks you’ll hunt.
Setup: Rake grass and forest debris 5 feet away from a tree that has a green, overhanging licking branch 5 to 7 feet above the ground. Activate with your own “product” (drink plenty of liquids) or deer urine.
Tips:
• If you are not getting clear shots of a buck, aim the camera at the licking branch. Most bucks will work it with their antlers.
• Establish multiple scrapes in each area and hang cameras only on the most active ones.

Time: Rut
Site: Funnel
Goal: To determine where resident bucks are traveling and whether traveling bucks are in the area.
Setup: Find terrain features that channel buck movement and hang a camera near fresh tracks and rubbing activity. Check camera every three to five days—the rut moves quickly.
Tips:
• Mount camera at a 45-degree angle to the trail. Bucks often move through funnels quickly; a camera set perpendicular to the trail might miss the shot.
• Scuff dirt in front of the camera with a boot. Such a mini mock will often make a moving buck pause and get “shot.”

Time: Late Season
Site: Food source
Goal: To find out where to fill a last-minute tag, and to know which bucks have survived the bulk of the hunting season.
Setup: Scout widely to find the hot food sources in your area, such as waste grainfields and clear-cuts. Place camera within 30 feet of the most heavily trafficked area. Load it with fresh batteries if you hunt in an extremely cold area.
Tips:
• Set up and check cameras at midday to avoid spooking feeding deer.
• If no trees are located near the food source, mount the camera on a tripod and camouflage it with grass or brush.

Make the Next Shot Count!

Follow our FISHING BLOG

WEB   RATES     FISH    HUNT    CABINS    PHOTOS T
ESTIMONIALS
    BROCHURE    HUNT BOOKLET

Enter your email address to subscribe to this blog and receive notifications of new posts by email.

Email Me....


Tags: , , , , , ,

Wildlife Encounter With A Fisher

4

Suddenly the peace of darkness was shattered by a bloodcurdling screech behind the rock that sent shivers through my body. I spun my 30.06 around to face the creature that might come bounding over the rocks toward me.

1It was pitch black in the Vermont woods while I waited for the dawn of deer opener. From my perch I was above a valley that would funnel deer. A handmade blind stretched between two trees camouflaging me while my back was against some large boulders. There was a fresh snow on the ground where I deposited deer urine to bring in the bucks. The blasting screech on the other side of the rocks was a fisher cat attracted to the doe urine that I had laid down. The nocturnal fisher was screeching a mating call misinterpreting deer urine for another fisher. I whistled a long blast and followed by a silence, the fisher gradually departed the scene, undoubtedly disappointed. When dawn came, the fisher was gone and I saw a nice buck in the valley and downed him with my 30.06.

The fisher (Martes pennant) is a ferocious predator that lives in the deep forest and is rarely seen except at night. Its nocturnal screech sounds like someone crying for help. Trappers take the fisher for its fine fur. It is the largest of the mustelids that include the weasels, mink, otter and skunk.

The fisher cat has a pointed face similar to the weasel and retracted claws make them excellent climbers. The dark brown to black fur shines and some individuals have patches on the chest or abdomen. Their screech- like cry is used to attract mates and sometimes they shriek before killing prey. The fisher commonly eats porcupine, grouse, turkey, poultry, rabbits, domestic cats and other small mammals.

2

Ironically, the fisher cat doesn’t eat fish despite its name, but the name comes from French trappers who called their pelts “fichet”. The fisher is found in Southern Alaska, throughout Canada, California to Maine and the Rocky Mts, any of the northern forests.

The solitary Fisher cat roams the forest areas at night in the summer and sometimes in the day during the winter. Fisher cats breed in Feb to March but have delayed implantation, similar to bears, with fertilized eggs that lay dormant for 10-11 months then eggs implant to uterine wall. Kits are born after 1 ½ months with a litter of 1-4. Fishers are mature at 1yr and females produce their first litter at age 2. Dens are located in tree holes where the female protects and nurses the kits for 4 months. By 5 months the kits are the same size as the adults and killing prey. By late summer, the kits leave and become solitary hunters. The female covers 10 square miles in a circuit, while the male has a 30 mile circuit returning within a week to its first area.

3

The screech is what most people remember about their first encounter with a fisher, while many people enter internet forums with recordings to find out what animal made that screech. If a fisher comes up close to you and lets off a screech, you will never forget it.   By Kathleen Kalina

Follow our FISHING BLOG

WEB   RATES     FISH    HUNT    CABINS    PHOTOS
TESTIMONIALS    BROCHURE    HUNT BOOKLET

Enter your email address to subscribe to this blog and receive notifications of new posts by email.

Email Me....


Tags: , , , , , ,

Maximizing Your Hunting Time With Trail Cameras

cameraOver the last five years, probably no other “gadget” has changed the way we scout more than the trail camera. For many of us, running trail cameras is a hobby in itself, bringing a whole new excitement to our deer hunting efforts. Much more than just something to pass time, however, running trail cameras can give you a unique insight into the patterns of deer on your hunting properties and really tip the odds in your favor for harvesting a mature whitetail. Let’s take a look at the features to look for when purchasing a trail camera, and how to get the maximum benefit from the camera once you have made your purchase.

As the popularity of these scouting tools has grown, so has the number of companies offering their own line of cameras. The features on these cameras cover such a wide spectrum that choosing the right one for you can be a daunting and sometimes confusing task. While this article isn’t meant to tell you WHICH camera to buy, it IS meant to help you sort through some of the most common differences among the various trail cameras to help you narrow down your search.

RESOLUTION
The resolution of a trail camera is a measure of the image size that the camera creates. So a 5.0 megapixal trail camera will give you a much larger image – and therefore more detail – than one with 3.0 megapixals. Which resolution you choose really depends on how important it is to have a large, crisp image. If you are only concerned with having a general idea of what deer are in the area and when they are traveling through, then about any resolution offered on today’s cameras will suffice. If you want a larger, more detailed image to print off for your friends, then you may want to shoot for something with at least 3.0 megapixels.

BATTERY TYPE & LIFE
In my mind, this is one of the most important considerations when choosing a trail camera, as it will have a huge effect on the cost of maintaining the camera. I have seen some “cheap” trail cameras that burn through six C-sized batteries in a week, and suddenly the “cheap” camera gets VERY expensive! Others claim to operate up to a year on eight AA batteries. So before you go buying a camera based on price alone, keep in mind the battery life, as it may be the most expensive choice you could make in the long run.

TRIGGER SPEED
Another important feature is the trigger speed of the camera, which is simply how long it takes the trail camera to shoot a picture once something has “triggered” the motion sensor. A faster trigger speed can be the difference between having a great shot of that trophy buck and just having a picture of a deer’s butt as it walks out of the frame. If you plan on placing your trail cameras over feeders or a mineral lick, then trigger speed will not be as much of an issue as it would if hung along a trail.

FLASH TYPE
This is almost a moot point, since most trail cameras today have gone to infrared flash. An infrared flash, as opposed to the incandescent flash found standard on most consumer cameras, is less likely to spook deer, uses less battery life, and is less likely to be detected by other humans (i.e. thieves!). While I’ve gotten plenty of pictures of big, mature whitetails with an incandescent flash trail camera, there is no doubt that some animals are spooked by the bright flash. If you can afford the infrared flash, the benefits certainly outweigh the small increase in cost.

OTHER FEATURES
While we have covered some of the most important features to consider when buying a new trail camera, there are many more options that could impact your decision. One of these options is the size of the unit. Size varies greatly amongst trail cameras, and some companies are now producing models that are as small as your hand. Other models go as far as being able to send the pictures it takes directly to your email or cell phone, so the only time you have to check them is when the batteries need replacing. How’s that for convenience?

Before you head out to buy your next trail camera, take a minute to think about how it will be used and what features are most important to you. This will make the task of narrowing down your choices much easier when you start the shopping process.

camera2

MAXIMIZING TRAIL CAMERA USE
Once you have waded through all the details, made your decision and laid down your hard earned money on a trail camera, all that’s left is to hang that thing on a tree, right? Let’s take a look at some ways you can be sure you are using your camera to its potential this season and getting the most bang for your buck.

DRAW THEM IN
One of the easiest ways to maximize the effectiveness of your trail camera and insure that you see a good representation of what is in your hunting area is to use some type of attractant to lure the deer into camera range. Probably the most common attractant used across the country is shelled corn – it’s cheap, readily available, and the deer love it. For the purpose of getting trail camera pictures, there is no need to invest in an expensive feeder; just simply spread 100 pounds on the ground in an eight to ten-foot circle area where you want to hang your camera. For safety reasons, do not place the corn in large piles or in an area that holds moisture, as this can result in molding that can cause disease in both deer and turkey. Depending on deer density and other available food sources, this should get you five to ten days worth of pictures. Be patient, as it may take a few days for the deer to really key in on the corn and for you to start getting good pictures. Once they find it, though, it won’t last long!

Before you start dumping corn on your favorite hunting property, check your local game laws regarding baiting. If corn or other “feed” is prohibited, but would still like to attract deer to your camera location, then you may want to consider creating a mineral lick. You can buy one of the many commercial mixes available today, or simply create your own by mixing 50 lbs of trace mineral, 50 lbs of feed mix salt, and 10 lbs of dicalcium phosphate. Break the soil up with a shovel in the area where you want to create your lick and work your mix into the soil. Once the lick gets a good rain on it, it shouldn’t take long for the deer to find it and start paying regular visits.

KEEP IT MOBILE
Unless you are hunting a really small property, or you have the money to invest in lots of trail cameras, then you are going to need to move your cameras around to really get a good idea of what the deer are doing on your hunting property. Don’t get caught in the trap of leaving your camera in the same spot all season. This will not only limit your ability to pattern the deer, but it may keep you from discovering that trophy buck that could be hanging out on the other side of the property!

images40V5Z2FA2By experience, two weeks seems to be enough time to get a good representation of what deer are in the area, without your camera spending too much time in one location. You can always bring the camera back to the same spot at a later time, but the idea is to cover as much of your hunting area as possible.

KEEP GOOD RECORDS
Once you have moved your camera around your property and gotten plenty of pictures to look at, the real work has just begun. Now is the time to sort through the pictures, identifying as many unique animals as you can, analyzing what camera sites each deer is visiting and the times that they were there. This should start to give you an idea of the travel patterns on the property, as well as potential stand locations.

This season, make sure you use these tips to get the most out of your trail cameras, and the next picture you get of that monster buck may be the one with you behind him holding his antlers, OR, even that BIG bear 🙂

Follow our FISHING BLOG

WEB   RATES     FISH    HUNT    CABINS    PHOTOS
TESTIMONIALS    BROCHURE    HUNT BOOKLET

Enter your email address to subscribe to this blog and receive notifications of new posts by email.

Email Me....


Tags: , , , , , , , , , , ,

Wild Game Recipe: Rabbit Sott’olio

rabbitsottolioEmploying an old Italian method of preserving meats and vegetables called sott’olio, submerge rabbits in oil and slow-cooks them until the meat is tender and rich. Then dress the warm meat in a salad for a perfect counterbalance. The only difficult part of this recipe is pouring that much oil into a pot—but it’s worth it. Be sure to fish the garlic out of the oil for later: Spread the cloves on toasted bread for a killer snack.

Ingredients
– 2 whole wild rabbits, cleaned
– About 3 quarts vegetable oil
– About 1 quart, plus
– 1 Tbsp., plus 1⁄4 cup, olive oil
– 2 whole heads garlic, broken into individual unpeeled cloves
– 6 sprigs fresh thyme
– 1⁄3 cup, plus 1⁄4 cup,
– red wine vinegar
– 1 red onion, sliced
– 2 carrots, peeled and chopped into 1⁄2-inch pieces
– 4 cups baby arugula
– 1⁄4 cup pine nuts, lightly toasted
– 1⁄4 cup Parmigiano Reggiano cheese, shaved or grated
– Salt and freshly ground pepper, to taste

Directions:
1. Preheat the oven to 300 degrees. Rub the rabbits with salt and pepper and place in a Dutch oven. Pour in about three parts vegetable oil to one part olive oil, enough to fully submerge the rabbits. Add the garlic and thyme, and cover the Dutch oven. (A sheet of aluminum foil underneath the lid is a good idea.) Place in the oven and cook for about 11⁄2 hours, or until the meat is tender and falling off the bone. Let cool.

2. Meanwhile, combine the 1⁄3 cup red wine vinegar in a small saucepan with 1⁄3 cup water, and bring to a boil over high heat. Put the red onion slices in a bowl, and pour the vinegar mixture over the onions. Stir, add salt and pepper, then allow the onions to pickle at room temperature.

3. Heat 1 Tbsp. olive oil over low heat in a saucepan, and add the carrots. Cook, stirring occasionally, for 6 to 8 minutes, or until the carrots are tender but not mushy. Add salt and pepper, and reserve.

4. Make a vinaigrette: Put the remaining 1⁄4 cup red wine vinegar in a bowl and gradually whisk in 1⁄4 cup olive oil, until the oil and vinegar are thoroughly integrated. Add salt and pepper.

5. When the rabbits are cool, remove the meat from the bones and reserve.

6. To serve, reheat the rabbit meat in a pan with some of the oil, over low heat, just to warm through. In a large mixing bowl, gently toss the arugula with the red onions (drained), carrots, pine nuts, cheese, and about 3 Tbsp. vinaigrette. Divide the salad among four plates, and top with the rabbit, adding a few more shavings of cheese and salt and pepper as desired. Serves 4

Follow our FISHING BLOG

WEB   RATES     FISH    HUNT    CABINS    PHOTOS
TESTIMONIALS    BROCHURE    HUNT BOOKLET

Enter your email address to subscribe to this blog and receive notifications of new posts by email.

Email Me....


Tags: , , , , , , , , ,