I hear people say all the time that they don’t like the taste of deer. Some people say that just because they know what they’re eating and have a preconceived notion that it won’t be good. Others have legit gripes, mainly due to poor handling by the hunter from the time of the kill up until it was cooked. This often results in gamey, tough meat. Here are some tips to help combat bad-tasting venison.

Hunting in the real world is not like the Outdoor Channel portrays it to be. Hunters make bad shots from time to time and the deer has to be tracked for a while. Shot placement and the stress the animal received while being trailed plays a big role in gamey meat. The faster a deer dies, the sooner it can be field dressed. This will reduce the amount of acid that builds up in the deer’s muscles.
Hunters often fail to get the deer cooled as quickly as possible. The first step it to field dress the animal immediately and wash out the cavity with cool water. Be sure to dry the cavity out, as the water can be a breeding ground for bacteria. If the temperatures outside are in the mid-30s or cooler, it’s okay to let the deer hang. Anything warmer than that, and the deer needs to hang in a walk-in cooler (or be skinned, quartered, and put on ice if you don’t have a walk-in).
 A whitetail is not a hard to deer to quarter. Because of how their joints and tissues hold their legs on, a simple pocket knife can have a deer quartered quicker than you might think. Some might use a saw to cut through bone marrow and small pieces of bone, but then you’d need to watch that shavings from the saw don’t get mixed in with the meat. Stick with a sharp knife instead, and your meat will be free of small bone pieces that can contaminate the meat.
Growing up, I can remember how much my dad loved the taste of fat from a good cut of beef. The same does not hold true with deer fat. Simply stated, deer fat tastes awful. It is not red meat, so cut it off before it’s made into steaks or burger. This includes all fat and silver skin.
Every year before deer season begins, we call in an order to the local butcher shop for beef suet. Even though we removed all of the deer fat, we need to add some sort of fat, whether beef or pork, when grinding it. If this is not done, the lean venison will quickly fall apart when making burgers, meat loaves, etc. We add beef fat at a ratio of 3:1 (three pounds venison per pound of fat).
If you have the means, the time, and the knowledge, I recommend processing all your deer yourself. When you take a deer to a meat locker you can’t be sure how the meat is handled — or if it’s even your own deer that you’re getting back. For all you know, you could be getting back someone elses deer, perhaps one that was gut-shot and not properly handled after the shot. If you have to take a deer to a processor, research the facility by talking to other hunters who’ve used it, and also talk with the workers, who will hopefully be honest with you.
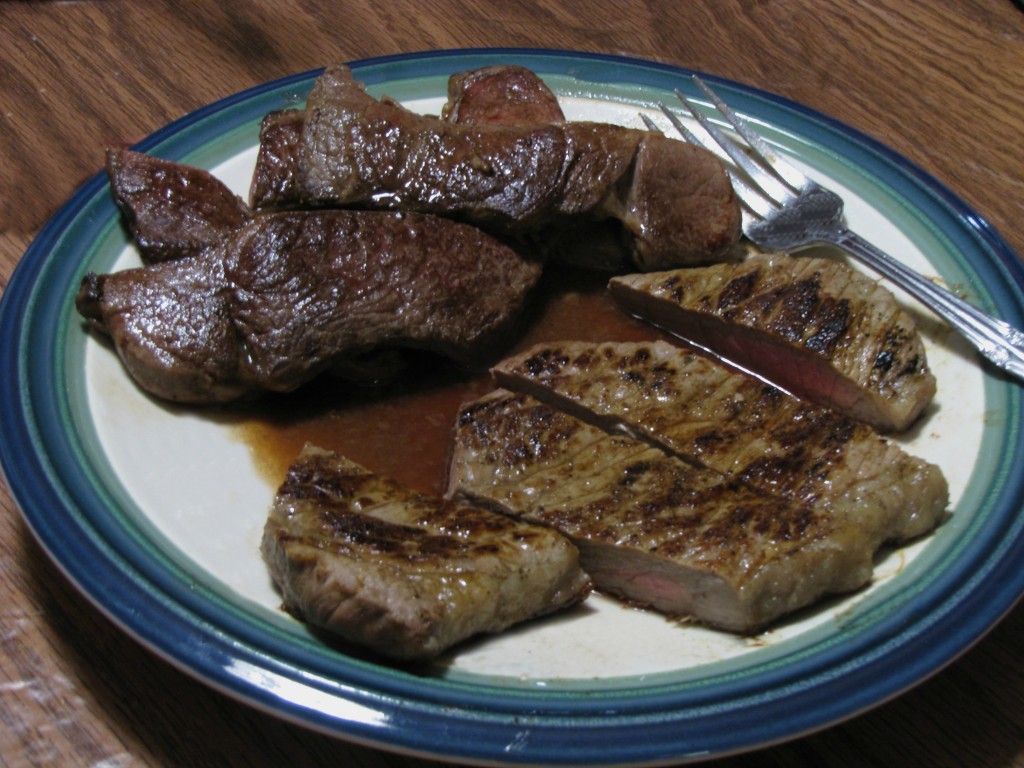 Don’t overcook venison. Cooking deer for too long causes it to become chewy and dry. Venison is best cooked to medium rare, but the outside needs to be cooked. To accomplish this, the grill must be hot enough to quickly sear the outside and lock in the flavors and juices. Turn your venison only once. If there are no grill marks on the meat after three minutes or so, the grate is not hot enough.
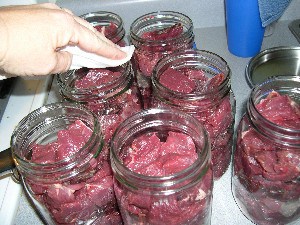
Freezer-burnt food, whether it is venison or other food, does not taste good. Some people use a vacuum sealer; if you go this route, buy a good one, as a cheap product will not keep the food fresh. When we butcher our deer, we make wrapping the meat a family affair, with all involved. We put one-pound portions of burger in sandwich bags and the steaks and roasts are wrapped with plastic wrap. After covering it with plastic wrap, we wrap it with good freezer paper and tapes. Writing on each package, we identify the cut of meat, who killed it, and the date of the kill.
I hope this advice helps you create a great-tasting meal. A few more final tips: The younger the deer, the better, more tender it will be (even though this might not sit well with trophy hunters). Thaw venison slowly to prevent toughness, then serve it hot and keep the remainder hot to prevent it from getting a waxy taste.

Follow our FISHING BLOG
WEB RATES FISH HUNT CABINS PHOTOS
BROCHURE HUNT BOOKLET