RSS

Tag Archives: black bear

STAY CALM

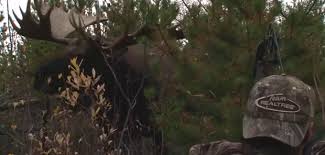
If you’ve had any trouble in the past “keeping it together” when shooting at game,
right now is the time to find a cure.

bow-hunting-wawang-lake

Countless of hunters who practice shooting regularly, months before the season opens, and they still have trouble closing the deal when Mr. Big shows himself. Getting excited is fine — excitement is a big part of why we hunt — but there is a big difference between getting excited and falling apart. We owe it to ourselves to perform under pressure. Even more, we owe it to the game we hunt to stay calm enough to make good shots and clean kills.

Below are six steps that have helped hunters stay cool at the moment of truth.

  1. Practice, Practice, Practice Nearly all bow hunters practice their shooting, but many fail to practice properly. To many average bow hunters, practice means flinging 20 to 30 arrows once or twice a week. This is not considered practice. When preparing for a hunt, practice every possible shot sequence, just as if you were actually hunting. That means shoot a 3D target from every possible angle while wearing camouflage, and shoot from any position that might become a possibility during the hunt. You want to be prepared for all contingencies.

Also practice at distances considerably farther than you will shoot on animals. A typical whitetail shot is closer than 30 yards, but practice regularly to shoot out to 80 and even 100 yards. That kind of practice will leave you very confident for any shots closer than 40 yards.

Lack of confidence is the biggest reason some people get shaken at the shot. They just keep thinking they may not make that shot. There are two things to offer those who lack confidence. One, restrict shots to your comfortable shooting range. Two, practice enough different scenarios that when an animal steps into your shooting lane, you’ll have no doubts about making the shot because you’ve already done it dozens of times in practice.

  1. Run & Shoot Now that sounds kind of dangerous, but it’s not meant in a literal sense.  During practice sessions, sprint anywhere from 60 to 100 yards, then pick up your bow and try to put a kill shot on a 3D target. This simulates the adrenaline rush you get when shooting at game. Some people may think it sounds crazy, but, it builds confidence like no other drill. You don’t have to do this every time you practice, but do it often enough to build confidence in your ability to shoot accurately when your heart is racing — whether from running or from watching a buck walk within range.
  2. Flex Those Muscles! When you see a big buck coming down the trail and your heart rate skyrockets, tense every muscle in your body while holding your breath. Then, after five or six seconds, let your muscles relax, and exhale. Do this several times as needed.

This is especially helpful during frigid hunts, when your muscles are stiff and your circulation is poor. It helps improve blood flow, regulate body temperature, settle your heart rate, and relax your muscles, all of which will calm you down to make a good shot. This muscle-tensing tactic has will help keep your cool on numerous animals.

  1. Focus On The Sweet Spot Once you decide to shoot an animal, you have no need to look anywhere other than the hair, scale, or feather you want to hit. Keying in on that certain spot keeps you calm and focused.   Some people miss when they focus on the headgear because they are looking with their mind’s eye at a beautiful shoulder mount gracing the wall above the fireplace. Don’t worry about the headgear while the critter is alive. You will have years to stare at it — if you focus on the vitals before and during the shot.

bow-hunting-wawang-lake (5)

You tend to aim where you are looking. Look at those wide antlers coming your way, and you might put an arrow right through the center of them. Instead, concentrate on the vitals, and that’s where you’ll put your arrow.

  1. Close Your Eyes This isn’t always an option, but when it is, it works. The longer some people look at an animal they want to shoot, the more stage fright they develop. If that’s you, closing your eyes or looking up at the sky will allow you to clear your mind and reorganize your thoughts.

Some people can perform on a moment’s notice, but, others prefer to have some time to evaluate the situation and to analyze every move before actually making it.   If too much time transpires and the nerves start taking over, close your eyes to regain focus before the animal gets within bow range.

  1. The Inner Voices Although you might not have demons and angels on your shoulders taunting you one way or the other, you certainly have inner voices that control your mind when you’re face to face with your prey. Listen to the positive voices and let them build you up.   Feeding your mind with positive thoughts will weed out the negative ones that flow through the minds of so many bow hunters. Doubt is where many archers fail at crunch-time. To eliminate doubt, talk to yourself — positively.

bow-hunting-wawang-lake (2)

WEBSITE    RATES     FISH    HUNT    CABINS    PHOTOS
TESTIMONIALS    BROCHURE    HUNT BOOKLET

Enter your email address to subscribe to this blog and receive notifications of new posts by email.

← Back

Thank you for your response. ✨

Email Me....


Tags: , , , , , , , , ,

How To Make Bear Tallow Soap

 44 oz. bear tallow
20 oz. olive oil
20 oz. coconut oil
12 oz. lye crystals
32 oz. cold water

When making soap it helps to have everything laid out and organized.
Here we have our lye, distilled water, equipment used only for lye which is labeled as such, and safety equipment.  While soap making is not hard you can never be TOO cautious with the lye.  Make sure you use gloves and safety glasses.  Wear shoes and long sleeves.
Lye is a base so if you do get some one your skin rinse off with vinegar(an acid).  Lye will also react with aluminum, cast iron, and steel.  For this reason we use some plastic, probably picked up at the dollar store.
Here we have our oils all set up.  The zip lock bag is rendered bear tallow.  The pot and stick blender are only used for soap making.  You will also need thermometers for checking temps.  One for lye and one for oils. A scale is important for exact measurements.
If you are interested in making your own homemade soap, you are going to want equipment that will only be used for soap making.  Search your cupboards for bowls and pitchers you don’t use anymore.  Hit up some garage sales and thrift stores.  It doesn’t have to cost a fortune.
Like any hobby there is costs however this hobby will get you homemade soap that is better than any commercial bar out there!
Closer look at that bear fat : )
Measuring out your fats and oils.
Pour oils into stock pot and slowly heat up.  For this recipe since the tallow is hard as is the coconut oil we found in order to melt all the fats down the oil heated up way past what we needed it at.  We then had to let it cool down.  This process took the longest.  For future note we will get the oil melted down well before we start the lye water.
When the lye hits the water it heats up fast.  The goal is to get it to the temperature down to what your soap recipe says.  In our case between 110-115 degrees.  To help cool it down we will stick the pitcher of lye water into a ice bath.  Another option would be to measure out your water the day before and freeze it.
While I was setting other stuff up I had my pitcher of distilled water sitting in the ice bath already.
Measuring out the lye needed and where to find lye.  We have always had luck at Menards, and I haven’t tried anywhere else.  If you can’t find it ask, they don’t always keep it on the shelf and if they do they only keep one bottle on at a time.  Lye is often misused for horrible purposes.  Also, make sure it says 100% Lye.
Equipment just for lye.

Our oils are melting down so we will wait a bit to combine the lye and water.  You should have an idea if you are going to add other stuff to you soap.  It’s good to organize all that you need in exact measurements so they are ready.  You never know how fast things can move a long.  Better to have a little down time waiting on temps than being rushed and frazzled.  That’s when accidents happen.

You can add some extra fats after the soap traces for superfatting.  You can add fragrance or other additives for texture.

One of our batches is to be a “gardeners” soap.  We added rosemary and lemongrass essential oils for the scent.  For the exfoliant we added a mixture of poppy seeds, caraway seeds, dried rosemary, and psyllium seed husk whole.   If one was to recreate this they could just pick one.  We happen to have these four ingredients on hand so decided to do a mixture with all.
Exfoliant for our gardener’s soap.
Another thing to ready before you get started is a place to keep the soap for the initial set up.  It is recommended that your soap should slowly cool down.  Most instructions will say to wrap your mold in towels.  We also place our molds in coolers.  Just helps insulate a little better and it’s safe from being bumped or knocked over.
You will need something to mold your soap in.
Miscellaneous containers we have found here and there is what we use for molds.  Soap is initially caustic so over time the soap you make will break down the molds.  Ours were cheap so we are ok with that.
I really love the silicone loaf pan.  It holds a little over 2 pounds of soap and the soap always comes out so easy.  If you are using old tupperware it helps to line with wax paper and grease it down a bit.
Back to the lye and oil.  The oil and fats have melted down and are now cooling so we now are going to mix the lye and water.  Always pour the lye INTO the water and slowly!
Make sure your gloves and safety glasses are on!
Stir it up and do not lean over it.  You could wear a mask during this step.  Make sure the area is well ventilated.  There will be harmful fumes.
Almost instantly the temperature gets to 150+ degrees.
Now we wait some more.  The oil is still cooling and now the lye needs to cool.  If your oil gets cooler before your lye just heat it up again.
When both reach desired temps pour lye water INTO oils.  Always.
Very quickly the oils start to thicken.
The process of the lye and oils combining is called saponification.
Follow this link, they give a good description of saponification.
If you don’t have a stick blender you will need to stir by hand.  You will be stirring for a LONG time.  Time does vary based on the oils used, but it still takes a long time.  The stick blender is.a.LIFESAVER!
For this recipe I think we stirred with the stick blender for about 20 minutes.
You stir until the soap reaches trace.
Trace means the oils and lye have combined.
Now we have soap.  Add any other additives at this point.
What combination of fats and oils makes a good soap?
Here just a couple links I found that explain the different characteristics commons fats and oils used in soap making.
 
In a nutshell soap making directions.
  1. Collect ingredients
  2. Weigh ingredients
  3. Get fats/oils to desired temp
  4. Get lye water to desired temp
  5. Add lye water to oils
  6. Stir until trace happens
  7. Add any additives
  8. Pour into molds
  9. Let sit for about 24hrs
  10. Take out of molds, if hard enough, and cut.
  11. Cure for 4-6 weeks
  12. Always use caution when working with lye.

    Follow our FISHING BLOG

    WEB   RATES     FISH    HUNT    CABINS    PHOTOS
    TESTIMONIALS    BROCHURE    HUNT BOOKLET

    Enter your email address to subscribe to this blog and receive notifications of new posts by email.

    ← Back

    Thank you for your response. ✨

    Email Me....


Tags: , , , , ,

Bear Baits – Consistency is Important

Consistent Baiting and Timing is Important
wawanglakebearbaitWe begin baiting two to three weeks prior to the hunters arrival as baiting is lucrative and can vary based on native food source availability, weather pattern and population.  If baiting is done too far in advance, bear can lose interest and become complacent.  The most impact for the hunter is when the food source is new and interesting yet dependable. The baits stations are checked regularly each day and documented as to its status:  whether it’s been hit or not.  This is also the ideal time to determine if the bait station has a sow with cubs or the size of the bear according to tracks.

wawanglakebearbait

Other animals frequent the baits as well.

All the information collected will determine if the bait station will be suitable for the hunter or not. Stations with sows will continue to be baited in order to confine that they remain in that specific area so they don’t wander and disturb the more suitable bait stations held for the hunters.

What Do We Use
Bears are omnivorous and will scarf down just about anything from produce to pastries, bread and meat scraps. The key is to make sure your offerings have a strong odor – sometimes the more putrid the smell, the better … at least when it comes to attracting them as we don’t place this directly on the bait.   However, during the fall bear do not especially like this strong scent on the bait therefore we use these attractants to drag the area ensuring to lure the bear to the bait station where more delectable bread, pastries and leftover good scraps are waiting. Visiting bear that walk trails and roads we’ve dragged will beneficially establish their own scent trail to and from the bait as well luring in even more bear.

The Set Up
Our baits stations are naturally set up and made from logs and other forest fragments. These logs are large, very heavy and piled in a manner making them difficult for smaller animals to move.  When hunters walk into the bait and notice that logs have been tossed around they are certain that a bear hi the bait.

bait

Know the Rules
Study the Ontario hunting regulations.  Know what you can and can’t do, season dates, licensing guidelines, bring firearms into Canada.   We want our hunters to be comfortable while hunting in Ontario and it is also important to know that you will need to bring along a state/province license as proof of hunting experience to show the Ontario license issuer. Always ask if you don’t know that’s what we’re here for.

When to Sit Baits
Our hunters are required to bring their own tree stands.  This is not only for liability reasons, but, also because you will be more familiar with your own tree stand and the more at ease you are with equipment the more it will increase your odds – less to think about. Upon request we will setup ground stands for those that are not able to climb. If this is the case be sure to bring along a comfortable chair.  Evening hours are by far the proven time to encounter bear on the bait. This however is simply a higher percentage timeframe.   Approaching the bait cautiously is always a must due to the fact that hunters have stumbled upon bear contently feeding at all hours, including early morning and mid-day. You can bring along trail timers and cameras to satisfy your knowledge of the activity of your bait station.

Follow our FISHING BLOG

WEBSITE    RATES     FISH    HUNT    CABINS    PHOTOS
TESTIMONIALS    BROCHURE    HUNT BOOKLET

Enter your email address to subscribe to this blog and receive notifications of new posts by email.

← Back

Thank you for your response. ✨

Email Me....


Tags: , , , , , , , , ,

How to Size a Black Bear

……… WHEN SIZING UP A BEAR

WawangLakeBear
A big bear swaggers and walks with attitude. He doesn’t jump at every sound like a small bear will.  A big bear doesn’t have to; he believes he’s got nothing to fear. Once you’ve spotted your bear on the bait site, it’s time to get serious about analyzing how that bear is behaving.

It is important to note that long before you judge the size of the bear, you must judge the sex of that bear and here are some things to take into consideration:

A big, old sow will have all, or more correctly, almost all of the physical characteristics of a big, old boar. She’ll have the nasty looking face that’s seen one too many years in the ring, the potbelly and the sway back.

Watch to see if the bear stands on his hind legs and rubs his back on a tree, that’s a boar.  If it walks along and straddles small trees, wiping its scent on that tree, it’s a boar.  If it stands up and breaks saplings over its shoulder, it’s a boar.  If it encounters another bear and gives chase, it’s a boar and if it is following a smaller bear, it’s a boar.

SCALE:  There is one last general appearance tip to judging black bear that makes the top three in importance, and that is scale.   A big bear looks big . . . but so does a closer, smaller bear.   Here’s a help tip on how to gauge more accurately.  If the bear is 150 yards away but the hunter thinks the bear is 200 yards away, the hunter will overestimate the bear’s relative size by somewhere near 25 percent.   In other words, the hunter is in for a serious case of ground shrink when he walks up to his bear.  TIP:  Let the bear get as close to you as possible and preferably on the bait itself.   The closer the bear, the less chance there is of misjudging the distance to relative size.

SPECIFIC TIPS FOR JUDGING BLACK BEARS: If the bear fails any one of the above general conditions, then it’s advisable to pass up on it or let the bear walk. It’s tough and you could be wrong, but at least there isn’t a dead small bear lying on the ground.   Call it a personal aversion to guilt.

BODY SHAPE:    Bigger bear are older bears, and like most of us, they don’t have the svelte bodies they once did. They tend to look “heavy” and out of shape. Remember, they monopolize the best feed and habitat, and therefore exert less energy to live.

HEAD SHAPE:   A big bear (boar) will have a deeper, wider and longer snout than a smaller bear or a female. His ears will appear to be wide apart and small. If he is aware of you and looking your way, his ears won’t stand up on top of his head like a dog’s ears, they’ll seem to be aimed out to the side of his head. A big bear will have well developed “bulging” muscles on the top of his head.


WawangBear2

LEGS:   A big bear will have massively developed front shoulders. His shoulders will look big and burly. A sow’s wrist will pinch in directly above the foot. Not so with a boar. The lower forearm, wrist and the foot on a big boar are all the same width. A big bear often appears to have shorter legs because the body is so much thicker, but keep in mind that the best-scoring bears for the records book are often the lankier looking, longer-bodied bears.

There are bear that have meatier heads; bear that look great and are great trophies, but that don’t score well.  There are others that have short skulls, block- headed beasts that look impressive, but that don’t score well at all and there are lanky, skinny bears with donkey faces that score like the devil, but that a hunter seriously looking for  a  records book bear wouldn’t walk across the street for. Black bear morphology is just too darn diversified to make a science out of judging.

The best way to hunt for a record boar is to simply shoot the bear that looks good to you and that hopefully  you’ll  appreciate all the time and effort you put in for the hunt.  If it’s got a nice hide, be happy with your animal. If it has long claws and weighs a ton, good for you and congratulations. If it isn’t as big as  you’d like, don’t fret, you’re not alone and the rug on your wall will still look great. If it happens to be one of those rare few bears that has grown a skull that qualifies for the record books, thank your guide for the good fortune that made that bear come to the bait site.

To easily judge, remember:

  • Check out the ear size in relation to the head
  • Mickey Mouse ears means a small bear.
  • Watch to see if the belly is low to the ground
  • Legs that appear short means big bear.

Watch the bear’s behavior around the bait – small bears will be skittish and afraid of a larger bruin in the area.

Look for a log around the bait and use it as a reference, check to see the length and height of the log before climbing into your stand. When the bear enters the bait site use the size of the log to help determine the overall size of the bear.

SKULL MEASURING

WawangSkull

Hope this information helps develop your judging skill on your next hunt, and,  good luck out in the field.

For further information, or, to book your next bear hunt please contact us at:
1-888-534-9217 or EMAIL

 WEBSITE    RATES     FISH    HUNT    CABINS    PHOTOS
TESTIMONIALS    BROCHURE    HUNT BOOKLET

Enter your email address to subscribe to this blog and receive notifications of new posts by email.

← Back

Thank you for your response. ✨

Email Me....


Tags: , , , , , , , , , ,

Bear Facts to Success

imagesS12UAEG6Simple Fact: The more effort you put into masking your scent, the bigger the Black Bears coming into your target zone will be.

All experienced Black Bear Outfitters have their little tricks to make their bear hunters hunt more enjoyable and also help with their success. If you are new to bear hunting you should know what you are up against. Every hunter wants a big trophy bear and this article should bring you a little closer to that goal, but remember, to thoroughly follow the advice of your outfitter, if you’ve chosen one, and, above all else:  DO NOT DEVIATE from the routine they have already established.

Black Bear hunting to the outfitter is about luring bears to a target zone for their hunting guests by baiting with food the bears like such as high-carbohydrate foods. Bread, pasta and other high starch content foods are rare in nature but it’s what the bears want most so they can quickly store fat for the winter. It’s also about setting up stands at strategic spots where big bears have been scouted. Black Bear hunting for the hunter is all about stealth, with the two biggest factors being sound and most of all, smell.

Black Bear’s Sense of Smell: Olfactory Receptors

imagesN9DAOG1VThe Black Bear has the best sense on smell of any land walking mammal on Earth. It’s really hard for a human to comprehend how well a bear can smell as we basically have to stick our nose in the pot to smell the sauce. Comparing the amount of Olfactory Receptors between a human and a Black Bear is mind boggling.

Olfactory Receptors are microscopic bulbs on the end of nerves in a mammal’s nose. The more you have the better your sense of smell is.

  • Humans:
    6,000,000 Olfactory Receptors (6 million)
  • Blood Hounds:
    1,800,000,000 Olfactory Receptors (1.8 billion)
  • Black Bear:
    12,600,000,000,000 Olfactory Receptors (12.6 Trillion)

A Black Bear can smell 2100 times better than a human. In addition the Jacobson’s organ in their mouth can taste the air, adding to their brains perception. A mature Black Bear can smell your breakfast from 20 miles away if the wind is right. Big mature bears can smell better than smaller younger bears as their noses are larger and more developed. Bears also know what unnatural smells are and associate them with a human presence. This can explain why Black Bear hunters that are not fanatical about the way they smell rarely see big trophy bears. There are procedures you can do to minimize unnatural smells to keep the bears concentrating on the bait that the outfitter has put out for them.  It is wise to check with your outfitter before applying anything new to the bait station that they normally don’t use.

1) Before your bear hunting trip; pick a couple of sets of clothes that you will only wear at the tree stand while hunting. Wash your clothes with scent-free detergent and when done, run them though the wash twice again with no detergent so they are well rinsed. This will ensure your clothes are scent free. If you live in the city and have chlorinated city water then go to a pet store and buy a small bottle of Aquarium Water Conditioner and add ½ oz. to the last rinse cycle you do with your clothes. The water conditioner will neutralize the chlorine in the water and keep the chlorine smell out of your clothes. Remember, they can smell 2100 times better than you so don’t feel silly getting fanatical. Then pack the clothes in a plastic bag to keep them scent free. If you consistently use fabric softener in your clothes dryer it’s best to hang your clothes up to dry because residual clothes softener might go on your clothes. If you are a smoker, do not smoke while wearing your hunting clothes.

Before we go to the next points you should be aware that Black Bears love the smell of mint. If you go on a camping trip in any of Ontario’s provincial parks the wardens will tell you not to keep mint toothpaste or mint gum in your tent because the bears will smell it and go after it. The bears craving for mint can be used to your advantage.

2) Think Mint: Go to one of those hippy tree-hugger heath stores and buy mint soap. The morning before the hunt take a shower using the mint soap. Brush your teeth with mint toothpaste. Chew mint gum while in the tree stand and if you really want to go all the way, have a glass of mint tea before the hunt and even keep a few bags of mint tea in your pockets. This will help cover up any scent.

3) Smoking: If you are a smoker and you smoke in the tree stand you are basically wasting your time if you expect a big trophy bear to come within sight. Wind direction can give you a little luck but it’s not something you should count on. It’s best to wear a nicotine patch while in the tree stand and if you need to; chew mint gum to keep your mind off smoking. Remember to brush your teeth and wash your hands and stop smoking before you put your scent free hunting clothes on.   This would also apply to cigars and chewing tobacco as well.

IMG_6110 - Copy

Black Bear Hearing:

The shape of Black Bear’s ears is mainly responsible for their great hearing. When detecting sound based on volume a bear’s hearing is about four times that of a human. However, a bear can hear a much broader frequency range; both higher and lower frequencies. Rubbing of cloth or twisting of your tree stand can produce sounds that the bear can hear and the hunter cannot. Big old male bears develop a crowned head and their ears move out to the sides giving them stereoscopic hearing, which allows them to pinpoint the origin of the sounds they hear. This is another reason why big old bears are harder to get.

With this in mind try to stay absolutely still. If you have to move; move very slowly. Take some nose drops before the hunt and if you have a cold or allergies. If your throat is dry and itchy bring some mint flavored lozenges with you. You can also oil the joints of your tree stand to make them a little quieter.

Black Bear Sight:

During the day a Black Bear basically has the same site as a human but older bears tend to be near sighted. As a result they cannot focus on things from a long distance. When one of an animal’s senses becomes diminished their brain rewires itself to compensate by making other senses more acute. This is known as neural placidity. As a bear gets older they become near sighted so the brain compensates by being more sensitive to color differentiation. If the bear sees colors it thinks are unnatural and he sees those colors move the game is up. Bears cannot see the same range of colors as a human. Hunter orange looks gray to them. But they can see dull reds and yellows as well into the blue/green cool color spectrum. This is why there are many different forms of camouflage clothing.

Picking the right Camouflage:

You need to talk to the outfitter when you book your hunt and ask what kind of plants will be at the tree stands. If the hunt is taking place in the southern range of Ontario’s bear hunting country during the fall you may have a mix of coniferous and deciduous trees, thus you will need a camouflage that represents pine needles, pine bark and colored fall foliage. If you are father north in an area with only pine trees you will need a camouflage that represents pine bark and pine needles, which means dark brown and green. You need to blend into the scenery so their bear cannot see any unnatural color pattern.

Black Bears are nocturnal. They have a reflective layer in the back of the eye called the tarpetum lucidum. Just because you can’t see them does not mean they cannot see you. Since dusk is the hottest bear hunting time it’s also when you should concentrate the most on being quiet and motionless.

Bear Size:

In most cases, big ears mean a smaller bear. A small ear is usually a bigger bear. Once a bear reaches three years old (approx. 100 lbs.), the bear starts to grow into its ears. The ears and eyes don’t grow as much as they do in the first three years. Sometimes if a bear has a hard year with food, the ears will look bigger because the bear is thinner. Read our article:  How to Size a Black Bear

Cubs:

When a sow is with cubs, 90% of the time the cubs are in the lead. The cubs will make more noise than a single bear. Most of the time, adult bears make little or no noise.

Sow:

You can’t shoot a sow with cubs in the Ontario spring hunt, and in the fall we continue this policy on our BMA – DO NOT SHOOT SOWS with cubs.. So make 100% sure you know what you are shooting at. Take a really good look around to make sure there are no cubs. A sow’s ears are usually closer together, as a male bear’s cranium grows wider on top and the ears look farther apart. They also look smaller, which is really an illusion.

These tips and techniques are just a guide line for some things to consider and think about. Ultimately the outfitter is the person you need to discuss the different factors with. Bear hunting can be quite different in different regions.

CHECK OUT OUR FISHING BLOG

WEBSITE    RATES     FISH    HUNT    CABINS    PHOTOS
TESTIMONIALS    BROCHURE    HUNT BOOKLET

Enter your email address to subscribe to this blog and receive notifications of new posts by email.

← Back

Thank you for your response. ✨

Email Me....


Tags: , , , , , , , , , ,

Black Bear on Bear Highway

It cant go without saying that this year’s batch of hunters fortitude has been tested over and over.  With weather that seems to be taunting them by cold raining one day and jumping to 80+ degrees and sunny the next, these guys have been putting in the hours and time after time have in most cases been rewarded.

On Saturday, Dave, Tim and Jason made the long drive up from Iowa to try their best to outsmart a couple bruin and get a day or two of fishing in.  Optimism high and clouds beginning to hang low, the stands began to be assembled for the drive to the baits.

Each man had a different weapon but all agreed that failure was not an option.  The first day was a shorter than normal sit of only 4 hours and all were thankful that it was a restful sit as they had a long drive before and had sat long enough 🙂

The men arrived back in camp late after a dark trip through the woods.  Dave was ecstatic to let me know that his bait had proven effective and he had spotted an average sized bear that he had decided to pass on and Tim and Jason both had heard but not spotted activity.

SAM_0016 (640x480)

The next day, the three went out, excitement and weapons in hand.  The weather had cooled down and was determined to hold that mercury low for the day.  The boys had layered and knew it would be a good, long, cool day.  The day wore on for us here at the lodge as we completed one task after another waiting for the telltale early truck arrival signalling a downed bear.  As we waited and watched, the clock ticked on.  The sun had already set and the boys were already 30 minutes passed the expected arrival.  We would give them 30 more minutes before setting out to ‘track’ our hunters.  As the minutes dragged on, I had begun to assemble my gear, ready for the drive out with Terry.

At 11:20 pm, a set of headlights pulled through the trees and the truck slowed to a stop in front of my door.  I emerged to a truck full of smiles, not only had Dave taken his boar of 368lb glory, but Tim had taken his as well!!

IMG_5703 - Copy (640x427) (2)

As we iced the bears down for the night, I had the chance to go over the hunt with both hunters, as a returning hunter to Wawang, Dave was so excited to tell me about all the bears he saw on ‘the bear highway’ today.  He couldn’t help but beam when he told me about the sow and cubs that came for two visits that day as well as the mid sizer that came in between.  He said that with all the action on the bait, it was very simple to decipher the size of his boar.  He was clear that it had trumped everything else that had come for a visit and was so proud to share the pictures.  “There were just bear everywhere I looked!” he repeated.

Smiles all around, Tim spoke up about his hunt and was proud of his harvest, though it wasn’t as big a bear as Dave’s, the tell white half chevron of white on the chest that made a winking emoticon made it very simple for me to dub this boy ‘Winky’ .  Both had prime hides and will make for not only fantastic stories but beautiful mounts to be enjoyed for year after year.

IMG_5726 - Copy (640x427) (2)

Jason was so proud of both of his hunting buddies and is determined to add to the celebration list too!

Follow our FISHING BLOG

WEB   RATES     FISH    HUNT    CABINS    PHOTOS
TESTIMONIALS    BROCHURE    HUNT BOOKLET

Enter your email address to subscribe to this blog and receive notifications of new posts by email.

← Back

Thank you for your response. ✨

Email Me....


Tags: , , , , , , , , , , , , ,

Canning Wild Game

mainMeat, poultry, and game are low acid foods and must be canned or processed in a pressure canner to assure it is safe to eat.

1. Canning frees up freezer space for other things.
2. Pressure canning can make the less tender cuts versatile.
3. Home canning meat means jars of meat on the shelf ready to go at a moment’s notice. No defrosting time. Ever tried to defrost an elk roast quickly in the microwave because you forgot to take it out earlier? Doesn’t work so well. (Ask me how I know!)
4. The best benefit? My guys love it. We are an active hunting family with 4 sons. Much of our meat is provided by the men of hunting age in our family.

Meat, poultry, and game are low acid foods and must be canned or processed in a pressure canner to assure it is safe to eat.

11 pounds pressure with a dial gauge pressure canner
15 pounds pressure with a weighted gauge pressure canner for required times.
Choose only good meat for canning, and handle it quickly and with total cleanliness, because bacteria grow rapidly in meat held at room temperature. If you have a large amount, store the part you’re not working on in the refrigerator.

canning-venison21You can:
Start with properly cleaned and chilled product.
Can fresh meat and poultry within 2 days or freeze it.
To can frozen products, thaw in the refrigerator until most ice crystals have disappeared, then handle as if they were fresh.
Trim gristle and fat off meat before canning. Fat left on meat melts and climbs on the sides of the jar during processing and may interfere with the sealing of the lid.
Salt is optional in canned meat and poultry.
Fish should be canned immediately or frozen until processed.
For large game animals (deer), follow beef processing times and methods.
For small game animals and birds, follow poultry processing times and methods.
Use canned venison or canned elk in stews, meaty soups, and even chili. You can use it to make Sloppy Joe’s and killer Enchiladas.

canning-steps-one

Follow our FISHING BLOG

WEB   RATES     FISH    HUNT    CABINS    PHOTOS
TESTIMONIALS    BROCHURE    HUNT BOOKLET

Enter your email address to subscribe to this blog and receive notifications of new posts by email.

← Back

Thank you for your response. ✨

Email Me....


Tags: , , , , , , , , , , ,

Maximizing Your Hunting Time With Trail Cameras

cameraOver the last five years, probably no other “gadget” has changed the way we scout more than the trail camera. For many of us, running trail cameras is a hobby in itself, bringing a whole new excitement to our deer hunting efforts. Much more than just something to pass time, however, running trail cameras can give you a unique insight into the patterns of deer on your hunting properties and really tip the odds in your favor for harvesting a mature whitetail. Let’s take a look at the features to look for when purchasing a trail camera, and how to get the maximum benefit from the camera once you have made your purchase.

As the popularity of these scouting tools has grown, so has the number of companies offering their own line of cameras. The features on these cameras cover such a wide spectrum that choosing the right one for you can be a daunting and sometimes confusing task. While this article isn’t meant to tell you WHICH camera to buy, it IS meant to help you sort through some of the most common differences among the various trail cameras to help you narrow down your search.

RESOLUTION
The resolution of a trail camera is a measure of the image size that the camera creates. So a 5.0 megapixal trail camera will give you a much larger image – and therefore more detail – than one with 3.0 megapixals. Which resolution you choose really depends on how important it is to have a large, crisp image. If you are only concerned with having a general idea of what deer are in the area and when they are traveling through, then about any resolution offered on today’s cameras will suffice. If you want a larger, more detailed image to print off for your friends, then you may want to shoot for something with at least 3.0 megapixels.

BATTERY TYPE & LIFE
In my mind, this is one of the most important considerations when choosing a trail camera, as it will have a huge effect on the cost of maintaining the camera. I have seen some “cheap” trail cameras that burn through six C-sized batteries in a week, and suddenly the “cheap” camera gets VERY expensive! Others claim to operate up to a year on eight AA batteries. So before you go buying a camera based on price alone, keep in mind the battery life, as it may be the most expensive choice you could make in the long run.

TRIGGER SPEED
Another important feature is the trigger speed of the camera, which is simply how long it takes the trail camera to shoot a picture once something has “triggered” the motion sensor. A faster trigger speed can be the difference between having a great shot of that trophy buck and just having a picture of a deer’s butt as it walks out of the frame. If you plan on placing your trail cameras over feeders or a mineral lick, then trigger speed will not be as much of an issue as it would if hung along a trail.

FLASH TYPE
This is almost a moot point, since most trail cameras today have gone to infrared flash. An infrared flash, as opposed to the incandescent flash found standard on most consumer cameras, is less likely to spook deer, uses less battery life, and is less likely to be detected by other humans (i.e. thieves!). While I’ve gotten plenty of pictures of big, mature whitetails with an incandescent flash trail camera, there is no doubt that some animals are spooked by the bright flash. If you can afford the infrared flash, the benefits certainly outweigh the small increase in cost.

OTHER FEATURES
While we have covered some of the most important features to consider when buying a new trail camera, there are many more options that could impact your decision. One of these options is the size of the unit. Size varies greatly amongst trail cameras, and some companies are now producing models that are as small as your hand. Other models go as far as being able to send the pictures it takes directly to your email or cell phone, so the only time you have to check them is when the batteries need replacing. How’s that for convenience?

Before you head out to buy your next trail camera, take a minute to think about how it will be used and what features are most important to you. This will make the task of narrowing down your choices much easier when you start the shopping process.

camera2

MAXIMIZING TRAIL CAMERA USE
Once you have waded through all the details, made your decision and laid down your hard earned money on a trail camera, all that’s left is to hang that thing on a tree, right? Let’s take a look at some ways you can be sure you are using your camera to its potential this season and getting the most bang for your buck.

DRAW THEM IN
One of the easiest ways to maximize the effectiveness of your trail camera and insure that you see a good representation of what is in your hunting area is to use some type of attractant to lure the deer into camera range. Probably the most common attractant used across the country is shelled corn – it’s cheap, readily available, and the deer love it. For the purpose of getting trail camera pictures, there is no need to invest in an expensive feeder; just simply spread 100 pounds on the ground in an eight to ten-foot circle area where you want to hang your camera. For safety reasons, do not place the corn in large piles or in an area that holds moisture, as this can result in molding that can cause disease in both deer and turkey. Depending on deer density and other available food sources, this should get you five to ten days worth of pictures. Be patient, as it may take a few days for the deer to really key in on the corn and for you to start getting good pictures. Once they find it, though, it won’t last long!

Before you start dumping corn on your favorite hunting property, check your local game laws regarding baiting. If corn or other “feed” is prohibited, but would still like to attract deer to your camera location, then you may want to consider creating a mineral lick. You can buy one of the many commercial mixes available today, or simply create your own by mixing 50 lbs of trace mineral, 50 lbs of feed mix salt, and 10 lbs of dicalcium phosphate. Break the soil up with a shovel in the area where you want to create your lick and work your mix into the soil. Once the lick gets a good rain on it, it shouldn’t take long for the deer to find it and start paying regular visits.

KEEP IT MOBILE
Unless you are hunting a really small property, or you have the money to invest in lots of trail cameras, then you are going to need to move your cameras around to really get a good idea of what the deer are doing on your hunting property. Don’t get caught in the trap of leaving your camera in the same spot all season. This will not only limit your ability to pattern the deer, but it may keep you from discovering that trophy buck that could be hanging out on the other side of the property!

images40V5Z2FA2By experience, two weeks seems to be enough time to get a good representation of what deer are in the area, without your camera spending too much time in one location. You can always bring the camera back to the same spot at a later time, but the idea is to cover as much of your hunting area as possible.

KEEP GOOD RECORDS
Once you have moved your camera around your property and gotten plenty of pictures to look at, the real work has just begun. Now is the time to sort through the pictures, identifying as many unique animals as you can, analyzing what camera sites each deer is visiting and the times that they were there. This should start to give you an idea of the travel patterns on the property, as well as potential stand locations.

This season, make sure you use these tips to get the most out of your trail cameras, and the next picture you get of that monster buck may be the one with you behind him holding his antlers, OR, even that BIG bear 🙂

Follow our FISHING BLOG

WEB   RATES     FISH    HUNT    CABINS    PHOTOS
TESTIMONIALS    BROCHURE    HUNT BOOKLET

Enter your email address to subscribe to this blog and receive notifications of new posts by email.

← Back

Thank you for your response. ✨

Email Me....


Tags: , , , , , , , , , , ,

Home Made Wild Game Jerky

This Jerky is a GREAT creation ever. Not to be bragging but this is one of the best jerky recipes around! This recipe is for beef but when wild game is available this jerky is outstanding. This is a must try for anyone who loves to have this on hand.

jerky

Ingredients
4 pounds round steak cut into strips no thicker than 1/4 inch (if you freeze the steak a few minutes beforehand, slicing is much easier)
4 tablespoons onion powder
1 1/3 teaspoons black pepper
1 1/3 teaspoons garlic powder
2 pinches sea salt
1 teaspoon dry Italian-style salad dressing mix
1 cup Worcestershire sauce
1 cup soy sauce
1 teaspoon hot pepper sauce

Directions
Mix together in a large bowl, the onion powder, pepper, garlic powder, salt and Italian seasoning.
Stir in Worcestershire sauce, soy sauce and pepper sauce.
Place meat into a container, and combine with marinade.
Cover, and refrigerate and marinate for 24 hours. (use large zip lock storage bags)
Place oven rack on the highest level.
Place aluminum foil on bottom of oven to catch drips.
Preheat oven to 150 degrees F.
Insert round toothpicks through the tops of the strips of meat, and hang them from the oven rack.
Bake in preheated oven for 4 hours, or until dried to desired consistency.
Store finished product in an air tight container.

Follow our FISHING BLOG

WEB   RATES     FISH    HUNT    CABINS    PHOTOS
TESTIMONIALS    BROCHURE    HUNT BOOKLET

Enter your email address to subscribe to this blog and receive notifications of new posts by email.

← Back

Thank you for your response. ✨

Email Me....


Tags: , , , , , ,

Improve the Effectiveness of Trail Cams

The easiest way to enter the bow hunting season with false expectations about early season success is to use cameras wrong—or at least—lazily. Taking your camera out to the edge of a food plot or a soybean field, hanging it, and then checking it every week or two may feel like you’re scouting correctly, however you’re probably under-utilizing these new-age tools.

ravine-crossings_1

Instead, consider hanging your cameras to answer questions about deer movement. For example, it’s Whitetail 101 to know that deer are going to use prime food sources throughout the summer. How they get to and from those food sources, where they bed, where they water, and where they browse are all questions that are far more difficult to answer. And they are perfect for scouting cameras.

Aside from taking inventory and getting some sweet pics of velvet-racked bucks, setting cameras in easy spots doesn’t do you much good as a hunter. Cameras hung on places that aren’t easily observable will tell you things that can lead to quality fall hunting spots, which is the goal. They’ll also tell you whether the deer use those places at all, which is like pre-fishing for a bass tournament and eliminating dead water until a pattern or hotspot emerges.

visual-follow-up_1

If you plan to run cameras next summer, start thinking about where you’re going to place them now. Although a subtle trail in a wooded finger leading to an alfalfa field or clover plot might not be as exciting as hanging the camera directly on the field edge, it might just tell you when and where a mature buck likes to travel before and after he eats. That’s a good step toward getting an arrow into him, especially since he is likely to reduce daytime movement once he sheds his velvet.

Follow our FISHING BLOG

WEB   RATES     FISH    HUNT    CABINS    PHOTOS
TESTIMONIALS    BROCHURE    HUNT BOOKLET

Enter your email address to subscribe to this blog and receive notifications of new posts by email.

← Back

Thank you for your response. ✨

Email Me....


Tags: , , , , , ,