RSS

Tag Archives: diy

Wild Plants to Cure the Flu and Common Cold

Can’t make it to the drug store right now? Whatever the reason, you do have some natural medicinal options in the winter season. Look for these three plants to lessen the symptoms and shorten the duration of your next case of the cold or flu. All you need is a sharp eye and a patch of wild growth to find these common and potent medicinal’s.

Mullein 
Mullein is a native plant, which favors dry, rocky soil and full sunlight, and is found throughout North America. An easy way to spot patches of this plants in cold weather is to look for the chocolate brown skeletons of the second-year plants. Look for 4- to 6-foot-tall stalks, which often have branching flower heads that resemble the arms of a saguaro cactus.

images2KI75GRG

The part you want for medicine are the velvety green leaves, which can still be found in winter growing in basal rosettes on one-year-old plants. Treat head colds by crushing the leaves into boiling water and breathing the steam. This medicated vapor acts as a decongestant.
barberryBarberry
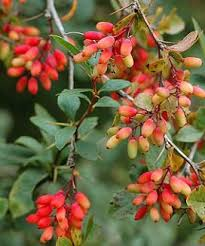
The little red berries of barberry contain a compound called berberine. This acts as an immune system booster, helping your body fight off viral attacks like the common cold and the flu. The bitter taste of the berries isn’t very inviting, but eating a handful each day you’re feeling sick can shorten the illness, much like elderberry and Echinacea will. Look for small bushes with small dangling red berries. The two native varieties of the shrubs will have thorns in sets of three growing all over the twigs. The introduced Japanese species will have single thorns growing around the twigs. All three species can be used medicinally. As an additional point of identification, check the seeds in the red berries. Each berry should contain dark, slender seeds—typically two per berry.


Yarrow

This non-native plant grows from coast to coast on sunny open ground, although it’s originally nativeyarrow to Europe. Its most common use is as a poultice for cuts and other wounds. But you can fight colds and flu with it by making a tea from the leaves. Chop up the fresh leaves and add one tablespoon to one cup of scalding hot water. Soak the leaves for 10 to 15 minutes. You can sweeten the drink if you need to, or drink it commando-style. The anti-viral compounds help your immune system through its battle, while the diaphoretic compounds will get a sweat going to help break fevers.

Just make sure you use a field guide or guidance from an expert for positive identification of these plants. The last thing you need to do is poison yourself while you’re already ill.

rosehipsRose Hip Benefits
A Rose hip is the fruit of a rose. The wild dog rose is the type of rose most often cultivated for their hips. This plant grows up to ten feet tall and bears a white, very fragrant flower. Once the flower has bloomed, and all the petals have fallen off, the hip is picked and used in a wide variety of preparations. Rose hips are the best source of vitamin C; they contain 50% more vitamin C than oranges.
A single tablespoon of the pulp gives an adult more than the recommended daily allowance of 60 mg. They can be eaten raw, after being put through a blender, or soaked in water overnight and then cooked in the water for about half an hour. Because of the high vitamin C content they are an excellent immune system booster, and are often used as a supplement to prevent or treat a cold. The pulp from rose hips may be used in sauces or made into jelly.

Have you made medicine from wild plants?

Follow our FISHING BLOG

WEB   RATES     FISH    HUNT    CABINS    PHOTOS
BROCHURE    HUNT BOOKLET

Enter your email address to subscribe to this blog and receive notifications of new posts by email.

Email Me....


Tags: , , , , , , ,

Making Waterproof Matches

When it comes to matches, waterproof ones are best, especially in dire circumstances like a flood. Since they’re much more expensive than their pedestrian cousins, you might want to make your own.

cabdle

Use the Candle Technique
Burn a candle long enough for a pool of wax to form around the wick. Blow it out, then dip the head of your match into the wet wax, about of an inch (3 mm) up the stick. Remove the matchstick and allow the wax to dry, pinching it closed to form a water-tight seal.

Deploy the Nail Polish Ploy
Coat your matches with clear nail polish to waterproof them. Dip the head of the match and a bit of the matchstick itself into the polish, then rest the match on a counter with the head hanging off the edge to dry. Survive any wilderness situation with these critical tips.

Try the Turpentine Trick
The easiest way to waterproof your matches is simply to drop them in turpentine. Allow the matches to soak for five minutes before placing them on newspaper to dry. After twenty minutes or so, you’ll have waterproof matches that will last several months.

Follow our FISHING BLOG

WEB   RATES     FISH    HUNT    CABINS    PHOTOS
BROCHURE    HUNT BOOKLET

Enter your email address to subscribe to this blog and receive notifications of new posts by email.

Email Me....


Tags: , , , , , , , , ,

How to Make a Quick CAN Stove

If you suffer sticker shock after shopping for wood-burning camping stoves, you’re not alone. Why pay $60 to $100 for a titanium backpacking wood stove when you can make one out of a bean can for nothing. Sure, you could build a fire without any containment at all, but the low weight, efficiency, and minimal set-up time of a tin-can stove could make you a believer. And as long as there are sticks to burn, your stove will have fuel. Follow these easy steps, and you’ll have a lightweight bug-out-ready survival stove in no time.

1

The Gear List
To create a bean can stove, you’ll certainly need the empty can. You’ll also need a pair of tin snips. If you don’t have a pair in your tool box, borrow a pair. You’ll also need a tape measure, a pencil or marker, a drill with a ½-inch (or similar size) drill bit, and a file to remove sharp edges when you’re done. Gloves are a good idea, too,  since you’ll be working with a lot of sharp metal.

2

The Procedure
Remove the can lid completely from a 40-ounce (or similar sized) food can. You could use a smaller can, but the 40-ounce size because one-quart water bottles will nest inside the finished stove. Next, make a mark all the way around the can about 1 ½ inches below the open top. Use your tin snips, spiraling in, to cut this ring off the top of the can, but before you start, determine whether you are using right- or left-hand snips. It will be easier if you cut in the correct direction. You could leave the can full height, but I wouldn’t recommend it. A shortened stove has better balance, and the last thing you need is for your stove to tip over.

3

Next, make four equidistant marks around the mouth. Each mark will be the centerline for the four “teeth” on the top of your stove. Mark a line half an inch on either side of each of the four centerlines and draw a line around the can 1 inch down from the mouth. Using the tin snips again cut out the lines,  leaving four 1×1-inch teeth at the top of the can.

Next, drill eight equally-spaced holes around the bottom of the can wall. These will be the air intake vents. File off any sharp or rough edges from your metal work. Finally, before you start cooking food or boiling water over this stove, burn a few twigs for about ten minutes to get rid of the plastic can lining.

4

The Effectiveness
Once your stove is complete, set some tinder in the bottom and some broken twigs on the top of that. Place it in a stable, level spot and light the tinder through one of the vent holes. Place your cooking pot over the top of the stove and cook away. You will have to remove the pot every time you need to add fuel, but this is far better than trying to create stove doors for adding fuel. It also forces you to set the dangerously hot pot out of the way when refueling. This stove can burn twigs, paper, cardboard and any other solid fuel that’ll fit inside; and it boils one quart of water in about eight minutes. The finished stove weighs only 2 ½ ounces.

Follow our FISHING BLOG

WEB   RATES     FISH    HUNT    CABINS    PHOTOS
BROCHURE    HUNT BOOKLET

Enter your email address to subscribe to this blog and receive notifications of new posts by email.

Email Me....


Tags: , , , , , , ,

How To Prevent Venison From Tasting Awful

I hear people say all the time that they don’t like the taste of deer. Some people say that just because they know what they’re eating and have a preconceived notion that it won’t be good. Others have legit gripes, mainly due to poor handling by the hunter from the time of the kill up until it was cooked. This often results in gamey, tough meat. Here are some tips to help combat bad-tasting venison.

venison

Hunting in the real world is not like the Outdoor Channel portrays it to be. Hunters make bad shots from time to time and the deer has to be tracked for a while. Shot placement and the stress the animal received while being trailed plays a big role in gamey meat. The faster a deer dies, the sooner it can be field dressed. This will reduce the amount of acid that builds up in the deer’s muscles.

Hunters often fail to get the deer cooled as quickly as possible. The first step it to field dress the animal immediately and wash out the cavity with cool water. Be sure to dry the cavity out, as the water can be a breeding ground for bacteria. If the temperatures outside are in the mid-30s or cooler, it’s okay to let the deer hang. Anything warmer than that, and the deer needs to hang in a walk-in cooler (or be skinned, quartered, and put on ice if you don’t have a walk-in).

A whitetail is not a hard to deer to quarter. Because of how their joints and tissues hold their legs on, a simple pocket knife can have a deer quartered quicker than you might think. Some might use a saw to cut through bone marrow and small pieces of bone, but then you’d need to watch that shavings from the saw don’t get mixed in with the meat. Stick with a sharp knife instead, and your meat will be free of small bone pieces that can contaminate the meat.

Growing up, I can remember how much my dad loved the taste of fat from a good cut of beef. The same does not hold true with deer fat. Simply stated, deer fat tastes awful. It is not red meat, so cut it off before it’s made into steaks or burger. This includes all fat and silver skin.

Every year before deer season begins, we call in an order to the local butcher shop for beef suet. Even though we removed all of the deer fat, we need to add some sort of fat, whether beef or pork, when grinding it. If this is not done, the lean venison will quickly fall apart when making burgers, meat loaves, etc. We add beef fat at a ratio of 3:1 (three pounds venison per pound of fat).

If you have the means, the time, and the knowledge, I recommend processing all your deer yourself. When you take a deer to a meat locker you can’t be sure how the meat is handled — or if it’s even your own deer that you’re getting back. For all you know, you could be getting back someone elses deer, perhaps one that was gut-shot and not properly handled after the shot. If you have to take a deer to a processor, research the facility by talking to other hunters who’ve used it, and also talk with the workers, who will hopefully be honest with you.

Don’t overcook venison. Cooking deer for too long causes it to become chewy and dry. Venison is best cooked to medium rare, but the outside needs to be cooked. To accomplish this, the grill must be hot enough to quickly sear the outside and lock in the flavors and juices. Turn your venison only once. If there are no grill marks on the meat after three minutes or so, the grate is not hot enough.

Freezer-burnt food, whether it is venison or other food, does not taste good. Some people use a vacuum sealer; if you go this route, buy a good one, as a cheap product will not keep the food fresh. When we butcher our deer, we make wrapping the meat a family affair, with all involved. We put one-pound portions of burger in sandwich bags and the steaks and roasts are wrapped with plastic wrap. After covering it with plastic wrap, we wrap it with good freezer paper and tapes. Writing on each package, we identify the cut of meat, who killed it, and the date of the kill.

I hope this advice helps you create a great-tasting meal. A few more final tips: The younger the deer, the better, more tender it will be (even though this might not sit well with trophy hunters). Thaw venison slowly to prevent toughness, then serve it hot and keep the remainder hot to prevent it from getting a waxy taste.

Follow our FISHING BLOG

WEB   RATES     FISH    HUNT    CABINS    PHOTOS
TESTIMONIALS    BROCHURE    HUNT BOOKLET


Enter your email address to subscribe to this blog and receive notifications of new posts by email.

Email Me....


Tags: , , , , ,

Building A Smoke House

9c

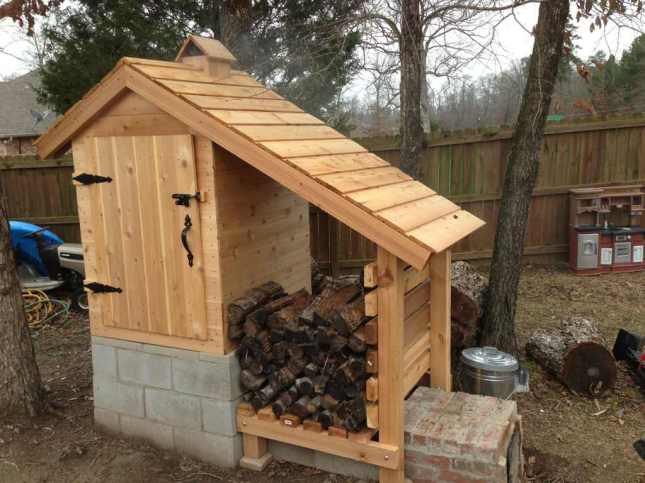
Building a smoke house the old fashion way is a method that has been used for generations. Many people today like to smoke their own meat not only to give it flavor but also to preserve it longer.

The size of your smoker will depend on what you plan to use it for. Whether you want it to just smoke a few fish, smoke sausage every now and then or smoke an entire animal at one time, will help you determine the size of your smoker

1

Beginning:

This slideshow requires JavaScript.

When it comes to flavor of the meat, people through the years have made up their own recipe of brine to rub over the meat before smoking it.

How To Build A Smoke House

9b

The Building Process:

This slideshow requires JavaScript.

Building a smoke house, there are a few things that should be considered when building your smoke house. It is not important to spend a small fortune for material for the construction. Reclaimed wood will work just fine. You may want a smoker big enough to walk in with shelves to lay the meat on along with hocks from the rafters to hang the meat.

You will want to vent the building to allow the smoke to travel freely through the building.

6d

The Firebox Process:

This slideshow requires JavaScript.

Building a smoke house, a very important factor  is to situate your fire box  down hill from the smoke house. This will allow the smoke to travel up hill into the smoker much easier. All that is required for a fire box is a fire box made from brick or even an old barrel with the smoke piped into the smoker will work just fine by having the fire box away from the smoker, the meat will not dry out as much as if it were right in the smoker.

1a

The Smoking Process:

This slideshow requires JavaScript.

To also help in the flavoring of the meat, by using different kinds of wood chips in the fire box will create different smoke changing the flavor in the meat.

Follow our FISHING BLOG

WEB   RATES     FISH    HUNT    CABINS    PHOTOS
TESTIMONIALS    BROCHURE    HUNT BOOKLET

Enter your email address to subscribe to this blog and receive notifications of new posts by email.

Email Me....


Tags: , , , , , , , , , , , ,

Stop Adding Fat to Your Game Meat

While my Wyoming elk tag has so far gone unfilled, my friend Tess was luckier, tagging her first elk in a Nebraska cornfield not long ago. A heat wave prompted us to spend all day Sunday butchering and last night we put about 20 lbs. of trimmings through the grinder.

I’ve been processing my own (and others) deer and elk for about a dozen years and view adding some type of fat to ground venison as a necessary evil. I prefer ground pork, adding anywhere from 10 to 20 percent. Due to a calculating error on my part (I was told there would be no math!), Tess’ grind ended up at about 25 percent pork, a bit more than she preferred.

Ground_Elk_0910_004
This math problem set me to wondering why hunters take a healthy source of protein and fatten it up? That’s like someone on a diet taking a carrot stick and dipping it in ranch dressing. Quick research shows no clear consensus on what or how much fat to add. Some hunters swear by 50/50, others just 10 percent. Some like pork, others beef tallow. Some add bacon ends and pieces.

Certainly, there’s a rationale to adding fat, including enhancing flavor because, hey, we all know fat tastes good. Fat also keeps meat from drying out when you fry it and helps patties from falling apart. But is there a better, healthier alternative? Yes, depending on how you’re planning to cook it.

Burgers on the grill are probably how much of the ground venison in America makes it to the table. I’ll be the first to admit, making a good burger without fat sounds impossible. The fat not only makes a burger juicy, it also helps it stay in patty form. Next time you have some 100 percent ground venison you want to throw on the grill, trying adding an egg and some breadcrumbs to serve as a binder. I’ve also heard of using steel-cut oats, diced onion, shredded potato and even powdered milk.

When frying ground venison for tacos, chili or spaghetti, cook it without fat. The spices should cover any gamy flavor you or your family might object to. (If not, find a new butcher to process your deer or learn to do it yourself. Since I started DIY processing 12 years ago, I’ve never had gamy game meat.) If the dry texture turns you off, try frying it in a little bit of olive oil, or add moisture as the venison browns in the form of stock, tomato juice or other flavored liquid.

As you can see, there are lots of alternatives to adding fat to your ground venison. What about you? How do you keep your low-fat game meat low fat? – David Draper, Wild Chef Blogger

Follow our FISHING BLOG

WEB   RATES     FISH    HUNT    CABINS    PHOTOS
TESTIMONIALS    BROCHURE    HUNT BOOKLET

Enter your email address to subscribe to this blog and receive notifications of new posts by email.

Email Me....


Tags: , , , , , , , , ,

The Wrong Turn

survival3

 On Aug. 31, Bill Lawrence, 40, got separated from his hunting partners and remained lost for five days. As told to Colin Kearns.

Wednesday. I’d just killed my first squirrel when I glanced over for my friends Russell and Cris. They were gone.

Russell was the only one who’d hunted these woods, Meeman-Shelby Forest north of Memphis. We’d been hunting for 20 minutes and were deep into the forest. Russell and Cris stuck together, while I drifted to their left. I tried to stay within eyesight of them, but I was also watching for snakes. The last time I saw them, it looked like they were continuing in a straight line. Then I stopped to shoot the squirrel.

I thought I had an idea where they were, but an hour later I wasn’t any closer. I shouted, but the thick woods only swallowed my cries. So I turned to hike back to the truck, but an hour later I was even more lost. I kept walking, though, figuring I’d find a way out.

I walked, stopping to rest now and then, until it started to get dark. I’d fired a couple of shots but got no response. It never got cold, which was good because I had nothing to build a fire with. I doused myself with bug dope, then lay down. With my vest, I was able to cover my face and roll up the bottom end to use as a pillow. That dead squirrel in the pocket added a decent cushion.

I heard helicopters but they couldn’t see me through the trees, and I wasn’t going to run through the woods in the dark. I just prayed they’d find me tomorrow.

Thursday. I finished the last of the two water bottles I’d brought with me that morning. The days were hot, and I was walking and sweating a lot. I needed to stay hydrated. Fortunately, it rained that morning, and I managed to catch a half bottle’s worth of water.

I mostly squirrel hunt, but I have enough experience hunting deer and rabbits that I can identify tracks—and I know that if you follow those tracks, they’ll often lead to a water source, which in my case was a puddle in gumbo mud. I dipped my empty bottle and watched it fill with gray, grimy water. I didn’t want to drink it. I worried it’d make me sick. But what choice did I have? I was already getting dehydrated.

The taste was nasty—dirty and sandy—but the dip of mint Skoal I had in my mouth made it at least drinkable. I figured I should eat something, too, even though I wasn’t starving. I turned a dead stump over and found some nightcrawlers. They tasted about as bad as the gumbo water. I don’t know how many I ate—only that I’d never eat another one.

The rest of Thursday was a lot like Wednesday: Walk, then break for a nap. Walk, then nap. That second day, as I was walking—with no real end in sight—is when I started talking to God. Why is this happening? If I don’t make it out, will you take care of my wife and kids?

imagesTJNT6CHZThat night I awoke to a WHOOSHWHOOSHWHOOSH. Dazed, it took me a moment to realize that it was another chopper—and that it was right above me. I stumbled to find the flashlight in my vest. But by the time I turned it on, it was too late. After the chopper left, my flashlight burned out.

Friday. I kept moving and praying—all day. Walking gave me a purpose. Praying gave me strength. I truly believe my faith is what kept me from ever panicking. That afternoon I stumbled upon some persimmons. They were the most delicious things I’d eaten in a long time, and they were just sitting there on the ground, perfectly ripe, waiting to be found.
Saturday. I heard a low-flying chopper that morning. I took the T-shirt I had on under my camo shirt, tied it to the barrel of my Mossberg, and rushed to the nearest open area where I waved it around. But it never got close enough.

I was weak and tired. My body ached. For the first time I started to think I might not get out. I had started with 15 shells, and by then I only had four or five left. I’d been firing them and leaving the shells at spots where I rested. But on Saturday I decided to fire the rest I had at once. I didn’t know how much more of this misery I’d have to suffer, and I didn’t want the option of taking my own life.

Later that afternoon, as I was resting, I heard two sounds: a Harley-Davidson and a chain saw. I decided to stay put for the remainder of the day and save my energy. Tomorrow, I’d travel toward those sounds. I just knew that if I didn’t get out on Sunday, I never would.

Sunday. I came to a hill that I wasn’t sure I had the strength to climb. I sat down on a nearby log and prayed for strength. When I finally got up and walked to the hill, I glanced to the left where I saw a trail. And I took it.

Two miles later I hit a blacktop road. I fell to the ground crying. I flagged down a couple of motorcyclists who came down the road and told them who I was. “Son,” one of them said, “there’s a lot of people looking for you.”

They drove me to the camp the search team had set up nearby. Just as they got me on the stretcher and were about to drive me to the hospital, I was given a satellite phone. Kim, my wife, was on the other line. My eyes welled. “Hey,” I said. “I’m alive.”

Survival Analysis
Bill Lawrence had no method of striking fire, carried nothing to signal with but his shotgun, and possessed no tool to navigate to safety but his brain. When he became lost, he had nothing to eat but nightcrawlers and no means to disinfect water. He was unfamiliar with the country and carried no map. To sum up: He struck into the woods about as unprepared as a man can be. But before you criticize him too harshly, take a look at yourself. Have you ever been similarly unprepared for an emergency, using the excuse that you only plan to be gone a few hours and won’t stray more than a few hundred yards from the road? I know I have.

Lawrence’s ordeal should be a cautionary tale for all of us, emphasizing the importance of carrying basic survival gear every time we go afield, no matter how small that field we intend to hunt. A compass, a whistle, a sparking wheel, Tinder Tabs, and chlorine tablets weigh about as much as a tin of Altoids, and easily fit inside one. S - - t happens. Have a hat for it.

Lawrence’s reaction to being lost was to walk and then walk some more. By doing so, he disobeyed the four steps that almost ensure survival: Stop. Shelter. Signal. Stay. Had he stopped walking, tied his undershirt to a treetop or placed it in an opening where it could be seen or, better yet, spelled SOS in a clearing with branches or stones, then hunkered out of the wind to wait, he probably would have been found quickly after being reported missing. Ninety percent of search-and-rescue operations are resolved during the initial hasty search, usually within 10 hours.

One thing that Lawrence did do right needs to be emphasized: He never panicked and was determined to survive. The right attitude is one positive that can make up for a lot of negatives in any survival situation.

Follow our FISHING BLOG

WEB   RATES     FISH    HUNT    CABINS    PHOTOS
TESTIMONIALS    BROCHURE    HUNT BOOKLET

Enter your email address to subscribe to this blog and receive notifications of new posts by email.

Email Me....


Tags: , , , , , ,

The Game Saver Silver Vacuum Sealing System

Gamesaver2

 Last fall I replaced my Cabela’s CG-15 vacuum sealer with a new model from FoodSaver—the GameSaver Silver (GS-500), which is marketed toward sportsmen. I had originally picked up the CG-15 as a refurbished unit in Cabela’s Bargain Cave, but after probably a decade of hard use that included several elk, a couple dozen deer, a few bear and antelope, and several seasons worth of geese and ducks, it was starting to show some wear and tear. When the folks at FoodSaver reached out offering a test model of their GameSaver Silver, I was happy to take them up on it. If nothing else, I wouldn’t have to cart that beast of vacuum sealer that was the CG-15 up and down my stairs anymore.

One problem I’ve had with a lot of vacuum sealer—including so-called “commercial-grade” models—is that after a season or two of intensive use they start to suck, in that they lose some of their vacuum pressure. You might get the device to remove a lot of the air, but it doesn’t have that extra oomph to really get a good, airtight package. So far, I’ve sealed a couple of deer, one antelope, countless ducks, geese, and pheasants, and about 50 pounds of redfish fillets—and the GameSaver Silver still has enough suck to flatten an empty aluminum can, as you can see in the accompanying photo.

Gamesaver1Of course, there’s also the case of too much vacuum, especially when you’re sealing soft or delicate foods. That’s where the GameSaver’s seal override button comes in. While sealing these pheasant sausages, I was able to stop the vacuum pressure before it flattened the tubed meat by hitting the oversized seal button.

Gamesaver3


Other features I like are the handle and locking lid, which makes toting the lightweight unit easy and makes me more likely to pack the thing along on extended hunting trips. It also comes with a 12-volt adapter cord to run off a vehicle’s electrical accessory port, or, to us old timers, the cigarette lighter plug. I am a little concerned about the ruggedness of the GameSaver’s construction, but so far it’s survived nearly a year of my handling, which is saying something.

There are a few things I don’t like: The heat bar seems like it takes a long time to seal, longer than any other units I’ve tested. Some online reviewers have also complained about a tendency for the unit to overheat and shut down for a period of anywhere from 5 to 30 minutes. I personally haven’t had that problem, even when packaging an entire deer’s worth of meat, but it is worth noting.

Of course, there’s also the problem with sealing fish, chicken, or other high-moisture items. As the vacuum is running, the liquid is sucked to the top of the bag preventing the heat bar from creating a full seal. Every vacuum sealer I’ve ever used has this same problem, although the GameSaver Silver seems to be even more finicky than most. I usually combat this with either a folded-up piece of paper towel placed inside the bag or by stopping the vacuum and sealing the bag before the moisture makes it way to the seal bar. FoodSaver does sell Liquid Block bags that feature a moisture-absorbing pad. I’ve used them and they do work, but at a buck per bag, I’ll stick with my more primitive, cheaper methods.

by David Draper

Follow our FISHING BLOG

WEB   RATES     FISH    HUNT    CABINS    PHOTOS
TESTIMONIALS    BROCHURE    HUNT BOOKLET

Enter your email address to subscribe to this blog and receive notifications of new posts by email.

Email Me....


Tags: , , , , ,

Recipe: Moose Tenderloin Lettuce Wraps

This super simple lunch idea will definitely be something you’ll be sure to make over and over.

mooselettucewrapscopy-600x399


Ingredients
marinated moose tenderloin (thinly sliced) Get Marinate Recipe HERE

1 head butter lettuce
1 carrot
1 mini cucumber
feta cheese

Honey Cherry Dressing
1/2 cup cherries
3/4 cup red wine
2 tbsp honey

For the cherry dressing simply put all the ingredients in a saucepan, bring to a boil and reduce heat and simmer.  Describe it as, once you can’t smell the alcohol anymore it’s ready!  Take it off the burner and let cool.  As it cools it will gradually thicken.

Pan fry the moose until desired done-ness.  If you are like me and you like your meat not kicking anymore, then simply remove the meat just before its cooked all the way through.  If it’s sliced thinly it will continue to cook after you take it out of the pan and will be the exact done-ness and will be nice and tender.

Next up shave your vegetables.  Grab a potato peeler and shaved off nice strands of carrots and cucumbers to add in to the lettuce cups.  If you prefer them chopped or grated, by all means go right ahead!

Place your butter lettuce leaves on a plate and begin to assemble and alternated between moose and veggies, crumble feta cheese on top and drizzle the Honey Cherry Dressing on top.

Make as many lettuce cups as you’d like depending on how much meat you used!

Enjoy!

Follow our FISHING BLOG

WEB   RATES     FISH    HUNT    CABINS    PHOTOS
TESTIMONIALS    BROCHURE    HUNT BOOKLET

Enter your email address to subscribe to this blog and receive notifications of new posts by email.

Email Me....


Tags: , , , , , , , , ,

Recipe: Sausage and Slaw Soup

Here’s a simple take on a sausage-based soup that’s sure to satisfy your pallet after a brisk day of hunting. To make things even easier, you can cheat and go with a bag of pre-chopped slaw mix from the grocery store.

slaw soup

Sausage and Slaw Soup

Ingredients
– ½ pound sliced sausage
– 1 Tbsp. canola oil
– 1 medium onion, chopped
– 4 garlic cloves, minced
– 1 ½ lb. bag of pre-packaged slaw mix
– 1 tsp. salt
– 1 Tbsp. flour
– 1 cup water
– 2 cups beef broth
– 1 Tbsp. red pepper flakes
– 2 tsp. each dried parsley and dill

Directions:
1. Over a medium-high burner, heat the oil in a saucepan or soup pot. Add the sausage to the oil and cook until brown.  . Add the onions and cook until translucent, about 3 to 4 minutes.

2. Stir in the garlic and slaw mix to the saucepan. Cook, stirring frequently, until the cabbage is wilted. Sprinkle the salt and flour over the onions and cabbage and stir.

3. Add the water, broth, and red pepper flakes. Raise heat and bring just to the point of boiling. Reduce heat and simmer 10 minutes.

4. Stir in the parsley and dill. Serve with a thick slice of crusty bread.

ENJOY!!

Follow our FISHING BLOG

WEB   RATES     FISH    HUNT    CABINS    PHOTOS
TESTIMONIALS    BROCHURE    HUNT BOOKLET

Enter your email address to subscribe to this blog and receive notifications of new posts by email.

Email Me....

 
Leave a comment

Posted by on September 21, 2016 in meat, preparation, recipe, Wawang Lake Resort


Tags: , , , , , ,