
Over the past two decades hunting backpacks have grown in popularity and size. Not only cubic inches, but number of pockets and where we can strap things. Don’t be sucked into the thought that you have to fill each and every pocket or empty space with something. Instead, make a list of items you think you’ll need for your outing by reviewing the possible scenarios that may occur. For example, if you are just planning a day hunt you may jot down a considerably short list, whereas if you are hunting for a few days you will be carrying a bit more gear.
Years ago a simple camouflage backpack was used with a large holding area and one pocket. Some hunters went out in the field with just a bow, a peanut butter sandwich in their pocket and a knife. Nowadays it’s good policy to prepare a couple packs that to utilize for different hunts. The following is what goes into these packs on a hunting trip, but, keep in mind that you should customize your pack essentials according to what your adventure will be. You will be surprised at how much extra ‘stuff’ you really don’t need.The first is the Badlands Hybrid pack that is used on most of short day trips like small game or turkey hunts. Pack calls and essentials and you’ll still have room left over. On longer hunts pack a Badlands 2200 which allows more room for extra clothing or food for longer excursions. Making sure the essentials are in your pack for a bow hunting adventure can be rather simple. In order to bow hunt, you have to find an area where you can take a quality shot.
You have to find a good area to hunt and you need to get there. You also have to have a pack that is tough, not too heavy, and has ample space to pack out an animal should you be fortunate enough to harvest one. Some areas can be thick vegetation so you need to be aware of the terrain and weather of where you will be headed. Pack your gear for each and every trip to be sure you have everything you might need and a little extra should you find yourself stranded. You should do some research and find a good pack that will fit your needs and more importantly fit you. Here are the essentials that you should take on every hunt.
These essentials should be a constant each time you venture into the forest.
 Water – Always plan to have enough to drink throughout the day. Also plan on sipping, not guzzling so you don’t waste the resource. Before you leave on your hike, locate a water source on a map and prepare to refill along the way. Put an extra bottle in the bottom of your pack in case your hydration system runs out. Then you know you at least have one bottle left. Also, leave a 2 liter bottle of water in your vehicle (preferably in a cooler) so you have something cool to drink when you reach it.
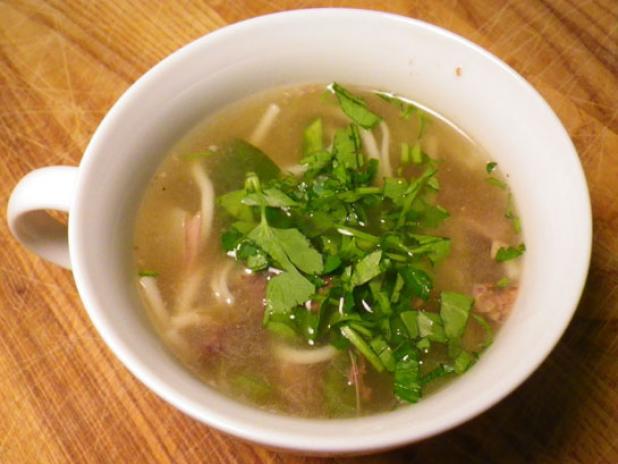
Food/Snacks – Have fun with what you eat on the trail! Take almonds, some energy gel, trail bars like Granola bars, and, be sure to pack a sandwich. For some, and, for those who like it, there is something about eating a peanut butter and honey sandwich on top of a peak that just makes it that much better. Try to stay away from most other sweets on the trail like candy bars or snacks that could leave you feeling sluggish.
First-Aid Kit – Pack a kit yourself or better yet, buy one of the Adventure Medical Kits Sportsmans Kit available at most stores. It is a great kit and the one you should carry on each and every trip. A word of advice to everyone is to open the kit and know what is in there before you leave your house check it over. If you think something is missing, add it. One of the items you should always sure to pack is moleskin. You can never tell when it might be needed to cushion a blister or protect your feet. Having that moleskin was invaluable. Be sure to include other items like QuikClot and a tick remover. You may never needed them and they could’ve been left at home, but don’t mind a little extra weight when it comes to safety.
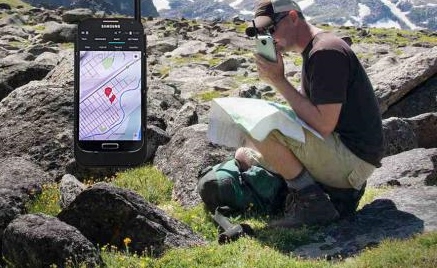
SPOT Locator – Having a locator beacon on your in case in the event you might get lost is added security. It allows your family to track you via computer when your on a hunt. They can see exactly where you are, the terrain, and if you are stationary or moving. The best part is that is if you get lost or need medical assistance you can press a button and have them dispatched to your location. It is highly recommended to review the features to see if you plan on hiking more than a couple miles in or if you plan to be out for a few days. Having a space blanket is a great idea in case you get stranded and need to keep warm. If you need to use it you will probably be miserable, but it will help keep you alive.
Compass – Know how to use it.
Map – A topographical map of the area I am hunting. Some of the items that should be packed, but not necessary really don’t need an explanation:
Whistle, Lighter, Headlamp/Flashlight, Knife and Paracord.
As mentioned earlier, for different hunts there will be a different set of items you will have in your pack. It may take some testing on your part to see what you need, don’t need, and what weighs the least. No matter what, whatever you pack, get out there and enjoy yourself.
Follow our FISHING BLOG
WEBSITE RATES FISH HUNT CABINS PHOTOS
TESTIMONIALS BROCHURE HUNT BOOKLET


