RSS

Category Archives: gun hunting

Tips For More Grouse

trees3Learn to Recognize Good Cover
Some hunters seem to have a sixth sense about where the grouse are. This isn’t magic but rather the culmination of years of experience, observation, and a working knowledge of what the birds need. These guys are constantly reading about grouse habitat and lore; they take note of wherever they hear drumming in the spring. They know that good grouse cover holds food and provides protection from predators — if it is near an evergreen stand or gravel so much the better.

Take a page from these hunters. Every time you or your dog move a bird, have a good look around after the smoke has cleared — you’ll see a pattern soon enough. Study grouse biology at home; carry field guides when you hunt; learn to recognize common grouse foods in your area. After a while you’ll develop that sixth sense too.

Keep a Log
Every serious grouse hunter I know keeps a hunting log. Some maintain elaborate leather-bound journals in which they detail particulars of the hunt such as the date, cover, number of flushes, dog work, weather, harvest, and crop contents of the birds. Other keep it simple, by marking covers on their handheld GPS. Either way, the hunter is reminded of the places that produced grouse last season.gps

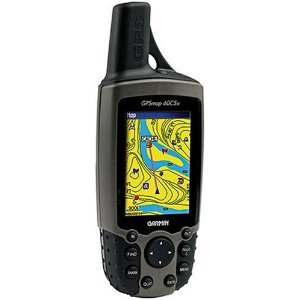
Do this consistently and it won’t take many seasons before you have a bevy of early, mid, and late season options. The more options you have, the better your chance of having a grouse dinner.

Break Some Clay
Over the course of a season, few of us get enough shots at grouse. So it only stands to reason that a hunter ought to make the most of each opportunity. I do this by honing my shotgunning skills in the off-season. Skeet, trap, or sporting clays keep a hunter sharp so that mounting and swinging his scattergun becomes second nature. You’ll still miss — grouse have a way of humbling everyone — but you’ll also make some shots that you might not have without the off-season practice. It just takes a few of these to turn a mediocre season into a great one.

Don’t Forget the Dog Days
Spring and summer are tailor-made for training your dog. Despite this, few of us take advantage of the opportunity. Instead, we expect our dogs to work flawlessly on opening day and we’re actually surprised when that doesn’t happen.

Does your flushing dog hunt too far ahead and blow cover before you get there? A little “hup training” (teaching your dog to sit on command, no matter how far away) in the off season goes a long way towards remedying this. You might also consider brushing up on retrieving drills or introducing your dog to pigeons or game farm forays prior to the season. Some advanced training, such as steadying to wing and shot (where a dog sits down automatically at each flush) might require the help of a professional dog trainer. If that’s what you want, the off-season is the time to do it.

P1040011

Pointing dogs have their own set of training needs, which might include bolstering staunchness, retrieving, hunting range and finding dead birds. Whatever your canine hunting partner’s flaw is, the off-season is the time to address it.

The idea is to learn to handle your dog so that you perform as a well-oiled team during the hunting season. There are plenty of great dog training books and videos — the off-season is when you should benefit from them most.

Follow the Food
Grouse eat hundreds of types of food and each provides a clue as to where the birds are hanging out. That’s why it’s a good idea to check the crop of every bird you shoot. Knowing what grouse are eating helps you understand their habits and tells you where you should focus your hunting efforts. If the last three birds you shot were full of blackberries, for instance, it’s definitely time to hunt any of your covers that hold these shrubs.

Against the Wind
A dog relies on his nose to find birds. So why would you hunt with the wind at its back? We all know that there isn’t any good reason for doing so, but it’s one of the first things excited dog handlers forget when approaching good cover.

If you hunt into the wind, your dog will work closer, scent more game and, hopefully, find more birds. It’s a simple but often overlooked strategy that can make the difference between a full and empty game bag. This is also an important consideration when looking for a lost bird. Take your dog downwind from where you think it fell and let it start hunting from there.

Stop and Start
A good grouse hunting dog provides opportunities that you might not have otherwise had, but that’s not to say that a dog less hunter can’t do well. The key, for a dog less hunter, is to stop and start through likely cover and change direction often. These unpredictable patterns unnerve grouse and invariably pressure them into flushing. Another added bonus is that when you stop you can sometimes hear the put-put-put of a grouse moving just ahead of you. If that’s the case, get the gun up and rush it.

Don’t Hesitate
A good upland shot doesn’t hesitate. He takes the first available shot, even if it’s not a great one.

If you wait for a better chance you’ll rarely get it. Similarly, if you are leading a bird that disappears behind a screen of leaves, follow through, and shoot anyway. You’ll be surprised how often you connect. If not, shells are cheap.

While we’re on the subject of shooting, be ready for the second flush. Often, especially, early in the season when birds are still in their family groups, multiple flushes do occur. If you keep this in mind, they won’t catch you flat-footed — or with an empty gun.

Follow Up
Whenever you flush a bird and don’t fold it, mark where you last saw it. Most times they won’t fly much further than 150 yards. If you marked it well and follow up immediately, you have a good chance of forcing a second flush.


This slideshow requires JavaScript.

Another advantage of following up on grouse is that they sometimes lead you to new covers. If that’s the case, don’t forget to mark it.

Lastly, never assume that you missed any grouse that you shot at. After the shot, keep quiet and listen. Sometimes you’ll hear a mortally wounded grouse doing its death dance against the ground — that’s the one that you thought you missed.

The Right Tools
A fast-handling 12, 16 or 20 gauge shotgun is ideal for birds. Most gunners like double guns. Some happen to prefer a pump because that’s what they shoot best with.  However, don’t discount the light weight, easy to carry .410 shotgun.  Nice little gun with ever growing in popularity in our neck of the woods.

Whatever, your preference, you can’t go wrong using 2 3/4-inch shells filled with 7.5 shot. Grouse aren’t tough birds and it doesn’t take much to bring them down. Since most shots are within 15 yards, the more open-choked your barrels are, the better.

Other essential grouse hunting tools include a quality blaze orange upland hunting vest with a lined game pouch; brush pants; comfortable, well-supported hunting boots; and a compass and/or GPS. If you are hunting with a dog, a whistle, water bottle, portable dog dish, dog first aid kit, and lead are important too. When working heavy, thorny cover, a pair of shooting glasses that protect your eyes are worth their weight in gold.

Conclusion
No one ever said grouse hunting was complicated. But it does take some planning, know-how and skill. Over the last few years, these strategies have made many a much better grouse hunter. Hopefully, they’ll do the same for you.

Follow our FISHING BLOG

WEB   RATES     FISH    HUNT    CABINS    PHOTOS
BROCHURE    HUNT BOOKLET

Enter your email address to subscribe to this blog and receive notifications of new posts by email.

Go back

Your message has been sent

Warning
Warning
Warning
Email Me....

Warning

Warning.


Tags: , , , , , , ,

Calling in Coyotes & Wolves

Thanks to the prevalence of electronic calling devices, anyone can become a decent coyote caller with the press of a few buttons. But if you really want to step up your game, you need to first understand what makes these animals tick.

coyote-hunting

Prey Distress
Coyotes are nature’s great omnivores. Studies of stomach contents have found that coyotes will swallow almost anything that they can get in their mouths, including rocks, plastic packaging, harness buckles, and even the occasional rabbit. Knowing this, it doesn’t matter much which sort of prey distress call you use—most modern electronic callers offer everything from a whitetail fawn to a house cat—as long as you set up within a coyote’s earshot.

The manner in which a coyote approaches a distress call depends on its security level, which is influenced by its latest experiences. An unpressured coyote will often come in quickly and boldly to almost any distress sound. A pressured coyote, however, will take much longer to approach a call. He’ll wait downwind of the sound before slowly slinking in, wary nose to the air.

Upon hearing the initial prey distress cries, the test coyotes would usually run to a downwind position without exposing themselves and remain there until we left. They would later approach our stand area to investigate. One wary old alpha pair (the male was 10 years old) waited 17 hours before approaching the calling location, and then spent 45 minutes at our stand site sniffing around.

The takeaway? One of the biggest mistakes you can make with a distress call is leaving a location too soon. Spend at least 30 to 45 minutes on stand.

Another important factor is the time of day you target coyotes. Only 10 percent of respondents in a recent poll of about 1,400 coyote callers said dawn was best. More than half the hunters chose 8 a.m. to 10 a.m., followed by 11 a.m. to 2 p.m., and then dusk, each of which got about 20 percent of the vote.

Whines & Yelps
These nonaggressive vocalizations—often made by pups—are probably the most effective sounds in a coyote caller’s repertoire because they trip so many behavioral triggers at once. With the press of a button you can target social interaction, territorial instincts, and protective maternal/paternal instincts. At certain times of the year, a case could probably be made that you’re appealing to their hunger, too, since several studies have documented coyotes cannibalizing pups.

Before switching to a different sound, we’ll increase the volume and intensity of the whines and yelps for three or four series in order to reach out to distant coyotes. This has proven extremely effective in all seasons and geographic locations, and at any time of day.

Challenge Howl
The challenge howl is a misnomer. A challenge is an invitation to fight, to do battle, such as a monarch bull elk bugling at a satellite bull. Coyotes don’t do that. Biologists call this vocalization the threat-bark howl because it more accurately describes the intent of the coyote: to threaten and demand that the intruder leave. Now. Field observations have shown that coyotes (unlike wolves) will avoid fights whenever possible. A wolf pack will run down an intruder and kill it. A pack of coyotes will run down an intruder, make him submit, and then let him leave the territory.

coyote_snarl

For these reasons, callers should use this vocalization only if they know they are set up in a pack’s core territory. If a caller sets up near a den during whelping or denning season, the results can be spectacular. Having resident coyotes charge in on a close, loud, aggressive call rivals any approach of a rutting buck or strut of a spring gobbler. However, if you set up in overlapping home ranges and demand that every coyote within hearing distance leave, they probably will.

The key to locating a pack’s core area is to home in on their group-yip howls. Listen for a pack’s group howl night after night. If you are able to pattern their howling with some regularity, you should be able to determine their core area. Once you’ve plotted that on a map or GPS, study the terrain. Coyotes will typically hide out in the thickest, most secluded cover in the area. Make an educated guess and move in close before threatening the pack.

Many callers will break off a stand when a coyote bark-threat howls in response to their distress calls because they believe that it means the coyote has busted them and will not approach. That’s not always the case. The coyote may simply be protesting the source of the sound even if it hasn’t identified it. You can often get a barking, threat-howling coyote to expose himself for a clear shot if you wait him out and weaken your return howls, keeping them less aggressive than the coyote’s. Another tactic is to retrace your steps and then circle around to a different location. If the coyote doesn’t see or scent you, you can call him in to the new setup with whines and whimpers.

130

Group and Solo Howls
Coyote calling is a numbers game. You want to offer sounds that appeal to the largest number of coyotes without alarming or intimidating them. The most effective howl to draw them in is a lone howl that is low frequency, high pitched, and long. It announces the presence of an unknown, young, small, nonaggressive coyote that any other dog within hearing distance will be willing to investigate.

Louder, long-range howls are more likely to get howls in return, but they are less likely to draw a coyote in to your stand.


Knowing that, here’s a simple formula for success: Locate coyotes with a group-yip howl (the collective yowling that you have undoubtedly heard on calm evenings) and call them in to gun range with a lone howl.

0cf5707bbfce2588fddf51ff630fbe1c

Most of those vocalizations are aggressive in nature. This is important to know because such vocalizations will alarm and/or intimidate most coyotes. Submissive coyotes will often retreat to their core areas after howls are broadcast and remain there until joined by another group member or until enough time has passed for them to call back or investigate. That’s the exact opposite of what you want your howls to do.

It is important to remember that coyotes will sometimes investigate the source of your group-yip howls, so don’t get caught unprepared.

Follow our FISHING BLOG

WEB   RATES     FISH    HUNT    CABINS    PHOTOS
BROCHURE    HUNT BOOKLET

Enter your email address to subscribe to this blog and receive notifications of new posts by email.

Go back

Your message has been sent

Warning
Warning
Warning
Email Me....

Warning

Warning.


Tags: , , , , , , , , , ,

Training Your Retriever

Attach a 6-foot lead or cord to a scent-infused training dummy or the wing of a bird. (Freeze wings during hunting season and thaw them out when ready for training.) Use this to create “drags” of scent the dog will follow.

66

Start with 10-yard straight-line retrieves on short grass. Gradually increase the challenge: curved drag lines, taller grasses, abrupt turns, short gaps in the scent trail by lifting the dummy off the ground for a foot or two.

88

To stay on track, some dogs need reinforcement in the form of small bits of dog treats dropped along the trail. Use treats if you need to keep your dog excited, but sparingly. The point is to find the big payoff at the end of the trail, not the little goodies along the way.

55

Once your dog is trailing enthusiastically, dial up the difficulty. Run the scent trail over a log, make a sharp turn, and drag it along the log as if the wounded bird ran down the log. Run the scent trail in and out of the water along a creek or pond edge. Run it across a creek and continuing on the other side. Create longer and longer gaps.

777

To really hone a dog’s tracking skills, make a dragging pole. This is a particularly good drill for dogs that will hunt in the heavy cover of beaver ponds and thick timber. Cut a piece of PVC pipe about 5 feet long. (The diameter doesn’t matter—use whatever is cluttering up your basement.) Run a 10-foot section of parachute cord or other cordage through the pipe, and tie a slip loop to one end.

Attach the loop to a bird wing or training dummy treated with duck scent. Hold the pipe out from your body, and drag the wing or dummy along a scent trail through yard. The pipe prevents your own foot scent from contaminating the trail.

Follow our FISHING BLOG

WEB   RATES     FISH    HUNT    CABINS    PHOTOS
BROCHURE    HUNT BOOKLET

Enter your email address to subscribe to this blog and receive notifications of new posts by email.

Go back

Your message has been sent

Warning
Warning
Warning
Email Me....

Warning

Warning.


Tags: , , , , , ,

Maximizing Your Hunting Time With Trail Cameras

cameraOver the last five years, probably no other “gadget” has changed the way we scout more than the trail camera. For many of us, running trail cameras is a hobby in itself, bringing a whole new excitement to our deer hunting efforts. Much more than just something to pass time, however, running trail cameras can give you a unique insight into the patterns of deer on your hunting properties and really tip the odds in your favor for harvesting a mature whitetail. Let’s take a look at the features to look for when purchasing a trail camera, and how to get the maximum benefit from the camera once you have made your purchase.

As the popularity of these scouting tools has grown, so has the number of companies offering their own line of cameras. The features on these cameras cover such a wide spectrum that choosing the right one for you can be a daunting and sometimes confusing task. While this article isn’t meant to tell you WHICH camera to buy, it IS meant to help you sort through some of the most common differences among the various trail cameras to help you narrow down your search.

RESOLUTION
The resolution of a trail camera is a measure of the image size that the camera creates. So a 5.0 megapixal trail camera will give you a much larger image – and therefore more detail – than one with 3.0 megapixals. Which resolution you choose really depends on how important it is to have a large, crisp image. If you are only concerned with having a general idea of what deer are in the area and when they are traveling through, then about any resolution offered on today’s cameras will suffice. If you want a larger, more detailed image to print off for your friends, then you may want to shoot for something with at least 3.0 megapixels.

BATTERY TYPE & LIFE
In my mind, this is one of the most important considerations when choosing a trail camera, as it will have a huge effect on the cost of maintaining the camera. I have seen some “cheap” trail cameras that burn through six C-sized batteries in a week, and suddenly the “cheap” camera gets VERY expensive! Others claim to operate up to a year on eight AA batteries. So before you go buying a camera based on price alone, keep in mind the battery life, as it may be the most expensive choice you could make in the long run.

TRIGGER SPEED
Another important feature is the trigger speed of the camera, which is simply how long it takes the trail camera to shoot a picture once something has “triggered” the motion sensor. A faster trigger speed can be the difference between having a great shot of that trophy buck and just having a picture of a deer’s butt as it walks out of the frame. If you plan on placing your trail cameras over feeders or a mineral lick, then trigger speed will not be as much of an issue as it would if hung along a trail.

FLASH TYPE
This is almost a moot point, since most trail cameras today have gone to infrared flash. An infrared flash, as opposed to the incandescent flash found standard on most consumer cameras, is less likely to spook deer, uses less battery life, and is less likely to be detected by other humans (i.e. thieves!). While I’ve gotten plenty of pictures of big, mature whitetails with an incandescent flash trail camera, there is no doubt that some animals are spooked by the bright flash. If you can afford the infrared flash, the benefits certainly outweigh the small increase in cost.

OTHER FEATURES
While we have covered some of the most important features to consider when buying a new trail camera, there are many more options that could impact your decision. One of these options is the size of the unit. Size varies greatly amongst trail cameras, and some companies are now producing models that are as small as your hand. Other models go as far as being able to send the pictures it takes directly to your email or cell phone, so the only time you have to check them is when the batteries need replacing. How’s that for convenience?

Before you head out to buy your next trail camera, take a minute to think about how it will be used and what features are most important to you. This will make the task of narrowing down your choices much easier when you start the shopping process.

camera2

MAXIMIZING TRAIL CAMERA USE
Once you have waded through all the details, made your decision and laid down your hard earned money on a trail camera, all that’s left is to hang that thing on a tree, right? Let’s take a look at some ways you can be sure you are using your camera to its potential this season and getting the most bang for your buck.

DRAW THEM IN
One of the easiest ways to maximize the effectiveness of your trail camera and insure that you see a good representation of what is in your hunting area is to use some type of attractant to lure the deer into camera range. Probably the most common attractant used across the country is shelled corn – it’s cheap, readily available, and the deer love it. For the purpose of getting trail camera pictures, there is no need to invest in an expensive feeder; just simply spread 100 pounds on the ground in an eight to ten-foot circle area where you want to hang your camera. For safety reasons, do not place the corn in large piles or in an area that holds moisture, as this can result in molding that can cause disease in both deer and turkey. Depending on deer density and other available food sources, this should get you five to ten days worth of pictures. Be patient, as it may take a few days for the deer to really key in on the corn and for you to start getting good pictures. Once they find it, though, it won’t last long!

Before you start dumping corn on your favorite hunting property, check your local game laws regarding baiting. If corn or other “feed” is prohibited, but would still like to attract deer to your camera location, then you may want to consider creating a mineral lick. You can buy one of the many commercial mixes available today, or simply create your own by mixing 50 lbs of trace mineral, 50 lbs of feed mix salt, and 10 lbs of dicalcium phosphate. Break the soil up with a shovel in the area where you want to create your lick and work your mix into the soil. Once the lick gets a good rain on it, it shouldn’t take long for the deer to find it and start paying regular visits.

KEEP IT MOBILE
Unless you are hunting a really small property, or you have the money to invest in lots of trail cameras, then you are going to need to move your cameras around to really get a good idea of what the deer are doing on your hunting property. Don’t get caught in the trap of leaving your camera in the same spot all season. This will not only limit your ability to pattern the deer, but it may keep you from discovering that trophy buck that could be hanging out on the other side of the property!

images40V5Z2FA2By experience, two weeks seems to be enough time to get a good representation of what deer are in the area, without your camera spending too much time in one location. You can always bring the camera back to the same spot at a later time, but the idea is to cover as much of your hunting area as possible.

KEEP GOOD RECORDS
Once you have moved your camera around your property and gotten plenty of pictures to look at, the real work has just begun. Now is the time to sort through the pictures, identifying as many unique animals as you can, analyzing what camera sites each deer is visiting and the times that they were there. This should start to give you an idea of the travel patterns on the property, as well as potential stand locations.

This season, make sure you use these tips to get the most out of your trail cameras, and the next picture you get of that monster buck may be the one with you behind him holding his antlers, OR, even that BIG bear 🙂

Follow our FISHING BLOG

WEB   RATES     FISH    HUNT    CABINS    PHOTOS
BROCHURE    HUNT BOOKLET

Enter your email address to subscribe to this blog and receive notifications of new posts by email.

Go back

Your message has been sent

Warning
Warning
Warning
Email Me....

Warning

Warning.


Tags: , , , , , , , , , , ,

Hunting: Muzzleloader

Muzzleloaders are a lot of fun to shoot! The concept of a single shot makes shooters try to do their best on every shot. Large puffs of smoke belching from the muzzle after each shot, makes this a very visual shooting sport. As well, muzzleloaders are capable of firing a variety of bullet weights and powder charges, giving them the ability to be a multi species firearm.

For years, people have shot muzzle-loading guns. Most shooters fired old style flintlock guns with open sights. Some shooters found these early muzzle-loading firearms reminded them of their forefathers and helped these individuals re-live the past. However, for many shooters, these guns were unappealing, inaccurate and were a royal pain in the butt to shoot and clean. Thus, there were a very limited number of people involved in muzzleloader shooting and hunting.

Over the course of the past several years, the interest in muzzleloaders and muzzleloader hunting has grown and continues to grow. Much of this growth is due to several gun manufacturers developing inline muzzle-loading rifles that are built with today’s technology, using yesterday’s ideas. These fine firearms are fun and easy to use, have high percentage ignitions and are highly accurate. In addition, they’re easy to disassemble and clean.

These new muzzle-loading guns resemble modern center-fire rifles. They have excellent safety mechanisms and precision rifled barrels. Many of them come tapped and died directly from the factory, so all a shooter has to do is add bases, rings and a scope. It’s very common these days for shooters using in-line muzzleloaders with scopes to achieve one inch groups or better at a hundred yards.

Along with the invention of new muzzleloaders, there has also been a major advancement in gun cleaning solutions. There are all kinds of effective no fuss, no mess gun cleaning solutions designed specifically for muzzleloaders. These new cleaning chemicals make cleaning muzzleloaders a breeze. With these new products, gone are the hours of cleaning after each session at the range or in the field!

Hunters are also quickly discovering that muzzleloaders offer new hunting seasons, high levels of success and many other unique opportunities.

Extra Seasons and Hunting Benefits
Many states and provinces, including my home province of Saskatchewan offer special muzzleloader hunting seasons that are separate from regular rifle seasons. Many of these special seasons are approximately a month before the regular rifle hunting seasons and are often set up to coincide with or run just before the peak rut of the big game species. Hunting with a muzzleloader during these bonus time periods can prove very exciting and productive. Antelope, deer, moose and elk become more mobile and visible just prior to and during their rutting periods as they try to prove their dominance or search for mates.

In many jurisdictions, special muzzle-loading seasons are often held after all other hunting seasons are over. Typically, these extra seasons are several weeks long. They give hunters ample opportunity to get out in the field and get in some bonus hunting action when big game animals are often patternable as they concentrate on cold weather feeding areas.


Inline muzzleloaders such as this one, have made muzzleloader hunting for
big game animals, much more enjoyable.

During muzzleloader seasons, there are usually fewer hunters in the field than during a regular rifle season. This gives muzzleloader hunters an excellent opportunity to harvest an animal. Fewer hunters means less pressure and less pressure means that the animals should continue acting in their natural ways. With the animals’ daily habits remaining unchanged, muzzleloader hunters should be able to pattern the animals. If the hunter is able to determine when, where and why an animal will be in certain location, it should increase the hunter’s odds for success.

Since in many areas muzzleloader seasons generally start before the rifle seasons, the muzzleloader hunter is able to get a jump on the rifle hunters. This early start accompanied with the fact that there are fewer hunters in the field, should allow the muzzleloader hunter to see more animals and get more opportunities at harvesting a big game animal before the rifle hunters move in.

Muzzle-loading Tactics
Using game calls to attract big animals can be very productive during the muzzleloader seasons. Whitetail and mule deer will often respond to grunt and bleat calls. In the early part of the season, when the rut is just starting to fire up, they may come to your call out of curiosity. If this is the case, be patient as their approach will typically be very slow. Later in the season when the rut is in full swing, be prepared for fast action, as the deer may come storming in to investigate your call.

Many a muzzleloader hunter has rattled in a whitetail deer. To be successful during the early part of the season, you should just tickle your rattling antlers together to stimulate a minor sparring match. Try to scrape your rattling antlers on trees and bushes, trying to fool a buck that there is another buck in his territory. Later in the season, when the rut is more advanced, you can use more aggressive rattling techniques to stimulate full-scale battles.

Elk can be called into range with bugles or cow calls. If the bull elk are bugling, try bugling back to them. With any luck, they will respond and move into muzzleloader shooting range. If the bulls are not calling, try using a cow call to entice them into shooting range. Often a simple series of cow calls will bring in an entire herd of elk.

If you get a chance to hunt moose just prior to the breeding period, bull grunts can be used to effectively coax a bull into range. The reason for this is that bulls will be competing with one another for dominance. However, if it’s breeding season, the bulls will be more interested in checking out the call of a cow in heat as opposed to responding to a bugling bull looking for a fight.

Some muzzleloader hunters pursuing antelope will use a decoy to try and lure in their buck. Although this technique can be highly productive, it can also be very dangerous. Other hunters may see the decoy and be fooled by it. The result could be someone shooting at the decoy and killing or injuring the hunter hiding behind the decoy. In most antelope/muzzleloader situations, I prefer to set up near a watering hole and try to catch a love struck buck as it comes in for a quick drink.

Added Bonuses
Muzzleloader hunters are usually able to go hunting in decent weather conditions. During a typical muzzleloader season, the temperatures are usually moderate to warm. Snow and winter blizzards are a rarity. This means the traditional hunting attire of long johns, toques and parkas can be replaced by T-Shirts, sweat shirts, light jackets and ball caps.

Many gun ranges have realized the growth of muzzle-loading. As a result, special muzzleloader ranges have been built to meet the unique needs of smoke-pole shooters. Having spent time on such ranges, I have found that muzzleloader shooters tend to be friendly, outgoing individuals who are willing to help other shooters, teach them tricks of the trade and talk hunting and shooting for hours on end.

Book, magazine publishers and Internet websites, such as www.biggamehunt.net have also recognized the growth of muzzle-loading. Over the past few years, there has been a steady growth in the number of books and articles published on muzzleloaders and muzzle-loading hunting. With increased access to product reviews, reference materials, hunting stories and hunting techniques, muzzleloader shooters are able to learn more about their sport. Increased knowledge means greater satisfaction and a greater desire to participate in the sport.

Game of Accessories and Gadgets
Muzzleloader shooters will also find that shooting a muzzleloader requires a variety of accessories and gadgets. These items are fun to accumulate. They are even more fun to use!


A few accessories: bullets/sabots, ram rod T-handle, cleaning jag, wire brush,
ball/quick starter, speed loader and cleaning solution are needed for your muzzleloader.

The ramrod is probably the most used muzzleloader gadget you require. One of the main functions of the ramrod is stuffing bullets down the barrel. However, it is also used for maintaining and cleaning the muzzleloader barrel. Ramrods are typically threaded on both ends for adding a variety of gun care attachments.

In addition to your ramrod, you’ll also need a jag (ribbed attachment for cleaning), ramrod extension, bullet puller and a short starter or bullet starter.

For those shooting loose powder, a powder measurer and a flask are essential. For a couple of dollars, you can also get a powder can nozzle that allows you easily pour powder right out of the can.


Just a few of my favorite things: bullets/sabots, speed loader, powder flask,
powder measurer, T-handle, ball/quick starter and a jag.

Whether you shoot loose powder or pellets, express loaders are a very good investment. These small tubes are made to hold a bullet and premeasured charge of powder. Express loaders make reloading a quick process and one that you’ll appreciate, especially when you have a 1200 pound moose requiring a second shot coming straight at you.

A capper unit serves a dual role of helping you put percussion caps on your gun’s nipple and allowing you to carry a few spare percussion caps. Speaking of nipples, a nipple wrench is necessary for removing and replacing the muzzleloader’s nipple. In most muzzleloaders, the nipples must be removed before the gun can be cleaned. Since the nipples are threaded and generally tucked away, a specialized nipple wrench is another must.


A variety of muzzleloader accessories resting on a possibles bag. Included are a powder flask, primers, ball/quick starter, powder measurer, capper and a speed loader.

Black-powder and pyrodex are highly corrosive propellants as they attract moisture. At a minimum, you require cleaning patches, a wire brush, cleaning solutions and gun oil. However, as previously mentioned, with today’s technologies, there are a variety of cleaning solutions and accessories that help make muzzleloader cleaning an easy event.


Cleaning is made easy these days!

After shooting your muzzleloader, you should clean it. For best results, get in the habit of cleaning it after every hunt. If you shoot your gun and store it away without cleaning it, you’ll be in for a big surprise (and it won’t be pleasant) the next time you go to use your muzzleloader.

A small glass jar with a lid on it is ideal for soaking small parts in cleaning solution. As well, an old toothbrush works great for cleaning hard to reach areas of your muzzleloader.

You will require a good set of screwdrivers for taking your gun apart and ensuring that everything is tight. Teflon tape is great for wrapping around the threads on the gun’s nipples. A simple wrap of teflon tape makes the nipple easier to remove and prevents it from seizing. If you are shooting your muzzleloader with a scope, a roll of electrical tape is a good investment. Since black powder and pyrodex are so corrosive, you can save damage to your scope’s finish by covering the scope tube with electrical tape.

When hunting, you will need to carry your muzzleloader accessories with you. Some hunters like to go with backpacks or bags they can carry, while other prefer a pouch that attaches to their belt. Whatever style you choose, make sure that it is big enough to carry all the equipment that you need, yet not so bulky that you continually leave it at home or in your truck. As well, make sure it seals shut, so that you don’t loose your equipment as you stalk across the countryside.

Limitations and Potential Restrictions
Muzzleloaders have changed dramatically over the past few years. However, it’s important to remember that they are still only capable of firing one shot at a time. In addition, they also have a limited effective range. While stories abound of hunters taking big game animals at long range shots with muzzleloaders, they really are a close to moderate range firearm. While many of the new in-line muzzleloaders loaded with a maximum charge have the capability of taking animals out to ranges of 200 plus yards, I personally try to limit my shots to 150 yards and prefer those in the 100 yard range.

Before heading out on a muzzleloader hunt, take time to check the regulations for the jurisdiction you are planning to hunt. Some states and provinces may have restrictions in place that do not allow hunters to use in-line muzzleloaders or scopes on their muzzleloaders. In addition, there may be restrictions in place for minimum caliber sizes…………Article by: Mike Hungle

Follow our FISHING BLOG

WEB   RATES     FISH    HUNT    CABINS    PHOTOS
BROCHURE   HUNT BOOKLET

Enter your email address to subscribe to this blog and receive notifications of new posts by email.

Go back

Your message has been sent

Warning
Warning
Warning
Email Me....

Warning

Warning.


Tags: , , , , , , ,

Pay Attention to Detail

Scent can be your biggest ally or your worst enemy

wawanglakebear
Black Bear are attracted to the aroma of a free meal, but if they catch a whiff of you, you can often kiss them good-bye for a day or two.   Keep your clothing and footwear as scent-free as possible. Be alert at all times while hunting your bait. You will most often see bear before you hear them. With padded feet they move with calculated precision. Remember, when they come into a bait station they know the treats were left by humans.


Shot Placement

Regardless of your choice of weapon, whether it is a gun or bow, learning when and where to shoot can mean the difference between an expedited kill, or, the outcome of tracking a wounded animal. We advise our hunters to wait until the bear is preoccupied with the bait and is facing away while standing broadside or quartering away. Bears are extremely tough, so a double lung or heart shot are always your best option therefore taking your time will be important.

wawangshotplacement

When archery hunting, bows must meet the following specifications.

Crossbows: Draw length must be at least (11.8 in.);

  • Draw weight must be at least (119 lbs.);
  • Bolt head must be at least (0.9 in.) at the widest point; and,
  • there must be at least two cutting edges of straight, sharp, un-serrated, barbless steel.

Re-curve Bow:    Draw weight must be at least (48.5 lbs.) at draw length of (27.6 in.) or less;

  • Arrow length must be at least (23.6 in.);
  • Broad head must be at least (0.9 in. at the widest point; and,
  • There must be at least two cutting edges of straight, sharp, un-serrated, barbless steel.

For bow hunting Black Bear we recommend a compound bow with a draw weight of no less than 50 pounds and a 100 grain broad head

Recommended Knowledge base
www.mnr.gov.on.ca/en/Business/FW/Publications/MNR E001275P.html

For rifle hunting black bear we recommend using nothing less than a .270 caliber.
Other recommended calibers: 7mm magnum; .308; .30-06.  NO 30-30’s

Firearm Information www.rcmp-grc.gc.ca/cfp-pcaf/index.htm

The bottom line – baiting is a proven strategy for attracting a wary game animal with a voracious appetite. It involves much more than just tossing out a few tasty morsels. There is a right way and a wrong way to do it and our experienced guides take pride in their skills and knowledge. Keen attention to detail and listening to the guide is the key to your success.

In order to ensure the highest possible success to our hunters we take only an average 14 hunters a year. Should we have an increase in bear sighting throughout the spring and summer we may take a few more hunters but our first obligation is to ascertain a healthy black bear population together with satisfied hunters for years to come.

Most importantly, remember baiting is a ton of work and takes weeks on our part for each hunter. From collecting legal paper work to buying and picking up the ingredients, materials along with travelling for miles and then finally establishing and maintaining each site daily prior to your hunt. It requires foresight and commitment on our part and we do this because of our passion for the outdoors and careful management of our Black Bear.

Follow our FISHING BLOG

WEBSITE    RATES     FISH    HUNT    CABINS    PHOTOS
BROCHURE    HUNT BOOKLET

Enter your email address to subscribe to this blog and receive notifications of new posts by email.

Go back

Your message has been sent

Warning
Warning
Warning
Email Me....

Warning

Warning.


Tags: , , , , , , , , ,

Grouse Hunting at Wawang Lake

Join us in NW Ontario CANADA for some exciting and thrilling grouse hunting

P1130017
Grouse Season:  September 15th to Oct 31st

Grouse hunting is a relaxing pastime that is getting more and more popular every year.  In our area bird hunting can be an adventure in itself!  Driving down the back roads & trails in your truck or on your ATV can not only be thrilling but breathtaking as well as you wander down roads that are in full color deserving of natures fall foliage. Just taking in these magnificent fall colors, peaceful wilderness & the wildlife that you’ll encounter will make you feel like you are definitely “North of the Tension Zone”.

The bush trails with the rise of the birds, singing of the guns, the smell of the pines along with friendly comraderie back at the camp will not long be forgotten.

Surrounding Wawang Lake are hundreds of miles of ATV trails, old logging road, game animal trails and hiking trails. The bush is just stuffed with these upland game birds and on a sunny fall afternoon you will see hoards of them. Many of our guests choose a fishing / grouse hunting combination package and spend half the their time taking advantage of the awesome northern pike and walleye fishing and spend the rest of their time enjoying the clean fall area and exploring the many trails where birds are plentiful.

There are three species of grouse found in Ontario.

Ruffed Grouse  –  Spruce Grouse  –  Sharptail Grouse

Ruffed Grouse is the most common and comprises of 80% of what you will encounter during your hunt.

The limit for grouse in Ontario is 5 birds per day in any combination of species with a total of 15 in your possession and you will be surprised at the number of grouse we do have and how fast you’ll bag those limits.

Compared to other areas the grouse cycle in our area has remained consistently high over the years and we credit this because of less human population that other places are known for.  In a nutshell what you’ll experience at Wawang Lake is a vast area of complete privacy during your hunt.

The most popular guns for grouse hunting are .410 or 20 gauge shot gun and some hunters use a 12 as well.   Quickly becoming more popular is BOW HUNTING for birds.  To increase the thrill and excitement of your hunt give your bow a try and the challenge alone is sure to thrill you.

Blaze orange hat & vest is required and must be worn out in the field

Canadian Firearms Regulations
All Firearms (does NOT include bows) being brought into Canada must be registered at the Canadian Customs at the time of entry into Canada. A one-year permit costs $50.00 Canadian, or there is a long term permit as well. If you would like further information, you can visit the Canadian Firearms Website through the link on our website or call toll free, 1-800-731-4000.

Canadian Customs
You should be aware of special customs and immigration issues whenever traveling to another country. For people with prior legal issues (including DWI’s) you need to find out what restrictions may be placed on your travel. Visit the Border Crossing Link and/or the Canada Citizenship & Immigration.

DEPOSIT REQUIREMENTS
A $150.00 non-refundable deposit is required at the time of reservation to guarantee a hunt. Balance to be paid in full upon arrival at the resort.  Hunting deposits and installments are non-refundable. Consideration may be given to date transfers if vacancy can be filled.

There are a limited number of spaces available for our hunts. Often there are more guests interested in hunting than there are available spaces, and hunts are often booked a year or more in advance. It is extremely difficult to fill spaces that become available due to cancellation. For these reasons we ask that our guests do not book hunts lightly

For further information, or, to book your next bear hunt please contact us at:
1-888-534-9217 or EMAIL

 WEBSITE    RATES     FISH    HUNT    CABINS    PHOTOS
BROCHURE    HUNT BOOKLET

Enter your email address to subscribe to this blog and receive notifications of new posts by email.

Go back

Your message has been sent

Warning
Warning
Warning
Email Me....

Warning

Warning.


Tags: , , , , , ,

Tips On How to Shoot Fast

by David E. Petzal

How_to_Shoot_Fast

The sign of a first-rate intelligence, said F. Scott Fitzgerald, is the ability to hold two conflicting ideas in the mind and still function. So it is with fast rifle work. Riflery is a sport of deliberation and precision, but the demands of the real world very often make deliberation and precision impossible. Gunsite Academy sums it up to a T: “A good fast shot is better than a slow perfect shot because you won’t get time for the perfect shot.”

What follows is about shooting quickly after you have positively identified your target. It’s not about blazing away at sounds or snap-shooting at what you think is an animal.

Develop Your Mental Clock
The first step in shooting fast has nothing to do with shooting. It involves learning how much time you have to shoot, and whether you have to shoot fast at all. Much of this can be acquired by watching critters and reading their body language. A whitetail aware of evil nearby does not act like a whitetail whose greatest worry is where he’ll find a date that evening. An animal that’s 400 yards away does not act at all like the animal right under your tree stand.

On occasion, I’ve given the hunters with me heart failure because I waited and waited for a critter to move just a little bit to give me the exact shot I wanted. And I always got it because I knew that animals never stand still, and I knew that whatever I was about to drop the hammer on had no idea anything was amiss.

Eschew Perfection
Unlike shot gunners, who send out hundreds of pellets with every pull of the trigger and are happy if one or two of them get the job done, riflemen have it dinned into them that they have to be precise. It’s not enough to get a bullet in the 10-ring; you want to get it in the X-ring. If you’re shooting groups, you want to shave off every tenth of an inch you possibly can. And the way you do this is by being deliberate and getting everything perfect before you pop a cap.

547e9416-31d5-4b8e-9e13-35f18ec88b17

This is exactly the opposite of how a good game shot operates. Animals have not evolved with 10-rings or X-rings. What they have are hearts and lungs, and a hit anywhere in either counts. Modern hunting bullets are so destructive that catching a distant corner of a lung will result in as certain a kill as a shot right through the middle of said organ.

Don’t Forget to Aim

On the other hand, you still have to aim. Many misses occur because hunters panic, get the crosshairs somewhere in what they think is the general vicinity of the beast, and yank the trigger. (The closer the critter, the more this seems to happen.) A little while back I listened to a Wyoming outfitter recounting in disbelief how a client, resting his rifle on shooting sticks, had managed to shoot an elk in the buttocks at 60 yards. “How do you hit an 800-pound animal in the ass at 60 yards?” he asked me, still indignant. (He tracked the poor creature for two days and eventually lost it.)

is
The answer is simple. When the moment comes, most hunters can only think: “OMG, this is the only chance I’m going to get!” Everything else, such as the fundamentals of riflery, goes right out of their heads.

Furthermore, too many hunters don’t practice. For them, the mechanics of mounting the gun, acquiring the sight picture, and pulling the trigger are about as familiar as those of piloting a space capsule.

What to Do?

I can’t tell you how to acquire cold blood. Jerry Fisher, the great custom gun maker, once told me that after you take about 300 head of big game you calm down. That sounds about right.

Short of that, the way to learn to shoot fast is roughly this: First, know your animal. There is no shortage of game-critter anatomical charts that you can study. Know where the lungs are. That’s always the percentage shot.

Second, when it comes time to shoot for real, envision an aiming point on the beast and hold for that. And the nanosecond the cross hairs are even close to it—not precisely on it—shoot. Fast, good shots, remember?

To practice shooting fast, you need a .22 rifle and a whole bunch of NRA 50-Yard Slow Fire Pistol targets. These have an 8-inch bull that’s just about the size of an animal’s boiler room. Set your scope at its lowest power and, at 20 yards, fire a five-shot string, lowering the gun from your shoulder between shots. What you’re trying to do is get that round off the instant the cross hairs are anywhere in the bull’s-eye. If the bullet hits in the bull, it counts. If it doesn’t, you missed.

sighting-rifle-deer-hunting

It takes me about 1.7 seconds to mount the rifle, aim, and get the shot off. Since my skill with a gun is legendary, bordering on mythical, this is a good time for you to try to match. When you can get all five rounds in the black, every time, back up 5 yards. Eventually you will be shooting from 100 yards, and if you can put 20 out of 20 shots into the bull at that distance, shooting fast, I will buy you a cigar. Or you can buy me one for telling you this stuff.

Follow our HUNTING BLOG

WEB   RATES     FISH    HUNT    CABINS    PHOTOS
BROCHURE    HUNT BOOKLET

Enter your email address to subscribe to this blog and receive notifications of new posts by email.

Go back

Your message has been sent

Warning
Warning
Warning
Email Me....

Warning

Warning.


Tags: , , , , , , , ,

Black Bear Hunting – SIT Until Dark

450_ashley

We hear tales of bear hunters not sitting until dark and instead stand in time to get back to camp before it gets too late. CRAZY!

Here are some 2016 successful hunters:

This slideshow requires JavaScript.

Just like in most types of hunting, “just before dark” is usually the best time for the mature animals to arrive. Sometimes the big ones will be there well before dark, but usually the last 30 minutes of legal shooting light is the best. Carry a flashlight; the bear usually won’t eat you. They are just as afraid of you after dark as they are in the daylight.

sunset bear

Follow our FISHING BLOG

WEB   RATES     FISH    HUNT    CABINS    PHOTOS
BROCHURE    HUNT BOOKLET

Enter your email address to subscribe to this blog and receive notifications of new posts by email.

Go back

Your message has been sent

Warning
Warning
Warning
Email Me....

Warning

Warning.


Tags: , , , , , , , , ,

Bargain vs. Premium Ammo

You get what you pay for. That’s an adage we generally believe in. But does it hold up with respect to ammunition? We set out to answer that question by testing the accuracy of a variety of value-priced .308 hunting ammo against more costly stuff.

ammo1

Methodology
Using three .308 rifles in the test—one hunting rig and two precision rifles that we knew would be ringers.

We put a number of budget and premium loads through all three rifles over the course of one day, ensuring the results wouldn’t be influenced by different environmental conditions. We also used a standard 5-shot-group protocol, and shot two groups with each load at 100 yards. As a control to establish a baseline level of accuracy for each rifle, we also shot 5-shot groups using Federal’s Gold Medal load with 175-grain Sierra BTHPs.

Using the baseline match load to calculate a ratio for each hunting load by dividing the size of the hunting-load groups into the size of the match-load groups. The closer to 1 that ratio is, the better the hunting load performed. None of the hunting loads outshot the match load, so all these ratios were greater than one.

Results
The outcome was interesting. The best hunting ammo was Hornady’s American Whitetail 150-grain Interlock SP. Compared to the baseline groups with the match ammo, this budget-priced load ($19.29 for a box of 20) shot nearly as well as the match ammo in all three rifles and had an impressive 1.41 average ratio. Federal’s Fusion, another bargain ammo ($21.49 for a box of 20) was second best among the loads, with an average ratio of 2.02.

The only expensive load that delivered consistent performance in all three rifles was Federal’s 165-grain Trophy Bonded Tip ($34.49 per box), The two Winchester loads had nearly identical levels of performance, though again, the less expensive 180-grain BST (2.11 ratio average) outshot the more expensive 150-gr. XP3 (2.81 ratio average).

ammo2

It’s worth noting when purchasing premium ammo that the promise of greater accuracy is certainly implied because it uses better quality components, but that much of its benefit is based on the idea that it will perform better on game.

Conclusion
It pays to try different loads in several different bullet weights in your rifles. Investing money to find an accurate load is the cheapest way to get the most from your rig.

Follow our FISHING BLOG

WEB   RATES     FISH    HUNT    CABINS    PHOTOS
BROCHURE    HUNT BOOKLET

Enter your email address to subscribe to this blog and receive notifications of new posts by email.

Go back

Your message has been sent

Warning
Warning
Warning
Email Me....

Warning

Warning.


Tags: , , , , , , , , ,