RSS

Category Archives: Rifle

Tips On How to Shoot Fast

by David E. Petzal

How_to_Shoot_Fast

The sign of a first-rate intelligence, said F. Scott Fitzgerald, is the ability to hold two conflicting ideas in the mind and still function. So it is with fast rifle work. Riflery is a sport of deliberation and precision, but the demands of the real world very often make deliberation and precision impossible. Gunsite Academy sums it up to a T: “A good fast shot is better than a slow perfect shot because you won’t get time for the perfect shot.”

What follows is about shooting quickly after you have positively identified your target. It’s not about blazing away at sounds or snap-shooting at what you think is an animal.

Develop Your Mental Clock
The first step in shooting fast has nothing to do with shooting. It involves learning how much time you have to shoot, and whether you have to shoot fast at all. Much of this can be acquired by watching critters and reading their body language. A whitetail aware of evil nearby does not act like a whitetail whose greatest worry is where he’ll find a date that evening. An animal that’s 400 yards away does not act at all like the animal right under your tree stand.

On occasion, I’ve given the hunters with me heart failure because I waited and waited for a critter to move just a little bit to give me the exact shot I wanted. And I always got it because I knew that animals never stand still, and I knew that whatever I was about to drop the hammer on had no idea anything was amiss.

Eschew Perfection
Unlike shot gunners, who send out hundreds of pellets with every pull of the trigger and are happy if one or two of them get the job done, riflemen have it dinned into them that they have to be precise. It’s not enough to get a bullet in the 10-ring; you want to get it in the X-ring. If you’re shooting groups, you want to shave off every tenth of an inch you possibly can. And the way you do this is by being deliberate and getting everything perfect before you pop a cap.

547e9416-31d5-4b8e-9e13-35f18ec88b17

This is exactly the opposite of how a good game shot operates. Animals have not evolved with 10-rings or X-rings. What they have are hearts and lungs, and a hit anywhere in either counts. Modern hunting bullets are so destructive that catching a distant corner of a lung will result in as certain a kill as a shot right through the middle of said organ.

Don’t Forget to Aim

On the other hand, you still have to aim. Many misses occur because hunters panic, get the crosshairs somewhere in what they think is the general vicinity of the beast, and yank the trigger. (The closer the critter, the more this seems to happen.) A little while back I listened to a Wyoming outfitter recounting in disbelief how a client, resting his rifle on shooting sticks, had managed to shoot an elk in the buttocks at 60 yards. “How do you hit an 800-pound animal in the ass at 60 yards?” he asked me, still indignant. (He tracked the poor creature for two days and eventually lost it.)

is
The answer is simple. When the moment comes, most hunters can only think: “OMG, this is the only chance I’m going to get!” Everything else, such as the fundamentals of riflery, goes right out of their heads.

Furthermore, too many hunters don’t practice. For them, the mechanics of mounting the gun, acquiring the sight picture, and pulling the trigger are about as familiar as those of piloting a space capsule.

What to Do?

I can’t tell you how to acquire cold blood. Jerry Fisher, the great custom gun maker, once told me that after you take about 300 head of big game you calm down. That sounds about right.

Short of that, the way to learn to shoot fast is roughly this: First, know your animal. There is no shortage of game-critter anatomical charts that you can study. Know where the lungs are. That’s always the percentage shot.

Second, when it comes time to shoot for real, envision an aiming point on the beast and hold for that. And the nanosecond the cross hairs are even close to it—not precisely on it—shoot. Fast, good shots, remember?

To practice shooting fast, you need a .22 rifle and a whole bunch of NRA 50-Yard Slow Fire Pistol targets. These have an 8-inch bull that’s just about the size of an animal’s boiler room. Set your scope at its lowest power and, at 20 yards, fire a five-shot string, lowering the gun from your shoulder between shots. What you’re trying to do is get that round off the instant the cross hairs are anywhere in the bull’s-eye. If the bullet hits in the bull, it counts. If it doesn’t, you missed.

sighting-rifle-deer-hunting

It takes me about 1.7 seconds to mount the rifle, aim, and get the shot off. Since my skill with a gun is legendary, bordering on mythical, this is a good time for you to try to match. When you can get all five rounds in the black, every time, back up 5 yards. Eventually you will be shooting from 100 yards, and if you can put 20 out of 20 shots into the bull at that distance, shooting fast, I will buy you a cigar. Or you can buy me one for telling you this stuff.

Follow our HUNTING BLOG

Enter your email address to subscribe to this blog and receive notifications of new posts by email.


Tags: , , , , , , , ,

Sighting in Your Rifle

So you’ve acquired a new hunting rifle. After saving your hard-earned cash and landing permission from your other half, the gun rests in your hot little hands. It looks great, feels great… it probably smells great… but more importantly does it shoot great? Now its time to hit the range and get this baby sighted in.

Truth is the same holds true for rifles we’ve had for many years. Chances are they don’t require the full-meal-deal, but sighting in, confirming that our equipment is in good working order, or realigning sights is something we should do on a regular basis.

Unfortunately many of us try to kill two birds with one stone. We visit the range infrequently and attempt to sight in and practice shooting all at the same time. It’s important to remember, sighting is very different from regular shooting practice. The process of sighting in involves aligning the scope (or other sights) with the firearm when using a specific bullet and load. Shooting practice involves discharging and often experimenting with different positions to allow our bodies to grow accustomed to the form and function of shooting.

k_wilson_sighting_in2Believe it or not, many of us don’t sight in properly. It never ceases to amaze me how many hunters pick up their guns once or twice a year, assume it’s shooting straight and hit the woods without a second thought. As a professional outfitter I see it all the time. In fact, I’ve seen guests take it personally when, after arrival in camp, I ask them to take a few practice shots – just to make sure their gun is properly sighted in. As though I’m insinuating that they haven’t prepared for their hunt, once in a while I get a hunter who thinks I’m a control freak. Then the truth comes out. After a few shots it becomes obvious; better than half are inevitably in need of scope adjustments. Every one swears that they were shooting one-inch groups at home, but now their rifle requires major scope adjustments. In their defense, a multitude of things can happen to guns in transit. Blunt trauma to cases or directly to the scope itself can throw it way out of whack; hence the need to sight it.

To be honest many of us are guilty of not maintaining our rifle and scope. If you shoot regularly that’s one thing; you’re constantly checking it and tweaking the scope when necessary. In reality, most of us don’t. By in large, recreational hunters pick up their guns a few times each year. Whether you’re tuning a brand new rifle or confirming the accuracy of an old one, here are a few tips for sighting in:

1) Bore sight your rifle before shooting
k_wilson_sighting_in3This first step applies mostly to rifles and scopes that have a new marriage. The first time a scope is mounted to a rifle the gunsmith will usually use a bore sighting tool. This tool is used to approximately align the crosshairs of the scope with the rifle barrel. Unfortunately some folks erroneously rely on bore sighting alone to zero their gun. Remember bore sighting can be precise but most often it only approximates accuracy. If, when you visit the range, you discover that you’re not even hitting the paper at all, consider rough bore sighting your gun. Practical with bolt-action rifles, by removing the bolt, you can stand behind the gun, look through the barrel and center the target. Then without adjusting the gun, look through the scope and make the necessary adjustments to bring the crosshairs in alignment with the target. This should get you hitting the paper in no time, then you can move on to shooting.

2) Shoot from a stable platform and rest
To reliably confirm the accuracy of your rifle and scope, you must shoot from a rest. I’m not sure I should say this or not, but I will. To illustrate the naivety of some, I’ve actually witnessed guys trying to sight in their rifles at the range by shooting freehand from a standing position. Needless to say these are the guys that get frustrated because they’re not hitting anything.

Remember, when we’re sighting in our rifles we’re not testing our shooting skill, but rather the accuracy of the gun, scope and bullet being used. Our goal should be to eliminate or at least minimize human error and allow the equipment to do its thing. With this in mind, a stable shooting bench or table is always recommended. Most shooting ranges are furnished with suitable tables or benches and adjustable stools. If you’re using a portable bench, make sure it is resting level on solid ground. Likewise, it’s imperative to use a shooting rest. In my opinion a vice can be that much better. I really like MTM Case-Gard products (www.mtmcase-gard.com). They make a variety of shooting supplies that are both affordable and practical. Few of us exhibit perfect shooting form. By understanding the biomechanics involved with aiming, breathing, squeezing the trigger and following through we can better acknowledge how to eliminate torsion while shooting from a rest. By cradling the rifle fore-end on a rest or in a vice, we can align our sights with the downrange target and maintain that alignment for a long period of time. Then, by gently squeezing the trigger to discharge, we minimize our human influence thereby allowing the firearm to perform more or less on its own.

3) Begin at close range, then move out to 100 yards and further
I’ve heard much discussion about the standard 100 yard shot and arguably for most bore-sighted rifles, sighting in at that distance is fine. But talk to the pros and most will agree that you should begin at 25 yards if you want to do it right. Making adjustments at close range is easier than at longer distances. At 25 yards you’ll find it easier to acquire your target; it simply appears larger and is easier to center the crosshairs at this short distance. Inaccuracies are simpler to rectify and adjustments can be made quickly at that distance. Remember, inaccuracies are exaggerated that much more at greater downrange distances.

k_wilson_sighting_in1
As you make your fine adjustments to your scope, be aware of the increments and don’t overdo it. For example, with my Leupold VXIII, one click = 1/4 inch adjustment. So, if my shots were hitting consistently two inches to the left of center, I would likely need to dial the adjustment eight clicks in that direction, then shoot another round of bullets. Some folks disagree, but in my opinion it is better to make subtle adjustments, then shoot to confirm that you are working toward the zero mark. As long as there are no fliers, a series of three shots is typically representative of where the gun is shooting. Although with today’s scopes I don’t believe it is as crucial, I still like to give it a firm tap to seat the crosshairs after each adjustment.

When your rifle and scope are in sync at 25 yards, move to 100 yards. Most big game rifle and bullet combinations that are sighted in a couple inches high at 100 yards will shoot a hair low at 25 yards – with most deer hunters this is considered ideal (e.g., I like my 300 Win Mag to be 2″ high at 100 yards). Once your rifle is sighted in, try shooting at 200, 300 and 400 yards to better learn how your rifle, scope and ammunition perform at greater distances.

4) Use the same ammunition that you plan to hunt with
Not all ammunition performs the same. Be sure to sight in your rifle with the load that you plan to hunt with. Ballistics of variable bullet weights and designs (not to mention manufacturers) will perform differently. For instance, Winchester Ammunition’s 150 grain Supreme Elite XP3 (www.winchester.com) will inevitably perform differently than Remington’s 180 grain Core-Lokt, PSP (www.remington.com) shot out of my 300 Winchester Magnum.

If you reload your own ammunition, then you’re likely acquainted with factors affecting bullet performance. Working the right load may take some trial and error, but the same applies – always sight in with the bullet and load you intend to hunt with.

5) Record and reference each shot
Sighting in can be as labor-intensive as you make it. As a rule, several items are required and several more make the job that much easier. As an absolute necessity, we require a table or bench, a shooting rest, our rifle, ammunition and a target. Beyond these basics, the job is much easier with a spotting scope, tripod, and additional targets along with a marker.

As you begin shooting, be sure to analyze and record each shot. I like to use a Bushnell Elite 15-45x 60 mm spotting scope (www.bushnell.com) mounted on a solid tripod. At 45 power magnification, I can see every detail on the downrange target. My scope allows me to closely assess where I hit in relation to where I aimed. Further, many shooters like to keep a matching target on the bench while they are shooting. By checking their shot, then marking it on the target beside them, they can better track their progressions to confirm any scope adjustments and accuracy. This eliminates much of the guessing about which shot was which.

Follow our FISHING BLOG

WEB   RATES     FISH    HUNT    CABINS    PHOTOS

Enter your email address to subscribe to this blog and receive notifications of new posts by email.


Tags: , , , , , , ,

Hunting: Muzzleloader

Muzzleloaders are a lot of fun to shoot! The concept of a single shot makes shooters try to do their best on every shot. Large puffs of smoke belching from the muzzle after each shot, makes this a very visual shooting sport. As well, muzzleloaders are capable of firing a variety of bullet weights and powder charges, giving them the ability to be a multi species firearm.

For years, people have shot muzzle-loading guns. Most shooters fired old style flintlock guns with open sights. Some shooters found these early muzzle-loading firearms reminded them of their forefathers and helped these individuals re-live the past. However, for many shooters, these guns were unappealing, inaccurate and were a royal pain in the butt to shoot and clean. Thus, there were a very limited number of people involved in muzzleloader shooting and hunting.

Over the course of the past several years, the interest in muzzleloaders and muzzleloader hunting has grown and continues to grow. Much of this growth is due to several gun manufacturers developing inline muzzle-loading rifles that are built with today’s technology, using yesterday’s ideas. These fine firearms are fun and easy to use, have high percentage ignitions and are highly accurate. In addition, they’re easy to disassemble and clean.

These new muzzle-loading guns resemble modern center-fire rifles. They have excellent safety mechanisms and precision rifled barrels. Many of them come tapped and died directly from the factory, so all a shooter has to do is add bases, rings and a scope. It’s very common these days for shooters using in-line muzzleloaders with scopes to achieve one inch groups or better at a hundred yards.

Along with the invention of new muzzleloaders, there has also been a major advancement in gun cleaning solutions. There are all kinds of effective no fuss, no mess gun cleaning solutions designed specifically for muzzleloaders. These new cleaning chemicals make cleaning muzzleloaders a breeze. With these new products, gone are the hours of cleaning after each session at the range or in the field!

Hunters are also quickly discovering that muzzleloaders offer new hunting seasons, high levels of success and many other unique opportunities.

Extra Seasons and Hunting Benefits
Many states and provinces, including my home province of Saskatchewan offer special muzzleloader hunting seasons that are separate from regular rifle seasons. Many of these special seasons are approximately a month before the regular rifle hunting seasons and are often set up to coincide with or run just before the peak rut of the big game species. Hunting with a muzzleloader during these bonus time periods can prove very exciting and productive. Antelope, deer, moose and elk become more mobile and visible just prior to and during their rutting periods as they try to prove their dominance or search for mates.

In many jurisdictions, special muzzle-loading seasons are often held after all other hunting seasons are over. Typically, these extra seasons are several weeks long. They give hunters ample opportunity to get out in the field and get in some bonus hunting action when big game animals are often patternable as they concentrate on cold weather feeding areas.


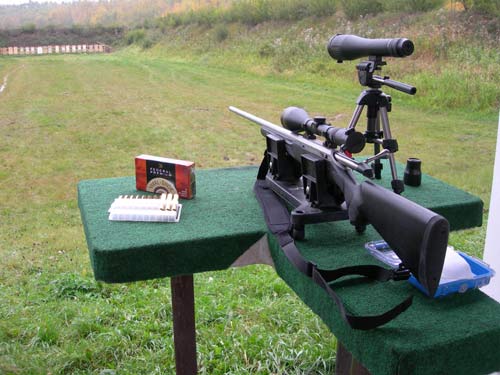
Inline muzzleloaders such as this one, have made muzzleloader hunting for
big game animals, much more enjoyable.

During muzzleloader seasons, there are usually fewer hunters in the field than during a regular rifle season. This gives muzzleloader hunters an excellent opportunity to harvest an animal. Fewer hunters means less pressure and less pressure means that the animals should continue acting in their natural ways. With the animals’ daily habits remaining unchanged, muzzleloader hunters should be able to pattern the animals. If the hunter is able to determine when, where and why an animal will be in certain location, it should increase the hunter’s odds for success.

Since in many areas muzzleloader seasons generally start before the rifle seasons, the muzzleloader hunter is able to get a jump on the rifle hunters. This early start accompanied with the fact that there are fewer hunters in the field, should allow the muzzleloader hunter to see more animals and get more opportunities at harvesting a big game animal before the rifle hunters move in.

Muzzle-loading Tactics
Using game calls to attract big animals can be very productive during the muzzleloader seasons. Whitetail and mule deer will often respond to grunt and bleat calls. In the early part of the season, when the rut is just starting to fire up, they may come to your call out of curiosity. If this is the case, be patient as their approach will typically be very slow. Later in the season when the rut is in full swing, be prepared for fast action, as the deer may come storming in to investigate your call.

Many a muzzleloader hunter has rattled in a whitetail deer. To be successful during the early part of the season, you should just tickle your rattling antlers together to stimulate a minor sparring match. Try to scrape your rattling antlers on trees and bushes, trying to fool a buck that there is another buck in his territory. Later in the season, when the rut is more advanced, you can use more aggressive rattling techniques to stimulate full-scale battles.

Elk can be called into range with bugles or cow calls. If the bull elk are bugling, try bugling back to them. With any luck, they will respond and move into muzzleloader shooting range. If the bulls are not calling, try using a cow call to entice them into shooting range. Often a simple series of cow calls will bring in an entire herd of elk.

If you get a chance to hunt moose just prior to the breeding period, bull grunts can be used to effectively coax a bull into range. The reason for this is that bulls will be competing with one another for dominance. However, if it’s breeding season, the bulls will be more interested in checking out the call of a cow in heat as opposed to responding to a bugling bull looking for a fight.

Some muzzleloader hunters pursuing antelope will use a decoy to try and lure in their buck. Although this technique can be highly productive, it can also be very dangerous. Other hunters may see the decoy and be fooled by it. The result could be someone shooting at the decoy and killing or injuring the hunter hiding behind the decoy. In most antelope/muzzleloader situations, I prefer to set up near a watering hole and try to catch a love struck buck as it comes in for a quick drink.

Added Bonuses
Muzzleloader hunters are usually able to go hunting in decent weather conditions. During a typical muzzleloader season, the temperatures are usually moderate to warm. Snow and winter blizzards are a rarity. This means the traditional hunting attire of long johns, toques and parkas can be replaced by T-Shirts, sweat shirts, light jackets and ball caps.

Many gun ranges have realized the growth of muzzle-loading. As a result, special muzzleloader ranges have been built to meet the unique needs of smoke-pole shooters. Having spent time on such ranges, I have found that muzzleloader shooters tend to be friendly, outgoing individuals who are willing to help other shooters, teach them tricks of the trade and talk hunting and shooting for hours on end.

Book, magazine publishers and Internet websites, such as www.biggamehunt.net have also recognized the growth of muzzle-loading. Over the past few years, there has been a steady growth in the number of books and articles published on muzzleloaders and muzzle-loading hunting. With increased access to product reviews, reference materials, hunting stories and hunting techniques, muzzleloader shooters are able to learn more about their sport. Increased knowledge means greater satisfaction and a greater desire to participate in the sport.

Game of Accessories and Gadgets
Muzzleloader shooters will also find that shooting a muzzleloader requires a variety of accessories and gadgets. These items are fun to accumulate. They are even more fun to use!


A few accessories: bullets/sabots, ram rod T-handle, cleaning jag, wire brush,
ball/quick starter, speed loader and cleaning solution are needed for your muzzleloader.

The ramrod is probably the most used muzzleloader gadget you require. One of the main functions of the ramrod is stuffing bullets down the barrel. However, it is also used for maintaining and cleaning the muzzleloader barrel. Ramrods are typically threaded on both ends for adding a variety of gun care attachments.

In addition to your ramrod, you’ll also need a jag (ribbed attachment for cleaning), ramrod extension, bullet puller and a short starter or bullet starter.

For those shooting loose powder, a powder measurer and a flask are essential. For a couple of dollars, you can also get a powder can nozzle that allows you easily pour powder right out of the can.


Just a few of my favorite things: bullets/sabots, speed loader, powder flask,
powder measurer, T-handle, ball/quick starter and a jag.

Whether you shoot loose powder or pellets, express loaders are a very good investment. These small tubes are made to hold a bullet and premeasured charge of powder. Express loaders make reloading a quick process and one that you’ll appreciate, especially when you have a 1200 pound moose requiring a second shot coming straight at you.

A capper unit serves a dual role of helping you put percussion caps on your gun’s nipple and allowing you to carry a few spare percussion caps. Speaking of nipples, a nipple wrench is necessary for removing and replacing the muzzleloader’s nipple. In most muzzleloaders, the nipples must be removed before the gun can be cleaned. Since the nipples are threaded and generally tucked away, a specialized nipple wrench is another must.


A variety of muzzleloader accessories resting on a possibles bag. Included are a powder flask, primers, ball/quick starter, powder measurer, capper and a speed loader.

Black-powder and pyrodex are highly corrosive propellants as they attract moisture. At a minimum, you require cleaning patches, a wire brush, cleaning solutions and gun oil. However, as previously mentioned, with today’s technologies, there are a variety of cleaning solutions and accessories that help make muzzleloader cleaning an easy event.


Cleaning is made easy these days!

After shooting your muzzleloader, you should clean it. For best results, get in the habit of cleaning it after every hunt. If you shoot your gun and store it away without cleaning it, you’ll be in for a big surprise (and it won’t be pleasant) the next time you go to use your muzzleloader.

A small glass jar with a lid on it is ideal for soaking small parts in cleaning solution. As well, an old toothbrush works great for cleaning hard to reach areas of your muzzleloader.

You will require a good set of screwdrivers for taking your gun apart and ensuring that everything is tight. Teflon tape is great for wrapping around the threads on the gun’s nipples. A simple wrap of teflon tape makes the nipple easier to remove and prevents it from seizing. If you are shooting your muzzleloader with a scope, a roll of electrical tape is a good investment. Since black powder and pyrodex are so corrosive, you can save damage to your scope’s finish by covering the scope tube with electrical tape.

When hunting, you will need to carry your muzzleloader accessories with you. Some hunters like to go with backpacks or bags they can carry, while other prefer a pouch that attaches to their belt. Whatever style you choose, make sure that it is big enough to carry all the equipment that you need, yet not so bulky that you continually leave it at home or in your truck. As well, make sure it seals shut, so that you don’t loose your equipment as you stalk across the countryside.

Limitations and Potential Restrictions
Muzzleloaders have changed dramatically over the past few years. However, it’s important to remember that they are still only capable of firing one shot at a time. In addition, they also have a limited effective range. While stories abound of hunters taking big game animals at long range shots with muzzleloaders, they really are a close to moderate range firearm. While many of the new in-line muzzleloaders loaded with a maximum charge have the capability of taking animals out to ranges of 200 plus yards, I personally try to limit my shots to 150 yards and prefer those in the 100 yard range.

Before heading out on a muzzleloader hunt, take time to check the regulations for the jurisdiction you are planning to hunt. Some states and provinces may have restrictions in place that do not allow hunters to use in-line muzzleloaders or scopes on their muzzleloaders. In addition, there may be restrictions in place for minimum caliber sizes…………Article by: Mike Hungle

Follow our FISHING BLOG

WEB   RATES     FISH    HUNT    CABINS    PHOTOS
BROCHURE   HUNT BOOKLET

Enter your email address to subscribe to this blog and receive notifications of new posts by email.


Tags: , , , , , , ,

Tips On How to Shoot Fast

by David E. Petzal

How_to_Shoot_Fast

The sign of a first-rate intelligence, said F. Scott Fitzgerald, is the ability to hold two conflicting ideas in the mind and still function. So it is with fast rifle work. Riflery is a sport of deliberation and precision, but the demands of the real world very often make deliberation and precision impossible. Gunsite Academy sums it up to a T: “A good fast shot is better than a slow perfect shot because you won’t get time for the perfect shot.”

What follows is about shooting quickly after you have positively identified your target. It’s not about blazing away at sounds or snap-shooting at what you think is an animal.

Develop Your Mental Clock
The first step in shooting fast has nothing to do with shooting. It involves learning how much time you have to shoot, and whether you have to shoot fast at all. Much of this can be acquired by watching critters and reading their body language. A whitetail aware of evil nearby does not act like a whitetail whose greatest worry is where he’ll find a date that evening. An animal that’s 400 yards away does not act at all like the animal right under your tree stand.

On occasion, I’ve given the hunters with me heart failure because I waited and waited for a critter to move just a little bit to give me the exact shot I wanted. And I always got it because I knew that animals never stand still, and I knew that whatever I was about to drop the hammer on had no idea anything was amiss.

Eschew Perfection
Unlike shot gunners, who send out hundreds of pellets with every pull of the trigger and are happy if one or two of them get the job done, riflemen have it dinned into them that they have to be precise. It’s not enough to get a bullet in the 10-ring; you want to get it in the X-ring. If you’re shooting groups, you want to shave off every tenth of an inch you possibly can. And the way you do this is by being deliberate and getting everything perfect before you pop a cap.

547e9416-31d5-4b8e-9e13-35f18ec88b17

This is exactly the opposite of how a good game shot operates. Animals have not evolved with 10-rings or X-rings. What they have are hearts and lungs, and a hit anywhere in either counts. Modern hunting bullets are so destructive that catching a distant corner of a lung will result in as certain a kill as a shot right through the middle of said organ.

Don’t Forget to Aim

On the other hand, you still have to aim. Many misses occur because hunters panic, get the crosshairs somewhere in what they think is the general vicinity of the beast, and yank the trigger. (The closer the critter, the more this seems to happen.) A little while back I listened to a Wyoming outfitter recounting in disbelief how a client, resting his rifle on shooting sticks, had managed to shoot an elk in the buttocks at 60 yards. “How do you hit an 800-pound animal in the ass at 60 yards?” he asked me, still indignant. (He tracked the poor creature for two days and eventually lost it.)

is
The answer is simple. When the moment comes, most hunters can only think: “OMG, this is the only chance I’m going to get!” Everything else, such as the fundamentals of riflery, goes right out of their heads.

Furthermore, too many hunters don’t practice. For them, the mechanics of mounting the gun, acquiring the sight picture, and pulling the trigger are about as familiar as those of piloting a space capsule.

What to Do?

I can’t tell you how to acquire cold blood. Jerry Fisher, the great custom gun maker, once told me that after you take about 300 head of big game you calm down. That sounds about right.

Short of that, the way to learn to shoot fast is roughly this: First, know your animal. There is no shortage of game-critter anatomical charts that you can study. Know where the lungs are. That’s always the percentage shot.

Second, when it comes time to shoot for real, envision an aiming point on the beast and hold for that. And the nanosecond the cross hairs are even close to it—not precisely on it—shoot. Fast, good shots, remember?

To practice shooting fast, you need a .22 rifle and a whole bunch of NRA 50-Yard Slow Fire Pistol targets. These have an 8-inch bull that’s just about the size of an animal’s boiler room. Set your scope at its lowest power and, at 20 yards, fire a five-shot string, lowering the gun from your shoulder between shots. What you’re trying to do is get that round off the instant the cross hairs are anywhere in the bull’s-eye. If the bullet hits in the bull, it counts. If it doesn’t, you missed.

sighting-rifle-deer-hunting

It takes me about 1.7 seconds to mount the rifle, aim, and get the shot off. Since my skill with a gun is legendary, bordering on mythical, this is a good time for you to try to match. When you can get all five rounds in the black, every time, back up 5 yards. Eventually you will be shooting from 100 yards, and if you can put 20 out of 20 shots into the bull at that distance, shooting fast, I will buy you a cigar. Or you can buy me one for telling you this stuff.

Follow our HUNTING BLOG

WEB   RATES     FISH    HUNT    CABINS    PHOTOS
BROCHURE    HUNT BOOKLET

Enter your email address to subscribe to this blog and receive notifications of new posts by email.


Tags: , , , , , , , ,

Sighting in Your Rifle

So you’ve acquired a new hunting rifle. After saving your hard-earned cash and landing permission from your other half, the gun rests in your hot little hands. It looks great, feels great… it probably smells great… but more importantly does it shoot great? Now its time to hit the range and get this baby sighted in.

Truth is the same holds true for rifles we’ve had for many years. Chances are they don’t require the full-meal-deal, but sighting in, confirming that our equipment is in good working order, or realigning sights is something we should do on a regular basis.

Unfortunately many of us try to kill two birds with one stone. We visit the range infrequently and attempt to sight in and practice shooting all at the same time. It’s important to remember, sighting is very different from regular shooting practice. The process of sighting in involves aligning the scope (or other sights) with the firearm when using a specific bullet and load. Shooting practice involves discharging and often experimenting with different positions to allow our bodies to grow accustomed to the form and function of shooting.

k_wilson_sighting_in2Believe it or not, many of us don’t sight in properly. It never ceases to amaze me how many hunters pick up their guns once or twice a year, assume it’s shooting straight and hit the woods without a second thought. As a professional outfitter I see it all the time. In fact, I’ve seen guests take it personally when, after arrival in camp, I ask them to take a few practice shots – just to make sure their gun is properly sighted in. As though I’m insinuating that they haven’t prepared for their hunt, once in a while I get a hunter who thinks I’m a control freak. Then the truth comes out. After a few shots it becomes obvious; better than half are inevitably in need of scope adjustments. Every one swears that they were shooting one-inch groups at home, but now their rifle requires major scope adjustments. In their defense, a multitude of things can happen to guns in transit. Blunt trauma to cases or directly to the scope itself can throw it way out of whack; hence the need to sight it.

To be honest many of us are guilty of not maintaining our rifle and scope. If you shoot regularly that’s one thing; you’re constantly checking it and tweaking the scope when necessary. In reality, most of us don’t. By in large, recreational hunters pick up their guns a few times each year. Whether you’re tuning a brand new rifle or confirming the accuracy of an old one, here are a few tips for sighting in:

1) Bore sight your rifle before shooting
k_wilson_sighting_in3This first step applies mostly to rifles and scopes that have a new marriage. The first time a scope is mounted to a rifle the gunsmith will usually use a bore sighting tool. This tool is used to approximately align the crosshairs of the scope with the rifle barrel. Unfortunately some folks erroneously rely on bore sighting alone to zero their gun. Remember bore sighting can be precise but most often it only approximates accuracy. If, when you visit the range, you discover that you’re not even hitting the paper at all, consider rough bore sighting your gun. Practical with bolt-action rifles, by removing the bolt, you can stand behind the gun, look through the barrel and center the target. Then without adjusting the gun, look through the scope and make the necessary adjustments to bring the crosshairs in alignment with the target. This should get you hitting the paper in no time, then you can move on to shooting.

2) Shoot from a stable platform and rest
To reliably confirm the accuracy of your rifle and scope, you must shoot from a rest. I’m not sure I should say this or not, but I will. To illustrate the naivety of some, I’ve actually witnessed guys trying to sight in their rifles at the range by shooting freehand from a standing position. Needless to say these are the guys that get frustrated because they’re not hitting anything.

Remember, when we’re sighting in our rifles we’re not testing our shooting skill, but rather the accuracy of the gun, scope and bullet being used. Our goal should be to eliminate or at least minimize human error and allow the equipment to do its thing. With this in mind, a stable shooting bench or table is always recommended. Most shooting ranges are furnished with suitable tables or benches and adjustable stools. If you’re using a portable bench, make sure it is resting level on solid ground. Likewise, it’s imperative to use a shooting rest. In my opinion a vice can be that much better. I really like MTM Case-Gard products (www.mtmcase-gard.com). They make a variety of shooting supplies that are both affordable and practical. Few of us exhibit perfect shooting form. By understanding the biomechanics involved with aiming, breathing, squeezing the trigger and following through we can better acknowledge how to eliminate torsion while shooting from a rest. By cradling the rifle fore-end on a rest or in a vice, we can align our sights with the downrange target and maintain that alignment for a long period of time. Then, by gently squeezing the trigger to discharge, we minimize our human influence thereby allowing the firearm to perform more or less on its own.

3) Begin at close range, then move out to 100 yards and further
I’ve heard much discussion about the standard 100 yard shot and arguably for most bore-sighted rifles, sighting in at that distance is fine. But talk to the pros and most will agree that you should begin at 25 yards if you want to do it right. Making adjustments at close range is easier than at longer distances. At 25 yards you’ll find it easier to acquire your target; it simply appears larger and is easier to center the crosshairs at this short distance. Inaccuracies are simpler to rectify and adjustments can be made quickly at that distance. Remember, inaccuracies are exaggerated that much more at greater downrange distances.

k_wilson_sighting_in1
As you make your fine adjustments to your scope, be aware of the increments and don’t overdo it. For example, with my Leupold VXIII, one click = 1/4 inch adjustment. So, if my shots were hitting consistently two inches to the left of center, I would likely need to dial the adjustment eight clicks in that direction, then shoot another round of bullets. Some folks disagree, but in my opinion it is better to make subtle adjustments, then shoot to confirm that you are working toward the zero mark. As long as there are no fliers, a series of three shots is typically representative of where the gun is shooting. Although with today’s scopes I don’t believe it is as crucial, I still like to give it a firm tap to seat the crosshairs after each adjustment.

When your rifle and scope are in sync at 25 yards, move to 100 yards. Most big game rifle and bullet combinations that are sighted in a couple inches high at 100 yards will shoot a hair low at 25 yards – with most deer hunters this is considered ideal (e.g., I like my 300 Win Mag to be 2″ high at 100 yards). Once your rifle is sighted in, try shooting at 200, 300 and 400 yards to better learn how your rifle, scope and ammunition perform at greater distances.

4) Use the same ammunition that you plan to hunt with
Not all ammunition performs the same. Be sure to sight in your rifle with the load that you plan to hunt with. Ballistics of variable bullet weights and designs (not to mention manufacturers) will perform differently. For instance, Winchester Ammunition’s 150 grain Supreme Elite XP3 (www.winchester.com) will inevitably perform differently than Remington’s 180 grain Core-Lokt, PSP (www.remington.com) shot out of my 300 Winchester Magnum.

If you reload your own ammunition, then you’re likely acquainted with factors affecting bullet performance. Working the right load may take some trial and error, but the same applies – always sight in with the bullet and load you intend to hunt with.

5) Record and reference each shot
Sighting in can be as labor-intensive as you make it. As a rule, several items are required and several more make the job that much easier. As an absolute necessity, we require a table or bench, a shooting rest, our rifle, ammunition and a target. Beyond these basics, the job is much easier with a spotting scope, tripod, and additional targets along with a marker.

As you begin shooting, be sure to analyze and record each shot. I like to use a Bushnell Elite 15-45x 60 mm spotting scope (www.bushnell.com) mounted on a solid tripod. At 45 power magnification, I can see every detail on the downrange target. My scope allows me to closely assess where I hit in relation to where I aimed. Further, many shooters like to keep a matching target on the bench while they are shooting. By checking their shot, then marking it on the target beside them, they can better track their progressions to confirm any scope adjustments and accuracy. This eliminates much of the guessing about which shot was which.

Follow our FISHING BLOG

WEB   RATES     FISH    HUNT    CABINS    PHOTOS
TESTIMONIALS    BROCHURE    HUNT BOOKLET

Enter your email address to subscribe to this blog and receive notifications of new posts by email.


Tags: , , , , , , ,

SAFETY Gun Storage

Modern firearms are powerful tools that experienced shooters understand need to be treated with respect. While a gun is in use, we carefully follow a set of common sense rules to keep everyone safe. But how do we practice firearms safety when the shooting or hunting sessions are over? Most of the guns folks own will spend the majority of their working life at rest, placed in one state of storage or another, until the next shooting event. Since they remain powerful tools between trips to the range, it’s very important to store them properly.

cannon-safe

A wide variety of safe gun storage accessories and containers are currently available. However, there is no universal solution to fill every role, or to fit every budget. Safe storage options are intended to perform one or more of the following tasks, which they do with varying degrees of effectiveness depending on how much money you’re willing to spend:

1. Prevent a gun from firing
2. Protect a gun from physical damage
3. Act as a theft deterrent

It’s much easier to consider the pros and cons of each storage system when they can be compared side by side. The following discussion is a walkthrough of the most common safe gun storage options, starting with the least expensive:

Trigger Locks
Trigger locks fulfill a single safe gun storage objective: Prevent the gun from firing. Most new guns now arrive from the manufacturer with a trigger lock of some kind or other in the box. Trigger shoes clamp and lock around the trigger housing to prevent the trigger from being pressed. They should not be engaged on a loaded gun because they come in contact with the trigger as they are installed and removed. Cable locks allow the shooter to run cable through the barrel or action of a firearm. Since the cable blocks the action from being closed, the gun cannot be loaded or fired with the cable lock in place.

lever2

If these two lock options are not available, a simple household padlock can be looped over the trigger guard with the hasp set behind the trigger. This will prevent the trigger from completing a firing cycle. Although trigger locks are inexpensive (or even free), and can successfully prevent a gun from firing, they do nothing to protect the gun’s finish or to deter theft.gunvault-breechvault

Soft-Side and Hard-Side Gun Cases 
Most sporting goods stores have entire aisles dedicated to affordable handgun, rifle, and shotgun cases. The options available range from padded fabric sleeves to rugged foam-lined plastic cases. The primary role of this kind of affordable carry case is to protect guns from physical damage. While they do a good job of preventing dings and scratches, their role as a security device is relatively limited.

s-l1000Most soft and hard side cases can be “legally” locked for transport to and from the shooting range (check your local regulations). This could be a luggage lock through a soft case’s zipper pull, or a padlock through the handles of a hard case. This security system may be enough to keep small children out as well. However, the materials these cases are made of are easily defeated by ordinary edged implements. These low-cost cases also have a low theft deterrence value since they are light and easy to move. They have to be hidden or locked inside of another container to protect them from theft.

Strong Boxes and Metallic Gun Cases 
In an effort to strike a balance between the security offered by a locking gun cabinet and the portability of a gun case, several companies offer portable strong boxes and metallic gun cases. Metal gun cases usually incorporate a reliable locking system or the means to attach heavy padlocks. Strong boxes, usually intended for handguns, offer mounting systems for permanent attachment to a fixed surface. Some boxes are fitted with quick-opening locking mechanisms, including electronic push-button access and fingerprint scanners.

gunvault-microvault

Strong boxes and metallic gun cases are the first products discussed so far that start to fill all three mandates of a safe gun storage device. They can effectively protect against unauthorized access because of the difficulty in opening these units without a key or lock combination. These containers will effectively protect a gun’s finish from damage. And, if they can be attached or locked to a fixed object or surface, they offer some level of theft deterrence. But with features to fill all three mandates, the price starts to go up. It may be necessary to purchase batteries or extra mounting hardware to take advantage of all the storage device’s available features.

Locking Steel Gun Cabinets
Remember that grand wooden gun display case that your great-uncle had in his den? Looking through the engraved glass panes of the double doors, you could see his beautiful vintage shotgun collection. Sometimes he would retrieve that little brass key to open the doors so you could get a better look. While this kind of locking gun cabinet looks wonderful, it does not offer any truly viable level of safe gun storage, accept against small children. To secure firearms, a locking steel gun cabinet is a more secure choice.

86034

Cabinets differ from gun safes in several respects. They follow a less-is-more design. The thinner gauge of steel, a simple locking mechanism, and the lack of fire-proofing insulation greatly reduces the cost. Because they are light enough to be safely carried by one or two people, they can be set up in apartment buildings or second-floor rooms where a gun safe would simply be too heavy or difficult to install.

Cabinets are a big step up from metallic gun cases or strong boxes when it comes to storing multiple firearms. They offer a much larger storage capacity and more configuration options. Cabinets can be securely bolted to a wall or to the floor. However, they do not offer the same level of theft deterrence as a gun safe. If you have the cash for a high-end cabinet, and the room to store it, you may want to spend a little more and purchase an economy-line gun safe.

Gun Safes
Simply stated, gun safes are the most secure gun storage option available to the average gun owner. Even the basic units have terrific advantages over any of the other gun storage units described so far. A locked safe will definitely prevent a gun from being handled or loaded. The upholstered interior and built-in gun racks will help to protect the finish of the firearms while allowing air to circulate. And, best of all, they are an effective theft deterrent.

browning-pro-series

Much like automobiles or personal computers, gun safes are available with a wide variety of features, locking systems, and finishes, all of which affect the bottom line cost of the unit. These cost-changing features include the gauge (or thickness) of the steel used to construct the safe, the strength and reliability of the locking mechanism, the level of fire resistance (if any), the extent of the warranty, shelf and rack configuration options, as well as the color and quality options for the exterior finish.

ID54-interior

Because all gun safes are relatively expensive (compared to other gun storage options) it makes sense to consider what you want very carefully before you buy. First-time safe buyers should be careful to avoid two common, but serious, mistakes. The first thing to avoid is buying a safe that’s too small. A unit that’s a perfect fit for your collection today may not serve your needs in ten years. A bit more expense up front may save you the trouble of changing out or adding a second safe down the road.

The second mistake is waiting too long to buy one. Yes, gun safes are big, heavy, difficult to install, and expensive to pay for. But they are well worth the trouble if you have a gun collection you care about. How do you know it’s time to invest in a gun safe? If the guns you have are worth more (sentimentally as well as financially) than the cost of the least expensive safe you would be willing to purchase, then it’s time to start shopping for one.

Follow our FISHING BLOG

WEB   RATES     FISH    HUNT    CABINS    PHOTOS
TESTIMONIALS    BROCHURE    HUNT BOOKLET

Enter your email address to subscribe to this blog and receive notifications of new posts by email.


Tags: , , , , , ,

Tips On How to Shoot Fast

by David E. Petzal

How_to_Shoot_Fast

The sign of a first-rate intelligence, said F. Scott Fitzgerald, is the ability to hold two conflicting ideas in the mind and still function. So it is with fast rifle work. Riflery is a sport of deliberation and precision, but the demands of the real world very often make deliberation and precision impossible. Gunsite Academy sums it up to a T: “A good fast shot is better than a slow perfect shot because you won’t get time for the perfect shot.”

What follows is about shooting quickly after you have positively identified your target. It’s not about blazing away at sounds or snap-shooting at what you think is an animal.

Develop Your Mental Clock
The first step in shooting fast has nothing to do with shooting. It involves learning how much time you have to shoot, and whether you have to shoot fast at all. Much of this can be acquired by watching critters and reading their body language. A whitetail aware of evil nearby does not act like a whitetail whose greatest worry is where he’ll find a date that evening. An animal that’s 400 yards away does not act at all like the animal right under your tree stand.

On occasion, I’ve given the hunters with me heart failure because I waited and waited for a critter to move just a little bit to give me the exact shot I wanted. And I always got it because I knew that animals never stand still, and I knew that whatever I was about to drop the hammer on had no idea anything was amiss.

Eschew Perfection
Unlike shot gunners, who send out hundreds of pellets with every pull of the trigger and are happy if one or two of them get the job done, riflemen have it dinned into them that they have to be precise. It’s not enough to get a bullet in the 10-ring; you want to get it in the X-ring. If you’re shooting groups, you want to shave off every tenth of an inch you possibly can. And the way you do this is by being deliberate and getting everything perfect before you pop a cap.

547e9416-31d5-4b8e-9e13-35f18ec88b17

This is exactly the opposite of how a good game shot operates. Animals have not evolved with 10-rings or X-rings. What they have are hearts and lungs, and a hit anywhere in either counts. Modern hunting bullets are so destructive that catching a distant corner of a lung will result in as certain a kill as a shot right through the middle of said organ.

Don’t Forget to Aim

On the other hand, you still have to aim. Many misses occur because hunters panic, get the crosshairs somewhere in what they think is the general vicinity of the beast, and yank the trigger. (The closer the critter, the more this seems to happen.) A little while back I listened to a Wyoming outfitter recounting in disbelief how a client, resting his rifle on shooting sticks, had managed to shoot an elk in the buttocks at 60 yards. “How do you hit an 800-pound animal in the ass at 60 yards?” he asked me, still indignant. (He tracked the poor creature for two days and eventually lost it.)

is
The answer is simple. When the moment comes, most hunters can only think: “OMG, this is the only chance I’m going to get!” Everything else, such as the fundamentals of riflery, goes right out of their heads.

Furthermore, too many hunters don’t practice. For them, the mechanics of mounting the gun, acquiring the sight picture, and pulling the trigger are about as familiar as those of piloting a space capsule.

What to Do?

I can’t tell you how to acquire cold blood. Jerry Fisher, the great custom gun maker, once told me that after you take about 300 head of big game you calm down. That sounds about right.

Short of that, the way to learn to shoot fast is roughly this: First, know your animal. There is no shortage of game-critter anatomical charts that you can study. Know where the lungs are. That’s always the percentage shot.

Second, when it comes time to shoot for real, envision an aiming point on the beast and hold for that. And the nanosecond the cross hairs are even close to it—not precisely on it—shoot. Fast, good shots, remember?

To practice shooting fast, you need a .22 rifle and a whole bunch of NRA 50-Yard Slow Fire Pistol targets. These have an 8-inch bull that’s just about the size of an animal’s boiler room. Set your scope at its lowest power and, at 20 yards, fire a five-shot string, lowering the gun from your shoulder between shots. What you’re trying to do is get that round off the instant the cross hairs are anywhere in the bull’s-eye. If the bullet hits in the bull, it counts. If it doesn’t, you missed.

sighting-rifle-deer-hunting

It takes me about 1.7 seconds to mount the rifle, aim, and get the shot off. Since my skill with a gun is legendary, bordering on mythical, this is a good time for you to try to match. When you can get all five rounds in the black, every time, back up 5 yards. Eventually you will be shooting from 100 yards, and if you can put 20 out of 20 shots into the bull at that distance, shooting fast, I will buy you a cigar. Or you can buy me one for telling you this stuff.

Follow our HUNTING BLOG

WEB   RATES     FISH    HUNT    CABINS    PHOTOS
TESTIMONIALS    BROCHURE    HUNT BOOKLET

Enter your email address to subscribe to this blog and receive notifications of new posts by email.


Tags: , , , , , , , ,

Sighting in Your Rifle

So you’ve acquired a new hunting rifle. After saving your hard-earned cash and landing permission from your other half, the gun rests in your hot little hands. It looks great, feels great… it probably smells great… but more importantly does it shoot great? Now its time to hit the range and get this baby sighted in.

Truth is the same holds true for rifles we’ve had for many years. Chances are they don’t require the full-meal-deal, but sighting in, confirming that our equipment is in good working order, or realigning sights is something we should do on a regular basis.

Unfortunately many of us try to kill two birds with one stone. We visit the range infrequently and attempt to sight in and practice shooting all at the same time. It’s important to remember, sighting is very different from regular shooting practice. The process of sighting in involves aligning the scope (or other sights) with the firearm when using a specific bullet and load. Shooting practice involves discharging and often experimenting with different positions to allow our bodies to grow accustomed to the form and function of shooting.

k_wilson_sighting_in2Believe it or not, many of us don’t sight in properly. It never ceases to amaze me how many hunters pick up their guns once or twice a year, assume it’s shooting straight and hit the woods without a second thought. As a professional outfitter I see it all the time. In fact, I’ve seen guests take it personally when, after arrival in camp, I ask them to take a few practice shots – just to make sure their gun is properly sighted in. As though I’m insinuating that they haven’t prepared for their hunt, once in a while I get a hunter who thinks I’m a control freak. Then the truth comes out. After a few shots it becomes obvious; better than half are inevitably in need of scope adjustments. Every one swears that they were shooting one-inch groups at home, but now their rifle requires major scope adjustments. In their defense, a multitude of things can happen to guns in transit. Blunt trauma to cases or directly to the scope itself can throw it way out of whack; hence the need to sight it.

To be honest many of us are guilty of not maintaining our rifle and scope. If you shoot regularly that’s one thing; you’re constantly checking it and tweaking the scope when necessary. In reality, most of us don’t. By in large, recreational hunters pick up their guns a few times each year. Whether you’re tuning a brand new rifle or confirming the accuracy of an old one, here are a few tips for sighting in:

1) Bore sight your rifle before shooting
k_wilson_sighting_in3This first step applies mostly to rifles and scopes that have a new marriage. The first time a scope is mounted to a rifle the gunsmith will usually use a bore sighting tool. This tool is used to approximately align the crosshairs of the scope with the rifle barrel. Unfortunately some folks erroneously rely on bore sighting alone to zero their gun. Remember bore sighting can be precise but most often it only approximates accuracy. If, when you visit the range, you discover that you’re not even hitting the paper at all, consider rough bore sighting your gun. Practical with bolt-action rifles, by removing the bolt, you can stand behind the gun, look through the barrel and center the target. Then without adjusting the gun, look through the scope and make the necessary adjustments to bring the crosshairs in alignment with the target. This should get you hitting the paper in no time, then you can move on to shooting.

2) Shoot from a stable platform and rest
To reliably confirm the accuracy of your rifle and scope, you must shoot from a rest. I’m not sure I should say this or not, but I will. To illustrate the naivety of some, I’ve actually witnessed guys trying to sight in their rifles at the range by shooting freehand from a standing position. Needless to say these are the guys that get frustrated because they’re not hitting anything.

Remember, when we’re sighting in our rifles we’re not testing our shooting skill, but rather the accuracy of the gun, scope and bullet being used. Our goal should be to eliminate or at least minimize human error and allow the equipment to do its thing. With this in mind, a stable shooting bench or table is always recommended. Most shooting ranges are furnished with suitable tables or benches and adjustable stools. If you’re using a portable bench, make sure it is resting level on solid ground. Likewise, it’s imperative to use a shooting rest. In my opinion a vice can be that much better. I really like MTM Case-Gard products (www.mtmcase-gard.com). They make a variety of shooting supplies that are both affordable and practical. Few of us exhibit perfect shooting form. By understanding the biomechanics involved with aiming, breathing, squeezing the trigger and following through we can better acknowledge how to eliminate torsion while shooting from a rest. By cradling the rifle fore-end on a rest or in a vice, we can align our sights with the downrange target and maintain that alignment for a long period of time. Then, by gently squeezing the trigger to discharge, we minimize our human influence thereby allowing the firearm to perform more or less on its own.

3) Begin at close range, then move out to 100 yards and further
I’ve heard much discussion about the standard 100 yard shot and arguably for most bore-sighted rifles, sighting in at that distance is fine. But talk to the pros and most will agree that you should begin at 25 yards if you want to do it right. Making adjustments at close range is easier than at longer distances. At 25 yards you’ll find it easier to acquire your target; it simply appears larger and is easier to center the crosshairs at this short distance. Inaccuracies are simpler to rectify and adjustments can be made quickly at that distance. Remember, inaccuracies are exaggerated that much more at greater downrange distances.

k_wilson_sighting_in1
As you make your fine adjustments to your scope, be aware of the increments and don’t overdo it. For example, with my Leupold VXIII, one click = 1/4 inch adjustment. So, if my shots were hitting consistently two inches to the left of center, I would likely need to dial the adjustment eight clicks in that direction, then shoot another round of bullets. Some folks disagree, but in my opinion it is better to make subtle adjustments, then shoot to confirm that you are working toward the zero mark. As long as there are no fliers, a series of three shots is typically representative of where the gun is shooting. Although with today’s scopes I don’t believe it is as crucial, I still like to give it a firm tap to seat the crosshairs after each adjustment.

When your rifle and scope are in sync at 25 yards, move to 100 yards. Most big game rifle and bullet combinations that are sighted in a couple inches high at 100 yards will shoot a hair low at 25 yards – with most deer hunters this is considered ideal (e.g., I like my 300 Win Mag to be 2″ high at 100 yards). Once your rifle is sighted in, try shooting at 200, 300 and 400 yards to better learn how your rifle, scope and ammunition perform at greater distances.

4) Use the same ammunition that you plan to hunt with
Not all ammunition performs the same. Be sure to sight in your rifle with the load that you plan to hunt with. Ballistics of variable bullet weights and designs (not to mention manufacturers) will perform differently. For instance, Winchester Ammunition’s 150 grain Supreme Elite XP3 (www.winchester.com) will inevitably perform differently than Remington’s 180 grain Core-Lokt, PSP (www.remington.com) shot out of my 300 Winchester Magnum.

If you reload your own ammunition, then you’re likely acquainted with factors affecting bullet performance. Working the right load may take some trial and error, but the same applies – always sight in with the bullet and load you intend to hunt with.

5) Record and reference each shot
Sighting in can be as labor-intensive as you make it. As a rule, several items are required and several more make the job that much easier. As an absolute necessity, we require a table or bench, a shooting rest, our rifle, ammunition and a target. Beyond these basics, the job is much easier with a spotting scope, tripod, and additional targets along with a marker.

As you begin shooting, be sure to analyze and record each shot. I like to use a Bushnell Elite 15-45x 60 mm spotting scope (www.bushnell.com) mounted on a solid tripod. At 45 power magnification, I can see every detail on the downrange target. My scope allows me to closely assess where I hit in relation to where I aimed. Further, many shooters like to keep a matching target on the bench while they are shooting. By checking their shot, then marking it on the target beside them, they can better track their progressions to confirm any scope adjustments and accuracy. This eliminates much of the guessing about which shot was which.

Follow our FISHING BLOG

WEB   RATES     FISH    HUNT    CABINS    PHOTOS
TESTIMONIALS    BROCHURE    HUNT BOOKLET

Enter your email address to subscribe to this blog and receive notifications of new posts by email.


Tags: , , , , , , ,

 
%d bloggers like this: