RSS

Category Archives: tree stand

YES, I’M STUPID!

by M.R. James

I’VE SAID IT BEFORE and I’ll say it again. If you hunt from a treestand without wearing a safety harness, you might as well wear a great big sign that reads “Yes, I’m stupid!” Stupid! Stupid! Stupid!

Only this morning I read another news account of a bowhunter found dead at the base of his tree stand. And while he reportedly had a safety harness with him, it was in his pocket. So what happened? No one will ever know the details of why and how he died. But he’s dead and that’s a damn shame.

Somehow I can’t help but believe that like some folks now reading these words, the guy believed it could never ever happen to him.  But it could and did.

He was wrong. Dead wrong! And so are you if you think you’re bulletproof.

Treestands can be a deer hunters best friend and worst enemy. Hunting from trees is the most consistently successful method to tag game, but each year falls injure and kill hunters.

STATISTICS SAY ODDS ARE one-third of bow hunters are destined to take a tumble while climbing into, out of, or while in elevated stands. Think about that. Can you name anyone who’s fallen? I sure can and so can most of the veteran bow hunters I know. It can happen to anyone. Anytime. Anywhere.

Believe it!

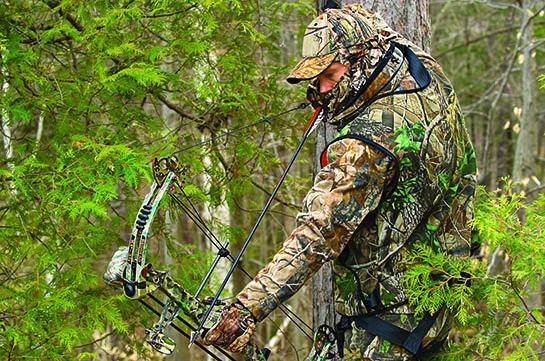
Wearing a safety harness is mandatory when hunting from elevated stands. It’s also smart to wear a climber’s strap or safety line when climbing into and out of stands.

A friend of mine, who was with me when I arrowed my first Montana bull elk, died of a broken neck years later while hunting bears from a tree stand. No one knows why and how he fell, but somehow he did and he’s dead.

Another friend fell while hanging a stand. He survived but suffered severe injuries – and still walks with a bad limp. Another guy I know is paralyzed and “lives” in a wheelchair because he’ll never walk again. And even though I wasn’t hunting at the time, I once lost my balance and jumped backwards from an eight-foot stepladder while trimming tree limbs, cold cocking myself when I banged my head on the ground. This list of accidental falls could go on and on. Sadly, it does.

SO HOW DO WE STAY SAFE? We begin by recognizing the fact each and every one of us is vulnerable and we must never climb without wearing a fall restraint safety harness. Ever! If we won’t do it for ourselves, we should do it for family and friends who would have to attend our funeral, visit us in the hospital, or feed, dress, and to tend us because we’re paralyzed and we can’t do it for ourselves.

When hunting alone, we also make sure a hunting buddy or family member knows exactly where we’ll be and when we expect to be home. We slip a cell phone and a whistle into our pocket or pack in case we fall and can’t walk to get help. And we take pains to be safe each and every time we climb a tree, especially in cold, wet, or icy weather. We not only wear a safety harness but add a lineman’s climbing strap or treestand lifeline for use when climbing up and down to and from a stand. We never climb while holding our bow or other hunting gear, raising and lowering hunting tackle with a haul line. We always keep three of four contact points (hands and feet) with the ladder or steps when climbing into or out of stands. And once in the tree stand, we immediately buckle ourselves in and do not unbuckle until just before climbing down. This is the most dangerous time frame we face while hunting from elevated stands.

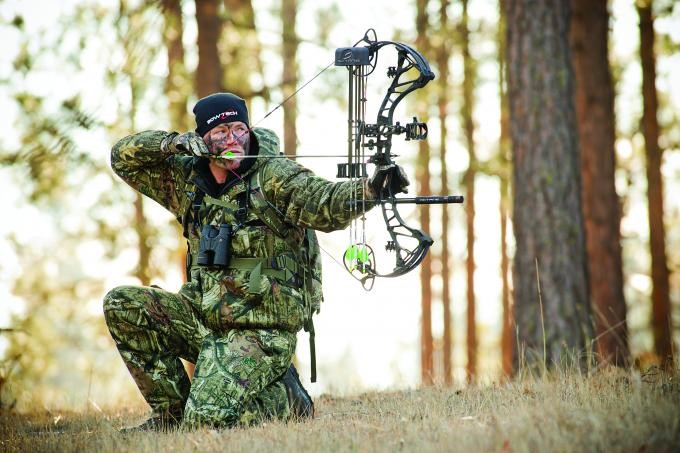
Here’s a hunter’s-eye view of a couple of feeding does. Knowing you’re securely buckled in allows you to focus on making the shot, not fretting about falling.

Finally, prior to using our hang-on or climbing stands, steps, and ladders, we inspect them for any sign or wear or damage. We check support cables and tighten bolts and screws, if necessary, and double check all straps.

BACK WHEN I RAN BOW HUNTER MAGAZINE, I repeatedly included little reminders designed to make readers think of safety. One of my favorites was, “Bow hunting Safety Is No Accident!”

It was true then and it’s true today.

But the bottom line is we are the ones responsible for keeping ourselves safe. We are the ones who must recognize the need to be proactive in doing whatever is necessary to avoid injury or death. We are the only ones who must admit that a life-changing or life-ending accident could happen to us.

Because doing anything less is downright stupid!

Follow our FISHING BLOG

WEB   RATES     FISH    HUNT    CABINS    PHOTOS
TESTIMONIALS    BROCHURE    HUNT BOOKLET

Enter your email address to subscribe to this blog and receive notifications of new posts by email.

Go back

Your message has been sent

Warning
Warning
Warning
Email Me....

Warning

Warning.


Tags: , , , , , , , , ,

A Better Bow Hunter: Aim to Hit

The traits that separate elite bow hunters from the masses are attention to detail and rigorous training. These are year-round archers, and here’s how they push themselves to become deadly hunters.

ODL0814_HUN02

1. Be Challenged
As creatures of habit, we’re guilty of practicing at distances at which we can comfortably stack arrows in an impressive -fashion—typically 20 yards. However, extending your practice distance well beyond your comfort zone accomplishes several things. First, it forces you to tighten your form, since miscues are multiplied as distance increases.

Greater practice distances also force you to identify and correct imperfections lest you continue to splash arrows about the range. This year, if space allows, double your practice comfort zone. You’ll find that when “short” shot opportunities present themselves, they’ll be chip shots.

2. Be Strong
Drawing a bow requires a certain degree of physical strength. Leveling a fiber-optic pin confidently on an animal is difficult, if not impossible, when your arms are trembling uncontrollably.

Sadly, archers who pull out their bow a week prior to the season aren’t physically prepared to attempt an ethical bow hunting shot. The right repetition makes you both strong and accurate.

3. Be Angular
Animals rarely present the perfect broadside shot. But how many of us practice any other angle? Whether you shoot a block or a 3D target, practice a variety of shot angles.

Shooting non-perpendicular angles adds another physical and mental dimension to the shot execution, because the bull’s-eye changes geometrically. When practicing, move about the range, varying your relationship to the target face until you’re proficient in every possible angle.

4. Be Accurate
Many archers think the only way to practice judging distance is with a bow in hand, but the opportunities are everywhere, including grocery stores and parking lots. Mentally measure an object in the distance and pace it off to check your guesstimate. Or stroll through the woods with a rangefinder. Stop occasionally and put an eye on a bush, branch, or rock. Give yourself a few seconds to estimate the real estate, and then check it against the laser. After a few trips, you’ll become amazingly accurate at taping distances with little more than a keen eye.

5. Be Crepuscular
Shot opportunities often present themselves in low light, whether the first or last of the day. Try shooting three or four arrows in this tough light. By doing so, you’ll have a real appreciation for what to expect when visibility is less than ideal in the field.

6. Be Blind-Ready
Ground blinds now outsell tree stands, as they offer a portability and versatility that tree stands simply cannot. However, if you’ve never practiced from one, you’ll be unpleasantly surprised when you try to lob a shot from inside its tight confines. Limited drawing distance, extremely small windows (which narrow the shot field), and dark interiors challenge even the best bow hunters. A word to the wise: Pop your ground blind up and practice shooting from it prior to toting it into the field.

Follow our FISHING BLOG

WEB   RATES     FISH    HUNT    CABINS    PHOTOS
TESTIMONIALS    BROCHURE    HUNT BOOKLET

Enter your email address to subscribe to this blog and receive notifications of new posts by email.

Go back

Your message has been sent

Warning
Warning
Warning
Email Me....

Warning

Warning.


Tags: , , , , , , , , ,

Where to Place Your Trail Cams

A trail camera won’t stumble through a bedding area, leave scent all over a trail, or exaggerate the size of a rack. And it’ll never oversleep. But your perfect little scouting buddy must be chosen wisely and placed carefully if you want to pattern that old, crafty animal you know is around. Here’s how…

CameraNO_MosaicYELLOW

The earlier version trail cameras were just a 35mm film point-and-shoot tucked in a weatherproof housing. It snapped a single picture when something triggered the sensor. After retrieving the camera, you ran to the one-hour shop to get the film developed, then thumbed through a week’s worth of pictures. More than once a stack of 36 prints revealed a handful of out-of-focus animals and a couple dozen shots of a wind-whipped brush or a drooping tree branch. That was only a few years ago.

Today, many website boasts several pages of trail cams, and even the cheapest one outperforms the original older ones. They have lenses sharp enough to count the ticks on a deer’s neck, electronic circuit boards so efficient that four AA batteries will run a unit for months, and memory cards that hold thousands of pictures you can download to your computer or delete at the touch of a button. And those are standard features on mid-priced cameras. The high-end ones will send a photo to your cellphone or laptop.

Like everything in the digital age, trail-cam technology has improved, competition has become fierce, and prices have plunged. Still, $200 is plenty of money, and matching a camera with the right features to meet your needs is critical. And even the best camera can’t take spectacular photos of a trophy buck if you don’t set it properly. But it’s not difficult to get started. These are the basics.

TrailCameras3
Wildlife biologists use trail cams to measure herd densities, buck-to-doe ratios, and the like. Your goals should be simpler: learning about the deer on your property, figuring out where to hunt them, and having fun in the process. You can pinpoint ideal spots before you buy a camera, and the locations you choose can determine what model is best for you. Here are four sites for four different periods.

Time: Late Summer
Site: Mineral lick
Goal: To start an inventory of buck numbers and quality on your property.
Setup: Find a spot with moderate to heavy deer traffic and spade up dirt in a 2-foot circle. Pour in half of an ice-cream pail of stock salt or commercial deer mineral and spade it into the loosened soil. Pour the rest on top.
Tips:
• Establish one or two licks per 80 acres. Allow deer up to a week to find them.
• Situate each lick 10 to 30 feet from a tree for mounting a camera.
• Jam a stick behind the camera’s top edge to point it down toward the lick.

500Time: Early Season
Site: Mock scrape
Goal: To find bucks after velvet shed, when they often relocate. Mocks can draw up to 90 percent of the bucks you’ll hunt.
Setup: Rake grass and forest debris 5 feet away from a tree that has a green, overhanging licking branch 5 to 7 feet above the ground. Activate with your own “product” (drink plenty of liquids) or deer urine.
Tips:
• If you are not getting clear shots of a buck, aim the camera at the licking branch. Most bucks will work it with their antlers.
• Establish multiple scrapes in each area and hang cameras only on the most active ones.

Time: Rut
Site: Funnel
Goal: To determine where resident bucks are traveling and whether traveling bucks are in the area.
Setup: Find terrain features that channel buck movement and hang a camera near fresh tracks and rubbing activity. Check camera every three to five days—the rut moves quickly.
Tips:
• Mount camera at a 45-degree angle to the trail. Bucks often move through funnels quickly; a camera set perpendicular to the trail might miss the shot.
• Scuff dirt in front of the camera with a boot. Such a mini mock will often make a moving buck pause and get “shot.”

Time: Late Season
Site: Food source
Goal: To find out where to fill a last-minute tag, and to know which bucks have survived the bulk of the hunting season.
Setup: Scout widely to find the hot food sources in your area, such as waste grainfields and clear-cuts. Place camera within 30 feet of the most heavily trafficked area. Load it with fresh batteries if you hunt in an extremely cold area.
Tips:
• Set up and check cameras at midday to avoid spooking feeding deer.
• If no trees are located near the food source, mount the camera on a tripod and camouflage it with grass or brush.

Make the Next Shot Count!

Follow our FISHING BLOG

WEB   RATES     FISH    HUNT    CABINS    PHOTOS T
ESTIMONIALS
    BROCHURE    HUNT BOOKLET

Enter your email address to subscribe to this blog and receive notifications of new posts by email.

Go back

Your message has been sent

Warning
Warning
Warning
Email Me....

Warning

Warning.


Tags: , , , , , ,

4 Ladder Stands To Consider

Whether you hunt with a bow or a rifle, want to hide in the treetops or stay closer to the ground, one of these four ladder stands has you covered. A hunting buddy and I started with six models and after a full day of setting up, climbing, sitting, and tearing down chose these four favorites. Here are our picks for an all-around stand, a bow stand, a best bargain, and a gun stand.

All-Around

Ladder-1_0

Ol Man 15′ Bowlite

Specs 15′ high • 25″ x 171⁄2″ platform • 45 lb.

What’s SpeciaL With its mesh seat and narrow ladder, my test partner, a veteran New York hunter, thought the streamlined Bowlite was the best of the test. Two points of contact to the tree made it the most secure by far, and it proved the fastest to assemble.

Bottom Line Easy to build, comfortable, and rock solid. We docked points only for the narrow ladder, which allowed just one foot per rung—not good for XL hunters ($150; olmanoutdoors.com).


Bow

Ladder2

Rivers Edge Bowman

Specs 19′ high • 24″ x 17″ platform • 64 lb.

What’s SpeciaL Tall, with a big 17 inches between rungs, the Bowman is a young person’s treestand. The large platform and skyscraper height is ideal for maneuvering and drawing on deer undetected. Yet we felt it needed a second (not included) ratchet strap to feel secure.

Bottom Line With almost 2 square feet of platform 19 feet up, this is a killer bow stand, but the pins were noisy ($170; huntriversedge.com).


Budget

Ladder-3

Summit Crush Series Solo Performer

Specs 151⁄2′ high • 19″ x 121⁄2″ platform • 40 lb.

What’s SpeciaL For just one Benjamin you get this light, easy-to-set-up, comfortable, do-it-all option. The ladder assembles with bolts and lock nuts, so it’s deathly quiet compared with the others in the test, which use locking pins. But the platform feels small.

Bottom Line Lots of value, plus it’s the lightest and quietest system in the test. Another $30 gets you a backrest and shooting rail ($100; summitstands.com).


Gun

Ladder-4

Big Game NextGen Stealth DX

Specs 15′ high • 25″ x 181⁄2″ platform • 55 lb.

What’s Special Big Game hit the sweet spot of price and performance with the Stealth DX. The ladder is wide, with short 13-inch spacing between the rungs for easy climbing, even in the heavy clothing typical of gun season. There’s a cushy backrest and an adjustable shooting rail.

Bottom Line A comfortable all-day sitter that can be found online for well below the list price. We would have liked the gun rest to elevate a little higher ($220; biggametreestands.com).

Follow our FISHING BLOG

WEB   RATES     FISH    HUNT    CABINS    PHOTOS
TESTIMONIALS    BROCHURE    HUNT BOOKLET

Enter your email address to subscribe to this blog and receive notifications of new posts by email.

Go back

Your message has been sent

Warning
Warning
Warning
Email Me....

Warning

Warning.


Tags: , , , , , ,

Need a Stabilizer on Your Hunting Bow?

If you are a walkabout bow hunter who keeps shots inside 40 yards, you might not need a stabilizer, and certainly not a long or heavy one.

Study indicates that unless you shoot in a heavy crosswind, an ultra-light bow, or stretch your shots out beyond 40 yards, a stabilizer is an optional accessory.

bow1

Assessing Stability
Stabilizers add forward weight to a bow, balancing it in hand and, because of the additional mass, absorbing some of the vibration that is produced by the power stroke of the bow.

Some claim that a stabilizer will also reduce noise. However, after experimenting the measured noise output of bows both with and without a stabilizer, results indicates only a minimal reduction in noise.

The real value of stabilizers is the weight they add to a bow. In this way, they are like barrel weight in a rifle. The heavier the barrel, the more the gun stays on target. This is why bench rest shooters use bull-barreled rifles, and it’s why Olympic archers shoot bows with long, heavy stabilizers. But neither group has to hump their gear over steep or difficult terrain.

The Test
Shooting three bows of different weights and dimensions with three different stabilizers and with no stabilizer at all at 10-yard increments from 20 to 60 yards and measured the size of three 10-arrow groups at each distance, for a total of 120 groups.

bow2

Some noteworthy conclusions:
Many test sessions were in crosswinds blowing in excess of 30 mph. In stiff winds and always shot more accurately with a stabilizer, and accuracy in wind was directly proportional to distance.

Stabilizers had the most effect on accuracy and noise reduction on a 3.5-pound Mathews Heli-M and the least effect on a 4.5-pound Prime Impact. In between was the 4.3-pound Bowtech.

There was no statistically significant difference in accuracy between stabilized and unstabilized bows inside 40 yards. From 40 to 60 yards, stabilized bows shot 10 percent more accurately than unstabilized bows.

The final conclusion is important. Accuracy is improved by a stabilizer, and if you’re hunting from a tree stand or a ground blind, or in a situation where weight isn’t a consideration, you should use a stabilizer to maximize your accuracy. But in highly mobile hunting situations, where weight can mean the difference between getting on game or not, then a stabilizer can be considered elective.

Test Notes: Field tips on 29 ½-inch, 350-grain arrows. Bows pulled 58 pounds at 29 inches and were shot with and without attached quivers.

Follow our FISHING BLOG

WEB   RATES     FISH    HUNT    CABINS    PHOTOS
TESTIMONIALS    BROCHURE    HUNT BOOKLET

Enter your email address to subscribe to this blog and receive notifications of new posts by email.

Go back

Your message has been sent

Warning
Warning
Warning
Email Me....

Warning

Warning.


Tags: , , , , , ,

Where to Place Your Trail Cams

A trail camera won’t stumble through a bedding area, leave scent all over a trail, or exaggerate the size of a rack. And it’ll never oversleep. But your perfect little scouting buddy must be chosen wisely and placed carefully if you want to pattern that old, crafty animal you know is around. Here’s how…

CameraNO_MosaicYELLOW

The earlier version trail cameras were just a 35mm film point-and-shoot tucked in a weatherproof housing. It snapped a single picture when something triggered the sensor. After retrieving the camera, you ran to the one-hour shop to get the film developed, then thumbed through a week’s worth of pictures. More than once a stack of 36 prints revealed a handful of out-of-focus animals and a couple dozen shots of a wind-whipped brush or a drooping tree branch. That was only a few years ago.

Today, many website boasts several pages of trail cams, and even the cheapest one outperforms the original older ones. They have lenses sharp enough to count the ticks on a deer’s neck, electronic circuit boards so efficient that four AA batteries will run a unit for months, and memory cards that hold thousands of pictures you can download to your computer or delete at the touch of a button. And those are standard features on mid-priced cameras. The high-end ones will send a photo to your cellphone or laptop.

Like everything in the digital age, trail-cam technology has improved, competition has become fierce, and prices have plunged. Still, $200 is plenty of money, and matching a camera with the right features to meet your needs is critical. And even the best camera can’t take spectacular photos of a trophy buck if you don’t set it properly. But it’s not difficult to get started. These are the basics.

TrailCameras3
Wildlife biologists use trail cams to measure herd densities, buck-to-doe ratios, and the like. Your goals should be simpler: learning about the deer on your property, figuring out where to hunt them, and having fun in the process. You can pinpoint ideal spots before you buy a camera, and the locations you choose can determine what model is best for you. Here are four sites for four different periods.

Time: Late Summer
Site: Mineral lick
Goal: To start an inventory of buck numbers and quality on your property.
Setup: Find a spot with moderate to heavy deer traffic and spade up dirt in a 2-foot circle. Pour in half of an ice-cream pail of stock salt or commercial deer mineral and spade it into the loosened soil. Pour the rest on top.
Tips:
• Establish one or two licks per 80 acres. Allow deer up to a week to find them.
• Situate each lick 10 to 30 feet from a tree for mounting a camera.
• Jam a stick behind the camera’s top edge to point it down toward the lick.

500Time: Early Season
Site: Mock scrape
Goal: To find bucks after velvet shed, when they often relocate. Mocks can draw up to 90 percent of the bucks you’ll hunt.
Setup: Rake grass and forest debris 5 feet away from a tree that has a green, overhanging licking branch 5 to 7 feet above the ground. Activate with your own “product” (drink plenty of liquids) or deer urine.
Tips:
• If you are not getting clear shots of a buck, aim the camera at the licking branch. Most bucks will work it with their antlers.
• Establish multiple scrapes in each area and hang cameras only on the most active ones.

Time: Rut
Site: Funnel
Goal: To determine where resident bucks are traveling and whether traveling bucks are in the area.
Setup: Find terrain features that channel buck movement and hang a camera near fresh tracks and rubbing activity. Check camera every three to five days—the rut moves quickly.
Tips:
• Mount camera at a 45-degree angle to the trail. Bucks often move through funnels quickly; a camera set perpendicular to the trail might miss the shot.
• Scuff dirt in front of the camera with a boot. Such a mini mock will often make a moving buck pause and get “shot.”

Time: Late Season
Site: Food source
Goal: To find out where to fill a last-minute tag, and to know which bucks have survived the bulk of the hunting season.
Setup: Scout widely to find the hot food sources in your area, such as waste grainfields and clear-cuts. Place camera within 30 feet of the most heavily trafficked area. Load it with fresh batteries if you hunt in an extremely cold area.
Tips:
• Set up and check cameras at midday to avoid spooking feeding deer.
• If no trees are located near the food source, mount the camera on a tripod and camouflage it with grass or brush.

Make the Next Shot Count!

Follow our FISHING BLOG

WEB   RATES     FISH    HUNT    CABINS    PHOTOS T
ESTIMONIALS
    BROCHURE    HUNT BOOKLET

Enter your email address to subscribe to this blog and receive notifications of new posts by email.

Go back

Your message has been sent

Warning
Warning
Warning
Email Me....

Warning

Warning.


Tags: , , , , , ,