


 Follow our FISHING BLOG
WEB RATES FISH HUNT CABINS PHOTOS
BROCHURE HUNT BOOKLET


Thankfully, wild turkeys don’t have a sense of smell, like deer, or we’d never outfox one. However, turkeys often thrive in deer habitat. Many seemingly perfect spring gobbler set-ups have been blown by a snorting deer that entered the hunter’s scent stream. A unique device called “Ozonics” can change that by eliminating human odor. It’s especially effective in an enclosed space, such as a turkey or deer blind. This unit works in spring or fall and has captured the interest of sportsmen, yet many aren’t sure how it works. Here’s the explanation from the manufacturer.
 Neutralize a mature buck’s best defense, its nose, and a hunter’s chances of success rise dramatically. Cover scents, hunting clothes washed in scent-free detergents, avoiding a buck’s core area during the prime time to hunt because the wind isn’t right… Hunters are obsessed with scent, and for good reason. A deer’s nose is truly its best sense.
1041It’s not often a new hunting product revolutionizes the sport. Ozonics is just such a product. O zonics is the only scent-control product that deals with your human scent zone. Simply, there is nothing else like it. Ozonics is an in-the-field ozone generator. An Ozonics Unit electronically changes oxygen into ozone, which destroys your human scent zone. Ozonics blankets your scent zone with scent-destroying ozone propelled by a quiet fan. The ozone is unstable, so it will bond with your scent molecules, rendering them indistinguishable to the nose of a deer.Ozonics should be positioned 6 to 10 inches above you and angled downward. Use a wind tracker to detect wind direction, and then aim Ozonics downwind. Heavy ozone molecules generated by the Ozonics Unit fall through your scent zone. The ozone concentration is heaviest in the direction Ozonics is facing and closer to the unit. This is why knowing wind direction is important. Reducing your scent profile means more ozone reaches your scent stream.
Best of all, Ozonics is guaranteed. If you do not experience a dramatic reduction in the number of downwind deer that bust you, Ozonics will refund your money in the same calendar year as purchase.
Follow our FISHING BLOG
WEB RATES FISH HUNT CABINS PHOTOS
TESTIMONIALS BROCHURE HUNT BOOKLET


Follow our FISHING BLOG
WEBSITE RATES FISH HUNT CABINS PHOTOS
TESTIMONIALS BROCHURE HUNT BOOKLET


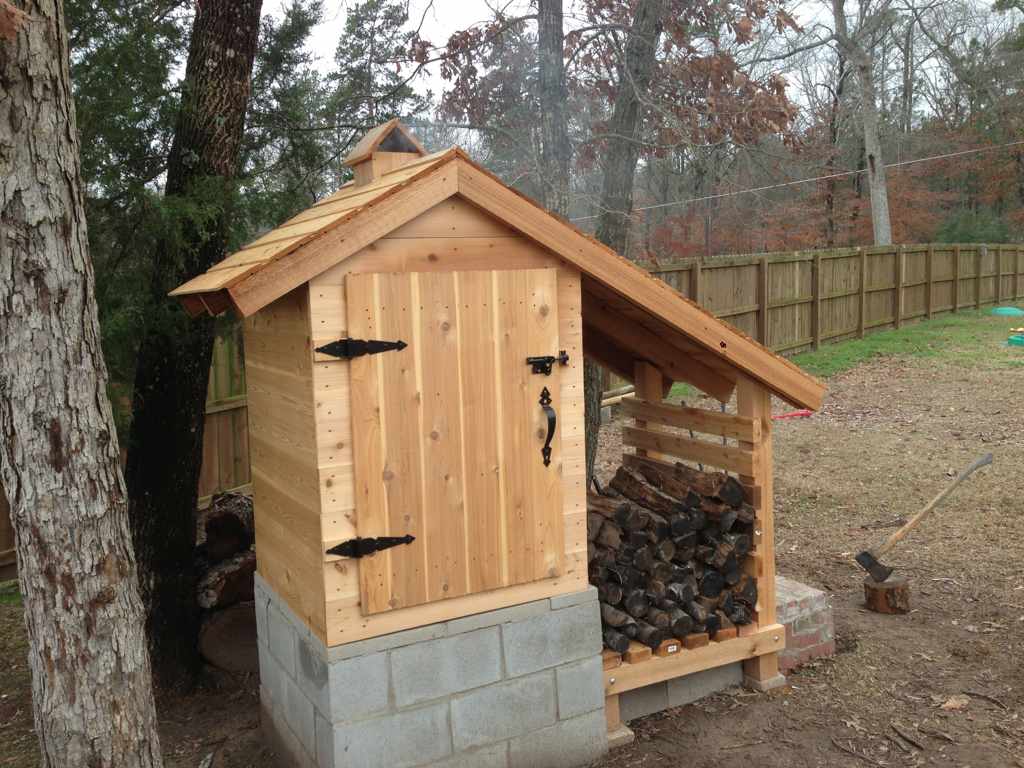
Building a smoke house the old fashion way is a method that has been used for generations. Many people today like to smoke their own meat not only to give it flavor but also to preserve it longer.
The size of your smoker will depend on what you plan to use it for. Whether you want it to just smoke a few fish, smoke sausage every now and then or smoke an entire animal at one time, will help you determine the size of your smoker

Beginning:
When it comes to flavor of the meat, people through the years have made up their own recipe of brine to rub over the meat before smoking it.
The Building Process:
Building a smoke house, there are a few things that should be considered when building your smoke house. It is not important to spend a small fortune for material for the construction. Reclaimed wood will work just fine. You may want a smoker big enough to walk in with shelves to lay the meat on along with hocks from the rafters to hang the meat.
You will want to vent the building to allow the smoke to travel freely through the building.

Building a smoke house, a very important factor is to situate your fire box down hill from the smoke house. This will allow the smoke to travel up hill into the smoker much easier. All that is required for a fire box is a fire box made from brick or even an old barrel with the smoke piped into the smoker will work just fine by having the fire box away from the smoker, the meat will not dry out as much as if it were right in the smoker.

The Smoking Process:
To also help in the flavoring of the meat, by using different kinds of wood chips in the fire box will create different smoke changing the flavor in the meat.
Follow our FISHING BLOG
WEB RATES FISH HUNT CABINS PHOTOS
TESTIMONIALS BROCHURE HUNT BOOKLET

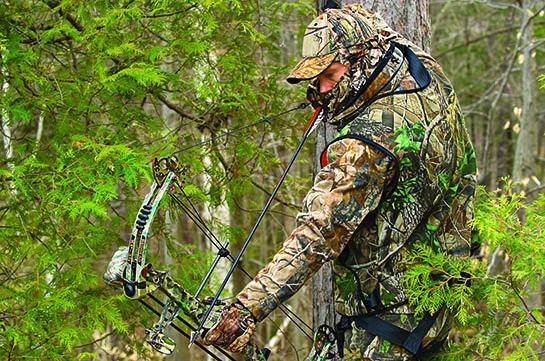
The traits that separate elite bow hunters from the masses are attention to detail and rigorous training. These are year-round archers, and here’s how they push themselves to become deadly hunters.
1. Be Challenged
As creatures of habit, we’re guilty of practicing at distances at which we can comfortably stack arrows in an impressive -fashion—typically 20 yards. However, extending your practice distance well beyond your comfort zone accomplishes several things. First, it forces you to tighten your form, since miscues are multiplied as distance increases.
Greater practice distances also force you to identify and correct imperfections lest you continue to splash arrows about the range. This year, if space allows, double your practice comfort zone. You’ll find that when “short” shot opportunities present themselves, they’ll be chip shots.
2. Be Strong
Drawing a bow requires a certain degree of physical strength. Leveling a fiber-optic pin confidently on an animal is difficult, if not impossible, when your arms are trembling uncontrollably.
Sadly, archers who pull out their bow a week prior to the season aren’t physically prepared to attempt an ethical bow hunting shot. The right repetition makes you both strong and accurate.
3. Be Angular
Animals rarely present the perfect broadside shot. But how many of us practice any other angle? Whether you shoot a block or a 3D target, practice a variety of shot angles.
Shooting non-perpendicular angles adds another physical and mental dimension to the shot execution, because the bull’s-eye changes geometrically. When practicing, move about the range, varying your relationship to the target face until you’re proficient in every possible angle.
4. Be Accurate
Many archers think the only way to practice judging distance is with a bow in hand, but the opportunities are everywhere, including grocery stores and parking lots. Mentally measure an object in the distance and pace it off to check your guesstimate. Or stroll through the woods with a rangefinder. Stop occasionally and put an eye on a bush, branch, or rock. Give yourself a few seconds to estimate the real estate, and then check it against the laser. After a few trips, you’ll become amazingly accurate at taping distances with little more than a keen eye.
5. Be Crepuscular
Shot opportunities often present themselves in low light, whether the first or last of the day. Try shooting three or four arrows in this tough light. By doing so, you’ll have a real appreciation for what to expect when visibility is less than ideal in the field.
6. Be Blind-Ready
Ground blinds now outsell tree stands, as they offer a portability and versatility that tree stands simply cannot. However, if you’ve never practiced from one, you’ll be unpleasantly surprised when you try to lob a shot from inside its tight confines. Limited drawing distance, extremely small windows (which narrow the shot field), and dark interiors challenge even the best bow hunters. A word to the wise: Pop your ground blind up and practice shooting from it prior to toting it into the field.
Follow our FISHING BLOG
WEB RATES FISH HUNT CABINS PHOTOS
TESTIMONIALS BROCHURE HUNT BOOKLET


Over the past two decades hunting backpacks have grown in popularity and size. Not only cubic inches, but number of pockets and where we can strap things. Don’t be sucked into the thought that you have to fill each and every pocket or empty space with something. Instead, make a list of items you think you’ll need for your outing by reviewing the possible scenarios that may occur. For example, if you are just planning a day hunt you may jot down a considerably short list, whereas if you are hunting for a few days you will be carrying a bit more gear.
Years ago a simple camouflage backpack was used with a large holding area and one pocket. Some hunters went out in the field with just a bow, a peanut butter sandwich in their pocket and a knife. Nowadays it’s good policy to prepare a couple packs that to utilize for different hunts. The following is what goes into these packs on a hunting trip, but, keep in mind that you should customize your pack essentials according to what your adventure will be. You will be surprised at how much extra ‘stuff’ you really don’t need.The first is the Badlands Hybrid pack that is used on most of short day trips like small game or turkey hunts. Pack calls and essentials and you’ll still have room left over. On longer hunts pack a Badlands 2200 which allows more room for extra clothing or food for longer excursions. Making sure the essentials are in your pack for a bow hunting adventure can be rather simple. In order to bow hunt, you have to find an area where you can take a quality shot.
You have to find a good area to hunt and you need to get there. You also have to have a pack that is tough, not too heavy, and has ample space to pack out an animal should you be fortunate enough to harvest one. Some areas can be thick vegetation so you need to be aware of the terrain and weather of where you will be headed. Pack your gear for each and every trip to be sure you have everything you might need and a little extra should you find yourself stranded. You should do some research and find a good pack that will fit your needs and more importantly fit you. Here are the essentials that you should take on every hunt.
These essentials should be a constant each time you venture into the forest.
 Water – Always plan to have enough to drink throughout the day. Also plan on sipping, not guzzling so you don’t waste the resource. Before you leave on your hike, locate a water source on a map and prepare to refill along the way. Put an extra bottle in the bottom of your pack in case your hydration system runs out. Then you know you at least have one bottle left. Also, leave a 2 liter bottle of water in your vehicle (preferably in a cooler) so you have something cool to drink when you reach it.
Food/Snacks – Have fun with what you eat on the trail! Take almonds, some energy gel, trail bars like Granola bars, and, be sure to pack a sandwich. For some, and, for those who like it, there is something about eating a peanut butter and honey sandwich on top of a peak that just makes it that much better. Try to stay away from most other sweets on the trail like candy bars or snacks that could leave you feeling sluggish.
First-Aid Kit – Pack a kit yourself or better yet, buy one of the Adventure Medical Kits Sportsmans Kit available at most stores. It is a great kit and the one you should carry on each and every trip. A word of advice to everyone is to open the kit and know what is in there before you leave your house check it over. If you think something is missing, add it. One of the items you should always sure to pack is moleskin. You can never tell when it might be needed to cushion a blister or protect your feet. Having that moleskin was invaluable. Be sure to include other items like QuikClot and a tick remover. You may never needed them and they could’ve been left at home, but don’t mind a little extra weight when it comes to safety.
SPOT Locator – Having a locator beacon on your in case in the event you might get lost is added security. It allows your family to track you via computer when your on a hunt. They can see exactly where you are, the terrain, and if you are stationary or moving. The best part is that is if you get lost or need medical assistance you can press a button and have them dispatched to your location. It is highly recommended to review the features to see if you plan on hiking more than a couple miles in or if you plan to be out for a few days. Having a space blanket is a great idea in case you get stranded and need to keep warm. If you need to use it you will probably be miserable, but it will help keep you alive.
Compass – Know how to use it.
Map – A topographical map of the area I am hunting. Some of the items that should be packed, but not necessary really don’t need an explanation:
Whistle, Lighter, Headlamp/Flashlight, Knife and Paracord.
As mentioned earlier, for different hunts there will be a different set of items you will have in your pack. It may take some testing on your part to see what you need, don’t need, and what weighs the least. No matter what, whatever you pack, get out there and enjoy yourself.
Follow our FISHING BLOG
WEBSITE RATES FISH HUNT CABINS PHOTOS
TESTIMONIALS BROCHURE HUNT BOOKLET


Most people have a visual preference for one eye or the other, often without realizing it. This is known as eye dominance. Before choosing a bow, it’s important to know which eye is dominant.
Eye dominance can be weak or strong, and has nothing to do with hand dominance. For example, you might be right-handed but left-eye dominant. Studies show about two-thirds of people are right-eye dominant, one-third are left-eye dominant and a small percentage favor neither eye.
Some Easy Steps to Test Eye Dominance:
Go where you can see an object that’s at least 10 to 20 feet away.
Clasp your hands together, make a circle between them about 1 inch in diameter, and extend your hands to arm’s length.

Keeping both eyes open, use the circle to visually frame the object.
While making sure you keep the object framed, pull your hands slowly back to your face.
Your hands will draw naturally to your dominant eye.
In rare cases, new archers will not have a dominant eye. When this happens, it’s best to use the dominant hand to draw the bow.

Follow our FISHING BLOG
WEB RATES FISH HUNT CABINS PHOTOS
TESTIMONIALS BROCHURE HUNT BOOKLET

Here’s a simple take on a sausage-based soup that’s sure to satisfy your pallet after a brisk day of hunting. To make things even easier, you can cheat and go with a bag of pre-chopped slaw mix from the grocery store.

Sausage and Slaw Soup
Ingredients
– ½ pound sliced sausage
– 1 Tbsp. canola oil
– 1 medium onion, chopped
– 4 garlic cloves, minced
– 1 ½ lb. bag of pre-packaged slaw mix
– 1 tsp. salt
– 1 Tbsp. flour
– 1 cup water
– 2 cups beef broth
– 1 Tbsp. red pepper flakes
– 2 tsp. each dried parsley and dill
Directions:
1. Over a medium-high burner, heat the oil in a saucepan or soup pot. Add the sausage to the oil and cook until brown. . Add the onions and cook until translucent, about 3 to 4 minutes.
2. Stir in the garlic and slaw mix to the saucepan. Cook, stirring frequently, until the cabbage is wilted. Sprinkle the salt and flour over the onions and cabbage and stir.
3. Add the water, broth, and red pepper flakes. Raise heat and bring just to the point of boiling. Reduce heat and simmer 10 minutes.
4. Stir in the parsley and dill. Serve with a thick slice of crusty bread.
Follow our FISHING BLOG
WEB RATES FISH HUNT CABINS PHOTOS
TESTIMONIALS BROCHURE HUNT BOOKLET

A number of years ago, Work Sharp, which is a division of Darex, set the cutlery world on its ear by introducing an electric belt sharpener that would put an edge on most anything in seconds, and without overheating the blade, tearing off steel, or baffling the user.

Now, Work Sharp has outdone itself by having custom knifemaker and designer Ken Onion put together an improved version that bears his name. The new Ken Onion Work Sharp has a more powerful, variable-speed motor, wider belts with better abrasive, a guide that lets you adjust your bevel from 15 degrees to 30 degrees, and upgrade kits that expand its already awe-inspiring capabilities. Using its full range of accessories, this tool can sharpen anything from a shovel to a scalpel.
Among its features is something I haven’t seen before—a work chart printed on heavy cardboard (also suitable for framing, in case you’re tired of your Vermeer or Lautrec) that shows you just how to proceed with all this technology. Let’s say you want to sharpen a hunting knife, so you look under “Hunting Knife” and below that you choose between “Haggered” (That’s how they spell it, and it’s the wrong word, but what the hell.) and “Dull.” Choose one of the two sets of directions that follow and you get the angle and speed at which to sharpen, the progression of belts to use, and how many strokes you give the edge on each side.
Especially intriguing is the subcategory called “Bragging Rights,” below which appears “How sharp can you get?” and below that, “Ridiculous,” following which is a formula that will get your knife sharp enough to perform corneal surgery.
What Worksharp does not make much of, and should, is the fact that its system gives you a rolled, or Moran-style edge, which can only be gotten with a belt. The rolled edge is convex in cross section rather than flat, and is very strong and long lasting because it leaves more steel where the metal meets the meat. When I asked Worksharp why they didn’t make more of it, the answer was that not many people appreciate such a refinement. So be it. But now you do.

If your needs are more modest, there’s another Worksharp product that costs far less than the Ken Onion Sharpener (which is $150) and that is the Guided Field Sharpener 221, which is about all I ever use, and which is so good that I have three—one in the shop, one in the kitchen, and one with my hunting gear. It ‘s about the size of a large folding knife, offers five sharpening steps (of which I only use only two) and costs $34.95. It’s as foolproof in its own way as the Ken Onion Sharpener.
Contact: Worksharptools.com
Follow our FISHING BLOG
WEB RATES FISH HUNT CABINS PHOTOS
TESTIMONIALS BROCHURE HUNT BOOKLET

Building a smoke house the old fashion way is a method that has been used for generations. Many people today like to smoke their own meat not only to give it flavor but also to preserve it longer.
The size of your smoker will depend on what you plan to use it for. Whether you want it to just smoke a few fish, smoke sausage every now and then or smoke an entire animal at one time, will help you determine the size of your smoker
Beginning:
When it comes to flavor of the meat, people through the years have made up their own recipe of brine to rub over the meat before smoking it.
The Building Process:
Building a smoke house, there are a few things that should be considered when building your smoke house. It is not important to spend a small fortune for material for the construction. Reclaimed wood will work just fine. You may want a smoker big enough to walk in with shelves to lay the meat on along with hocks from the rafters to hang the meat.
You will want to vent the building to allow the smoke to travel freely through the building.
Building a smoke house, a very important factor is to situate your fire box down hill from the smoke house. This will allow the smoke to travel up hill into the smoker much easier. All that is required for a fire box is a fire box made from brick or even an old barrel with the smoke piped into the smoker will work just fine by having the fire box away from the smoker, the meat will not dry out as much as if it were right in the smoker.
The Smoking Process:
To also help in the flavoring of the meat, by using different kinds of wood chips in the fire box will create different smoke changing the flavor in the meat.
Follow our FISHING BLOG
WEB RATES FISH HUNT CABINS PHOTOS
TESTIMONIALS BROCHURE HUNT BOOKLET


