RSS

Monthly Archives: March 2018

Hunting Bears With Bows – Decoy Tactics

Trophy boars are smarter than your average bear. But even the savviest old bruin has a few chinks in his armor. Using a decoy is an exciting way to exploit them. Even weary old black bears will come in spoiling for a fight. Here are three strategies for drawing a dominant, hungry bruin into bow range.

 1

The Intruder
Big boars are solitary animals and will claim a food source as their own, commonly defecating along entrance trails to warn other bears away. To get this bear’s attention, stake a small bear decoy near the food source, positioned with its head down and its backside facing the direction you expect a boar to approach. Attach a few strips of black cloth to the decoy’s ears and tail for added realism and collect some bear scat from another area—preferably from a boar—and with a plastic bag, transplant it on the entrance trails.

Now sit back. Any wise old boar that might otherwise camp just off the food until nightfall is almost sure to investigate when he sees your “intruder.” Keep in mind that a boar may visit a food site daily or stop by every second or third day while patrolling his home turf. Be patient, and don’t let your guard down.

2

The Easy Meal
Black bears are fond of fresh meat and will drop their guard to capture an animal in distress. Any small, furry decoy, like those used for foxes and coyotes, wiggling about in plain sight is sure to catch a passing bear’s attention. With a little luck, the bruin will move in quickly to finish off what he thinks is hapless prey. If he hangs up, though, add a few squeals from a dying-rabbit call to entice him.

If whitetail deer are prevalent in your area, a fawn decoy can be too much for any hungry black bear to ignore. Try a few fawn contact bleats, and if that fails, go to a fawn-in-distress call. Nock a broadhead and get ready. The bear will come in fast, so be prepared to shoot pronto.

3

The Feeding Female
You’ll have to wait a few months to use this setup, but it’s a good one to have in your arsenal. Black bears rut in late spring and early summer and will visit bait sites, looking for a sow in heat. If baiting is legal in your area, position a small black bear decoy with its head in the bait barrel, and hang a few scent canisters soaked with sow-in-heat urine 3 or 4 feet off the ground nearby.

Big boars are ultracautious around bait, so odor control is critical. As you’re setting up, wear rubber gloves and spray the decoy down liberally with a quality scent remover. The boar will approach the decoy warily. Don’t rush the shot. As he investigates, you should have plenty of time to draw.

Follow our FISHING BLOG

WEB   RATES     FISH    HUNT    CABINS    PHOTOS
BROCHURE    HUNT BOOKLET

Enter your email address to subscribe to this blog and receive notifications of new posts by email.


Tags: , , , , , , , , , ,

Gear up: The Parts of Compound Bow

combowwawanglake


The lure of archery hunting has been an age old tradtion. From the evolution of spear to projectile, a sport was born!

Many people (including myself) have been daunted by the task of choosing their first bow. From draw length to pull pounds, this choice can be pivitol to a successful purchase.

There are many manufacturers and models being introduced yearly boasting a wide array of different accessories, colors, cam numbers and composites but in general, most compound bows come equipped with the same basics.

Study the image to the right to help learn the parts of the compound bow. Click on a compound bow part for glossary definition.

Parts of a Compound Bow

parts of a compound bow

  1. Arrow Rest
  2. Arrow Shelf
  3. Berger Hole
  4. Bow Sling
  5. Bow String
  6. Brace Height
  7. Cable(s)
  8. Cable Guard
  9. Cable Slide
  10. Cam(s)
  11. D-Loop
  12. Fletchings / Vanes
  13. Grip
  14. Limb(s)
  15. Nock
  16. Nocking point
  17. Peep Sight
  18. Quiver
  19. Riser
  20. Sight
  21. Silencing Aids
  22. Stabilizer
  23. String Vibration Arrester
  24. Tiller Measurement

With this basic outline, you can build your understanding and move forward into the purchasing stage.  Remember, before attempting to harvest any animal, practice practice practice!  More times than not, an amateur archery hunter will skip this step and either miss or wound an animal needlessly 🙂

If you are anxious to use your bow immediately, join an archery club…not only will you learn the skills needed, but you may even meet others that are looking forward to hunting and may request your company 🙂

Follow our FISHING BLOG

WEB   RATES     FISH    HUNT    CABINS    PHOTOS
BROCHURE    HUNT BOOKLET

Enter your email address to subscribe to this blog and receive notifications of new posts by email.

 
Leave a comment

Posted by on March 25, 2018 in archery, bow, Wawang Lake Resort


Tags: , , , , , ,

TIPS for Hunting Grouse Without a Dog + video

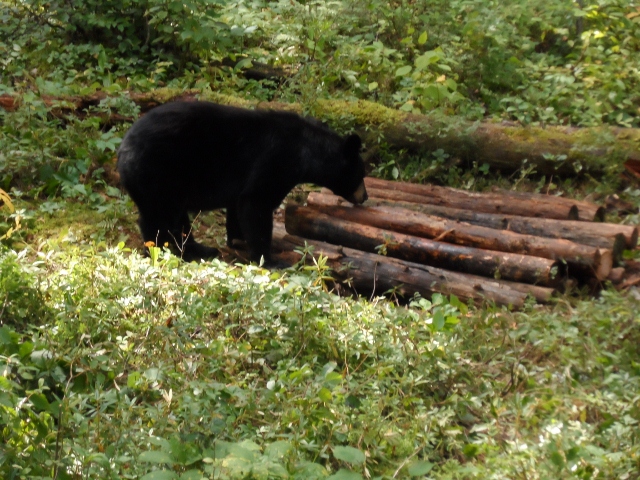
Ruffed grouse (colloquially called partridge) are the premier upland game bird of northern Ontario and are both delicious and incredibly difficult to hunt. They often dwell in the kind of thick, previously logged, new-growth forest habitat that is nearly impossible to walk through and offers a wall of brushy cover that can make spotting and hitting birds a tall order.

grouse (3)

A hunter with a well- trained canine companion can level the playing field somewhat due to the fact that a good dog can sniff out birds and give the hunter a slight edge. Unfortunately, not everyone is in a position to give a hunting dog the proper home and training it needs and are thus stuck hunting solo. All is not lost, however, and the following tips will improve a hunter’s chances of bagging a few grouse without the aid of a dog.

1. Locate Food Sources

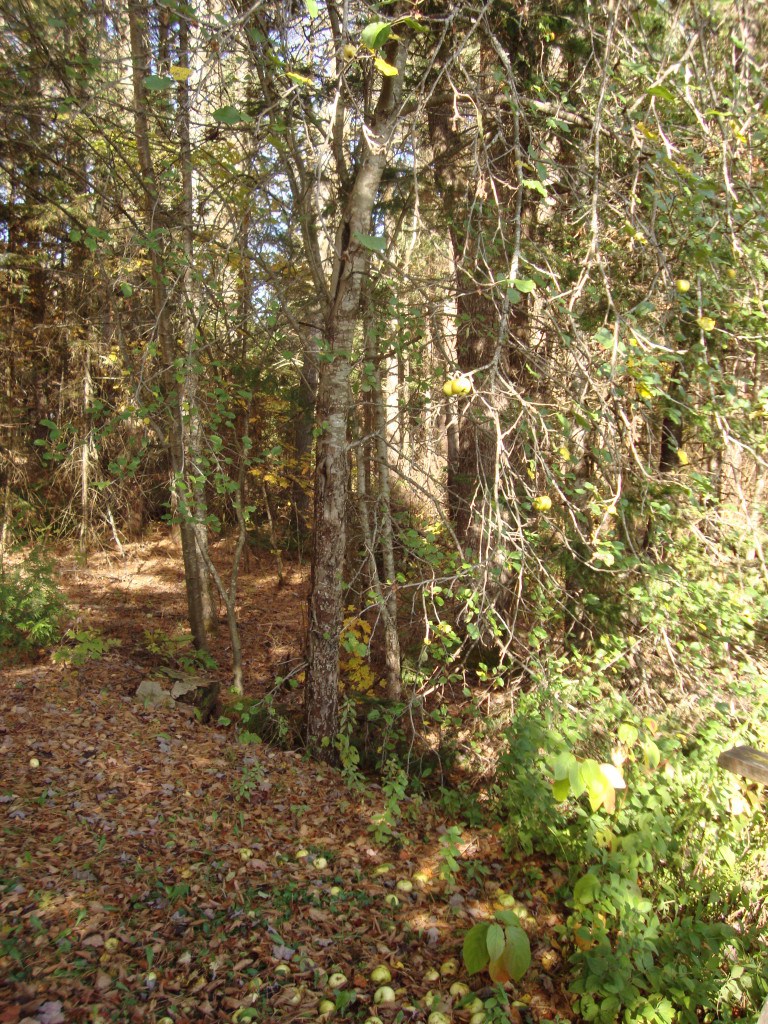
Omnivorous ruffed grouse have a varied diet that includes insects, snails, slugs, mushrooms, and the leaves and buds of trees (usually poplar), but they have a particular affinity for the various fruits that are common to their habitat.

Other fruits that may attract grouse include choke cherries, blackberries (if they are still present at the start of hunting season), and the fruit of hawthorn trees or “haws”.

grouse

2. Stick to the beaten path

Whenever it is possible, safe, and legal to do so, it makes sense for a grouse hunter to stick to established trails and decommissioned logging roads. The primary reason for holding to roads and trails is that these travel ways provide grouse with a convenient source of dust and pebbles. The birds dust themselves to control parasites, and eat small pebbles to aid in the breakdown of food stored in their gizzards. It follows that grouse often stay within easy striking distance of a path or road. Areas where a food source, such as a stand of apple trees or poplar saplings, is immediately adjacent to gravel path or road typically yield a lot of grouse.

Trails and roads also facilitate easy movement through the thick, brushy, and nearly unwalkable new-growth forests that comprise typical ruffed grouse habitat.

3. On rainy days, take to the pines

Grouse, much like any other terrestrial animal in existence, don’t like to be rained on and will seek shelter during inclement weather. This shelter often takes the form of such coniferous trees as balsams and spruces. Stands of pines that are in close proximity to food sources are particularly good places to look for grouse on wet weather days.

4. Keep one eye on the ground and the other on the trees

An easy error to make while hunting grouse is to keep eyes only on the ground. While ruffed grouse are primarily ground-dwelling birds, they do spend an appreciable amount of time perched in trees. A hunter concentrating on spotting birds on the ground will likely miss birds perched in tress and vice versa.

grouse (2)

5. Catch them sitting still

Ruffed grouse are an incredibly difficult bird to wing shoot, especially without the help of a dog to provide advanced warning or a bird’s presence. Not only do grouse take flight in a manner that results in a sudden blur of motion and thunderous wing beats likely to startle an unaware hunter, but the birds are also adept at quickly taking cover by putting trees and thick brush between them and the muzzle of a shotgun. By the time a hunter, surprised by a bird, shoulders his or her gun, disengages the safety, and gets on target, the bird will likely be gone. That’s not to say those hunting sans dog will never hit a flying grouse, it’s just that spotting the birds before they take flight is a surer way to put meat on the grill.

Spotting grouse before they fly is a skill in and of itself as their natural camouflage is just shy of perfect. A good way to spot them is to look for movement rather than trying to recognize their outline on the forest floor. A grouse moves in a very awkward, jerking motion, similar to that of a chicken. This distinctive movement will often give away a bird’s position.

Occasionally, ruffed grouse will also give away their position with sound. The noise that ruffed grouse are perhaps best known for is their characteristic drumming that sounds similar to a distant lawnmower engine starting and stalling. This sound will make a hunter aware of a bird’s presence in a general area, but it is difficult to use it to pinpoint an exact location.  Another sound emitted by grouse is a kind of high-pitched, raspy clucking.  Grouse will occasionally make this clucking sound when distressed a few seconds prior to taking off, thereby giving a hunter advanced warning of its presence in the immediate area.

6. Walk slow, pause often

This last piece of advice is perhaps the single most important.  Most of us have become conditioned to walk through our day to day lives as quickly as we possibly can. This mindset is perfect when navigating the local supermarket, but it will lead to certain failure on a hunt.

Rather than walking quickly and continuously, it is important to move at what at first will seem like a snail’s pace, and to pause every few steps to thoroughly scan the woods. Walking in this manner will not only result in the spotting of more game, but will also result in a hunter noticing other interesting details about the woods that would be missed when hiking at forced march speeds. Noticing such details as a vibrantly colored mushroom, a hawk or eagle circling high overhead, or even just a really cool looking tree are as important to the experience of hunting as bagging game.

Follow our FISHING BLOG

WEB   RATES     FISH    HUNT    CABINS    PHOTOS
BROCHURE    HUNT BOOKLET

Enter your email address to subscribe to this blog and receive notifications of new posts by email.


Tags: , , , , , ,

Don’t Forget To Breath

Whether we are at the range shooting targets, or in the field hunting, breathing is important. We want our sight, scope or pin to be on its mark when we pull the trigger.

untitled

Education, shooting positions and firearms are all very important to shooters. Breathing is a very important factor as well. We all breathe. From the day we were born we have unconsciously learned to breathe in and out. That natural motion can help or hinder during shooting.

Controlled breathing is a necessity in shooting accuracy. When you breathe in and out your chest rises and falls. This movement can cause your gun barrel or arrow sight to float on its target. Your breathing may cause you to move at the exact moment you pull the trigger to fire.

Sometimes when you are hunting, you get excited and/or the terrain and conditions cause your heart rate to accelerate. Your breathing becomes more rapid and harder to control. If you hold your breath, you may become light headed and your shot may be off target. It is important to practice your breathing techniques as you practice shooting positions at the range.

There are multiple methods of breathing during a shot. The best thing to do is practice them and determine which works best for you. Once you’ve determined your breathing technique, practice it so it becomes instinctive when you are under pressure.

untitled4Exhale & Pause – When you are in shooting position, put your cheek against the stock of the gun. Take in a deep breath. Exhale just a portion of that breath, pause briefly and pull the trigger. The pause should allow you to hold your gun barrel and sights in perfect alignment on the target at the very moment the gun fires.

Inhale & Pause – Relax and practice steady breathing. Double check your shooting position. In your rythm of relaxed breathing, inhale. When your lungs are about half full, pause and pull the trigger. The inhale and pause is similar to the exhale and pause method. Your gun barrel and sights should be in perfect alignment on the target at the exact moment the gun fires.

Full exhale – Make sure you are in proper shooting position. Breathe slowly to relax. Focus on your target. As you breathe naturally, and you are at complete exhale, pause when your lungs are empty and squeeze the trigger.

untitled2Breathe Naturally – Breathing naturally takes the focus completely off of breathing technique. You do not  pause at all. Focus on your form and your target as you breathe naturally and squeeze the trigger. Sometimes being consciously focused on breathing can increase heart rate and breathing patterns. The natural breathing technique takes the focus off and you begin to unconsciously form a habit of correct shot timing.

When you are pausing, remember just that. It is a pause, not a hold. When a shooter holds their breath, their muscles tighten and their heart rate can change. This will dramatically change the accuracy of a shot.

While you are practicing, if you become short of breath, stop. Re-group and practice your natural, relaxed breathing. It is important to steady your breath to decrease the amount of movement your body is making. If you are able, step back. Take a deep breath in. Then exhale and then reacquire your target.

untitled3

Follow our FISHING BLOG

WEB   RATES     FISH    HUNT    CABINS    PHOTOS
BROCHURE    HUNT BOOKLET

Enter your email address to subscribe to this blog and receive notifications of new posts by email.


Tags: , , , , , , , ,

Geared Up: Cleaning your gun

Most know that cleaning a firearm is a necessity for ownership.  This not only helps prevent malfunction and missfire but can also help bullet path and accuracy.  What most don’t know is that the average gun owner does not clean their firearm correctly which can lead to major headaches down the road 🙂

Here are a few great tips to set you straight

Step 1: Clean barrel and metal parts
Step 1: Clean barrel and metal parts with good commercial solvent.
Step 2: Bore should be cleaned through breech end
Step 2: Bore should be cleaned through breech end where possible.
Step 3: Clean bore until dry patch comes through as clean
Step 3: Clean bore until dry patch comes through as clean as possible.
Step 4: Run oily patch through barrel
Step 4: Run oily patch through barrel.
Step 5: All metal parts should get light coat of oil
Step 5: All metal parts should get light coat of oil.
Step 6: Store in horizontal position
Step 6: Store in horizontal position, or with muzzle pointing down.
Step 7: After storage, run a clean patch through bore
Step 7: After storage, run a clean patch through bore before firing.
Step 8: Remove all excess grease and oil
Step 8: Remove all excess grease and oil.
Click to view pdf of this diagram
With clean gun in hand, enjoy the hunt!

Follow our FISHING BLOG

WEB   RATES     FISH    HUNT    CABINS    PHOTOS
BROCHURE    HUNT BOOKLET

Enter your email address to subscribe to this blog and receive notifications of new posts by email.


Tags: , , , , , , , , ,

Bear Down: Tracking and Tracking the One That Might Getaway

 Black bear are very hard to kill, and they are hard to track when wounded. Even a good heavy-caliber lung or heart shot may not keep the animal from getting off into the woods, and that same shot may not leave very much of a blood trail. Wounded bear bleed into the porous fat layers between hide and muscle, and their thick fur absorbs external bleeding like a sponge. As the bear runs and the fat moves, it appears to seal over most wounds and even a heavily bleeding animal may travel a great distance before its wound begins to leave a visible trail again.

SAM_0022 (640x480)

There aren’t many more upsetting situations a hunter can face in this country than to put a carefully aimed shot into a carefully selected bear at virtual point-blank range, see it stagger, then vanish into the brush in two steps before you can even recover from recoil. You sit there, with dark closing in by the minute, not able to see more than 20 feet, and a wounded bear extending the distance. You have to get down onto the ground and do something about it. No wonder now why your guide and other experienced bear hunters kept telling you how important it is to hit a bear hard and solid and put him down and keep on hitting him until there is no chance he will get up and get out of your sight.

First rule is to wait.  Be patient and slowly gather your wits and be prepared for the next steps.

Second: Look.  Observe the direction your bear exited.

Third: Listen.  Bears are commonly known to turn into the direction of their wound (more likely if mortally wounded) and can actually end up circling the bait.  Those that don’t will run with such ferocity that the normally silent creature can cause major disturbances to surrounding areas and make enough ruckus for you to gage the direction to begin tracking.

If you are lucky, a short time after your shot is made, you may hear a drawn out, breathy cry often referred to as the death moan.  This likely means your bear is down and is not getting back up.  Don’t worry if you don’t hear one, not all bears will give you this satisfaction.

After waiting at least 30 minutes in your stand, cautiously come down and look at the area where your shot connected.  Look for any sign of your shot: blood, tissue or even an arrow that carried through.

Start in the direction where you shot and look for any sign of blood in the direction you saw your prey evacuate from.  Take the time to bring and use marking tape to highlight your trail as you go, not only will it give you a general direction, but it will also make finding your way out much easier and stress free.

A good, clean shot should drop a bear within 40 yards but we have tracked bear that have gone up to a couple of miles away.

peroxide

On top of marking tape, I also suggest having a spray bottle with peroxide in your kit.  In the forest, leaves can often have brown marks that look an awful lot like blood and using the peroxide will help differentiate as it will bubble on contact with blood.  I often add the brightest yellow food coloring I can find to highlight the blood even further.  I also like to pack a small black light to use in conjunction with this mixture as it will illuminate if the natural lighting begins to fade.

It is not uncommon to spend a few hours searching if your bear has gone beyond the 40 yard mark but don’t lose hope.  Keep your eyes peeled for signs of foot prints, snapped twigs or torn leaves as this could be nature’s own way of marking your bear’s trail.

If the day ends and no bear can be found, ensure that you go back early the next day.  Look for any signs of scavengers in the area.  Turkey vultures are often a DEAD giveaway.  They feed in the daytime so be prepared to wait a bit for them to arrive.  We sometimes will suggest to our hunters to climb back in the stand and look over the area again from the original vantage point.

If on the second day there is no harvest found and no sign of scavengers, it is very unlikely you will find your bear and you will come away with one of the hardest experiences in hunting.  Disappointing for both sides.

So in closing, take time placing that shot and take time looking for any wounded animals you may have created.

Follow our FISHING BLOG

WEB   RATES     FISH    HUNT    CABINS    PHOTOS
BROCHURE    HUNT BOOKLET

Enter your email address to subscribe to this blog and receive notifications of new posts by email.


Tags: , , , , , ,

What is Solunar and Why is it Helpful?

The Solunar Theory is a hypothesis that animals and fishes move according to the location of the moon in comparison to their bodies. The theory was laid out in 1926 by John Alden Knight, but was said to be used by hunters and fishermen long before the time it was published.

History

1063326111In May 1926, John Aldenn Knight put together some fishing folklore and other fishing factors such as the sun and the moon, hence the name Solunar (Sol for sun and Lunar for moon) to form a theory on the patterns of animal movement. Knight compiled a list of factors which control or influence the day-to-day behavior of many freshwater and saltwater fish. Each one of the 33 different factors were considered. All but 3 were rejected.

The three factors retained were the sun, the moon and the tide. For salt water fishing, tides have long been known as a factor which control fishes’ behavior. As Knight’s research progressed, he found that rather than just tides themselves, the relationship of the moon and sun’s positions relative to each other may be the determining factor.

In addition to the time of moon up (moonrise) – moon down, his research determined that there were intermediate times of the day that occurred in between the two major periods. From that he establishes that there were major periods (moon up – moon down) and minor periods. Knight published the first Solunar table in 1936.

Tables

Solunar tables are tables that fishermen and hunters use to determine the best days of the month and times of the day for catching fish and hunting game. For fishermen, the tides, sunrise and sunset are helpful times of the day to know when the fish are going to bite. For hunters, the tides are not a factor.

Hunters use the sun and the moon to determine when the game will be moving the most.”Other conditions not being unfavorable, fish will feed, animals will move about, birds will sing and fly from place to place, in fact, all living things will become more active, more alive, during Solunar periods than at other times of apparent equal value. …anglers have found that it is a guide to the best fishing of each day, and the quality of their sport has improved…”

Using these tables, a fishermen and a hunter can tell when the moon is directly underfoot and overhead. The strongest activity occurs when there is a full moon or a new moon and is weakest when there is a quarter moon and a three quarter moon. This is because the moon and the sun’s gravitation force is strongest when directly above or directly below our head. The lunar data humans receive is better now because of the newer technology the US Naval Observatory and GPS technology.

This new technology has allowed the Solunar Theory to generate hunting and fishing times with much greater precision It is important to note that data in tables found on various websites should be reverified periodically with US Naval Observatory available data as well as compared against other reputable solunar data providers. Inconsistencies abound due to the complex nature of the Astrophysics computations and overlooked associated anomalies checking that are required to produce useful results. Moon Transits which do not occur for more than a day or associated times being off more than a few minutes are indications of a fundamental issue for a given position and should be suspect.  All data providers should be verified before assuming data presented is authoritative or accurate.

Go to http://www.solunarforecast.com to create your own solunar calendar 🙂

Follow our FISHING BLOG

WEBRATES FISHHUNTCABINSPHOTOS
TESTIMONIALSBROCHUREHUNT BOOKLET

Enter your email address to subscribe to this blog and receive notifications of new posts by email.


Tags: , , , , ,

 
%d bloggers like this: