Article by Phil Bourjaily
Our tests at a high-tech ballistic research laboratory may change the way you buy loads and guns…and even how you hunt.
While it had long been known that a swarm of shot lengthened as it flew downrange, no one agreed on what it meant. Brister’s patterns, which sometimes splattered the length of his 16-foot-long targets, indicated that if you shot at a bluebill streaking past your decoys, up to 30 percent of the pattern might arrive too late to hit the bird.
A lot has changed since 1976. There are new questions about shot gunning to answer and, fortunately, new ways to answer them.
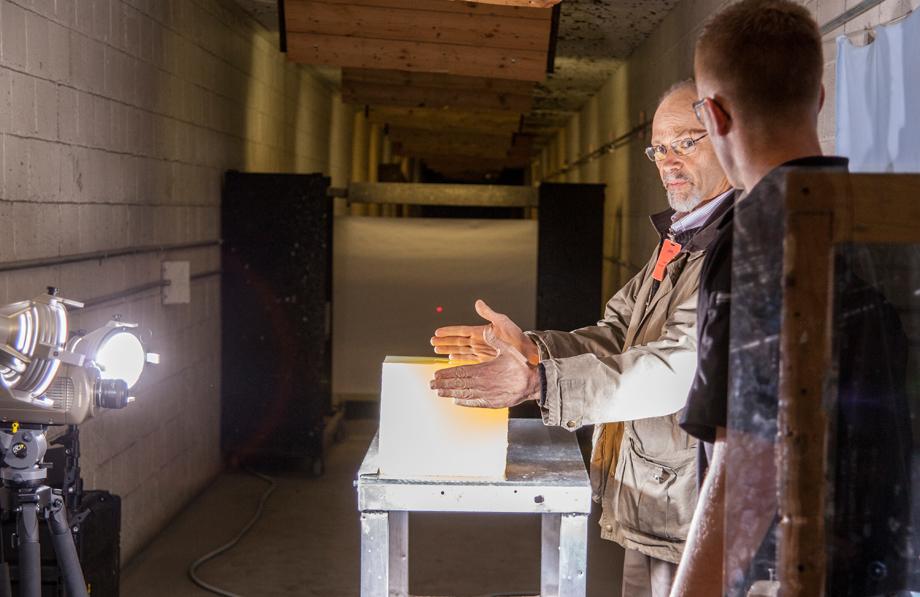
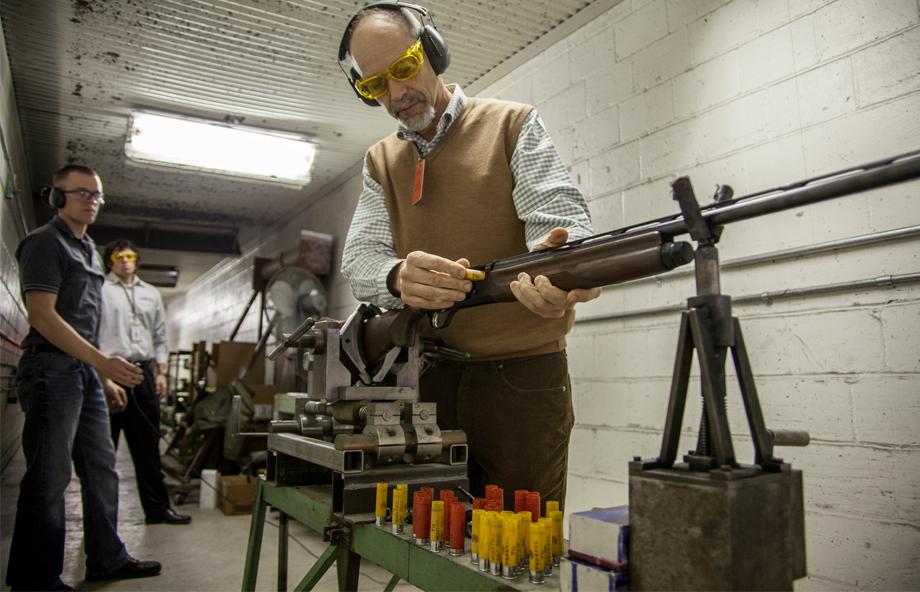
I don’t own an $80,000 high-speed camera, but Federal Cartridge Co. has one in its underground test range (above). They also have a computerized shotgun pattern analyzer, a walk-in cooler full of ballistic gelatin, and a factory full of shotshells to test. Federal granted my request to spend a couple of days there in April to test shotgun loads. I had countless questions, but was able to answer these six.
Some things I thought I knew turned out to be wrong. Others were right. And several changed the way I think about shotshells.
1. Is a 3 1/2-Inch 12-Gauge More Effective Than a 3-Inch 12-Gauge?

I’ve always believed the brutal recoil of a 31⁄2-inch 12-gauge magnum negates any ballistic advantage over the standard 3-inch magnum. I have always suspected, too, that cramming what amounts to a 10-gauge load into a 12-gauge barrel produced poor, ragged patterns and longer shot strings that made the extra pain even less worthwhile.
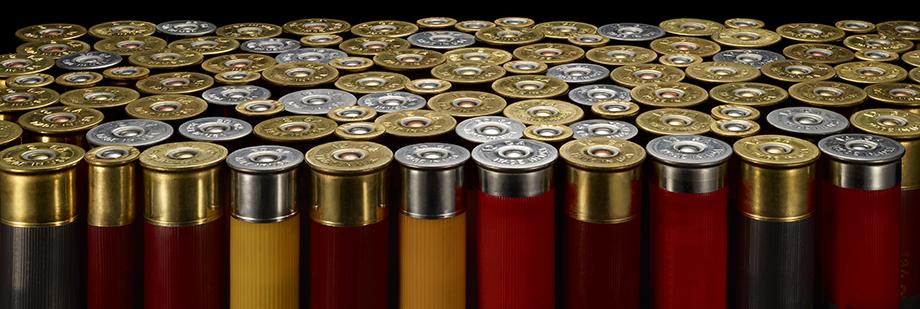
Test Loads:
– 12-gauge, 3-inch, 11⁄4-ounce loads of Black Cloud steel BB shot at 1450 fps (Modified choke)
– 12-gauge, 31⁄2-inch, 11⁄2-ounce loads of Black Cloud steel BB shot at 1500 fps (Modified choke)
Results: Both loads patterned almost identically on a 30-inch circle at 40 yards: The 31⁄2-inch load put 72.6 percent of its shot in the circle, with 77 pellet hits. The 3-inch placed 71.8 percent of its shot in the circle, with 63 hits.
There was no significant difference between the lengths of the shot strings, which averaged 42 inches for the 3-inch and 49 inches for the 31⁄2-inch midway between muzzle and target. Both loads exhibited equal penetration in ballistic gelatin at 30 yards—5 inches—despite the 31⁄2-inch shell’s 50 fps head start in muzzle velocity.
The Takeaway: I expected the 31⁄2 to string out longer and pattern worse than the 3-inch load, but it patterned just as well. The higher pellet count of the 31⁄2-inch resulted in significantly more hits in the circle, but both loads put enough hits on target to kill geese.
However, the improvement in performance comes at a cost of a whopping 50 percent increase in recoil. Even with a gun seated in a massive rest, I could feel the difference, and the muzzle blast was noticeably louder in the test tunnel, too. I shot some of those same 31⁄2-inch shells while trying to shoot a triple on a five-stand range. I could hit the first target always, but recovering from the shot to make the next two was almost impossible.
Is the 31⁄2-inch more effective than the 3-inch? Yes—if you can withstand the recoil. “More” is only better if you can put it on target.
2. Is the .410 a Suitable Gauge for Young, Beginning Hunters?

The .410 is a ballistic disgrace, and a crippler of game birds. Just ask me and all the other gun writers who have repeated that “fact” over the years. I believe beginning hunters should shoot a 20-gauge, not a .410, despite the higher recoil and extra weight of the 20. A comparison between the two, I was sure, would dramatically show the 20’s superiority.
Test Loads:
– .410 11⁄16-ounce loads of Game-Shok Upland No. 6 shot at 1135 fps (Full choke)
– 20-gauge 7⁄8-ounce loads of Game-Shok Upland No. 6 shot at 1210 fps (Modified choke)
Results: Unlike other gauges, which are patterned at 40 yards, .410s are typically patterned at 25 yards. We picked 30 yards as a compromise distance and to reflect the shorter ranges at which beginners shoot. The Full choke .410 shot 87.8 percent patterns at 30 yards, while the Modified 20 shot 84.6 percent. The higher pellet count and higher velocity of the 20 combined to put more pellets in the 30-inch circle (173) than the .410 (139). Penetration was better, too—3.3 inches vs. 3 inches. The 46-inch-long shot string of the 20-gauge, which was measured at 20 yards, was a full 20 inches shorter than the .410’s shot string.
The Takeaway: The .410 surprised us with great patterns. However, the .410’s shot string, which was 50 percent longer than that of the 20-gauge, revealed a shortcoming: The longer the string, the slower the trailing pellets are traveling, and therefore the less energy they retain. The .410 not only puts fewer pellets on target than the 20-gauge, but the .410’s tail-end pellets won’t hit as hard. Even so, I will give the .410 more respect in the future. I waited until my kids were 11 and 12 and big enough to shoot 20-gauges, but if a child is too small to handle a 20, a .410 can work.
3. Is a 20-gauge as Effective as a 12-Gauge for Doves?

There’s a faction of smallbore shooters—including some people I hunt with—who condemn the 12-gauge as “unsporting.” As a 12-gauge shooter, I see it as being versatile and ballistically efficient. This test was my chance to crush my detractors with science. One area where 12s and 20s can be compared in an apples-to-apples format is the dove field, where many hunters shoot 1-ounce loads with either gauge, so that became the basis for the test.
Test Loads
:
– 20-gauge 1-ounce loads of Game-Shok Upland No. 71⁄2 shot at 1165 fps (Modified choke)
– 12-gauge 1-ounce loads of Game-Shok Upland No. 71⁄2 shot at 1235 fps (Modified choke)
Results: The 12-gauge delivered a 50.7 percent pattern with 202 pellets in a 30-inch circle at 40 yards. The 20 did just 39.6 percent with 149 pellets inside the circle. The 12 achieved slightly deeper penetration (2.875 inches vs. 2.5625) in gelatin at 30 yards, likely due to the higher muzzle velocity. The high-speed camera showed no statistical difference between the lengths of the shot strings, which averaged 55 inches for the 12-gauge and 57 for the 20 at 20 yards.
The Takeaway: I thought the 12 would win, but I hadn’t expected it to beat the 20 so badly. Out of curiosity we tested the 20-gauge with one size larger shot to see if we could improve its performance. With No. 6 shot the 20 delivered a huge 15 percent increase in pattern density. That gave us a bonus takeaway: If you want to tighten patterns (sometimes by a lot), shoot larger shot.
A 20-gauge is fun to handle and shoot, but when it comes to putting pellets on target efficiently, it loses out to the 12.
4. Is Steel Shot Suitable for Pheasants?

A growing number of pheasant hunters have to shoot nontoxic ammunition. Pheasants are tough birds and elusive cripples, so choosing the right shell matters, especially when you go from dense lead to lighter steel. In the field I have had no trouble killing wild birds with steel shot, but while dead is dead, I wanted to quantify the differences between steel and lead loads.
Test Loads:
– 12-gauge 11⁄8-ounce loads of Federal Prairie Storm No. 3 steel at 1600 fps (Modified choke)
– 12-gauge 11⁄8-ounce loads of Wing-Shok High Velocity No. 6 lead at 1500 fps (Modified choke)
Results: As expected, the hard steel pellets patterned tighter than lead (62.5 percent vs. 52.6 percent) inside a 30-inch circle at 40 yards. Nevertheless, the higher pellet count of the lead load meant more pellets in the circle: 128 hits, compared to 102 hits for the steel load. The lead pellets also penetrated 4.12 inches into the 30-yard gelatin, compared to steel’s 3.43 inches. The lead load had a shorter shot string (55 inches) at 20 yards than the steel load (61 inches).
The Takeaway: Even with advances in steel ammunition, lead is still superior. Usually hunters switching from lead to steel compensate for steel’s light weight by following the “rule of two” and going up two sizes in shot. Yet despite my choosing three sizes larger in steel and driving it 100 fps faster than the lead load, it didn’t perform as well as lead in the test. The “rule of two” should be the “rule of three or maybe four.” Steel 3s and 2s make the best pellet choice. Steel pellets, which remain round and fly true, patterned more efficiently than lead, resulting in tighter patterns. Given the lower pellet count and retained energy of steel, though, I would not go to a more open choke if switching from lead to steel. Still, modern steel loads are effective for pheasants.
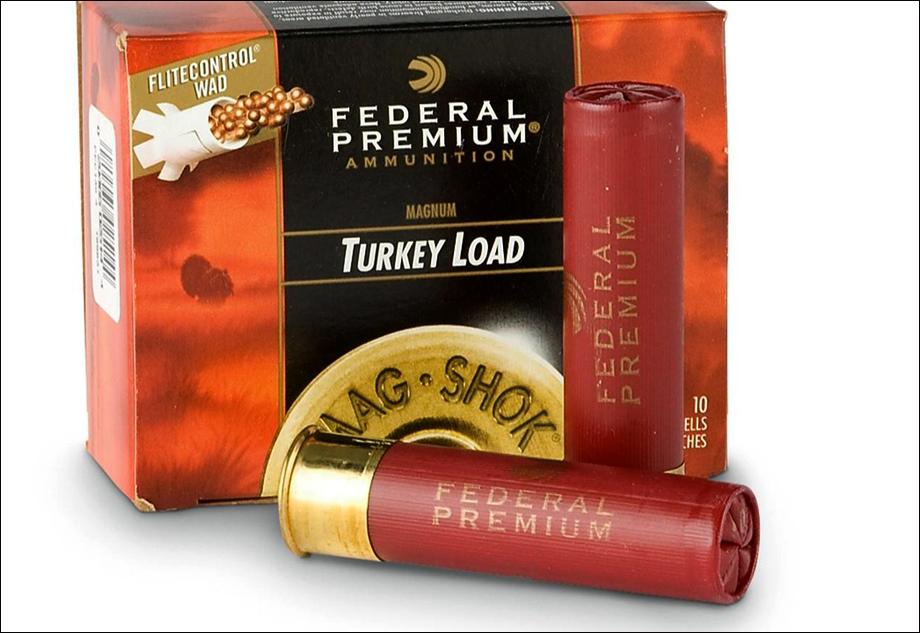
5. Are Premium Buckshot Loads Worth the High Cost?

One important lesson Brister learned was that hard shot loaded with ground plastic buffer protected the pellets from deforming in the barrel. Premium buffered magnum waterfowl loads clearly outperformed nonbuffered loads. But would this be true for the biggest pellets of all? Premium buck costs nearly $2 per shell, twice the cost of standard loads, so I wanted to see if it was worth the price.
Test Loads :
– 12-gauge, 3-inch, 15-pellet loads of Federal Vital-Shok buffered, copper-plated 00 buckshot at 1100 fps (Modified choke)
– 12-gauge, 3-inch, 15-pellet handloads of unbuffered, unplated 00 buck at 1210 fps (Modified choke)
Results: Premium buckshot averaged 12.4 pellets in a 30-inch circle at 40 yards, whereas unbuffered buck averaged 11 hits. The pattern diameter of the buffered load at 40 yards was 31.65 inches; the unbuffered load spread out to 36.89 inches. The unbuffered buck penetrated deeper (16.84 inches vs. 14.62 inches) than the premium, probably due to its higher muzzle velocity.
The Takeaway: There was a dramatic difference in the shape of recovered buffered and unbuffered pellets. I had thought the deformed, unbuffered pellets would string out farther due to increased air resistance and pattern much worse. That didn’t happen. Unbuffered buckshot tore uneven holes in paper, yet it penetrated deeply into the gelatin.
We did notice an odd phenomenon during this test. Occasionally two pellets would fly through the same hole in the paper or into the gel. With only 15 pellets in the pattern, the odds against that happening are very high—unless there is a drafting effect where a trailing pellet falls in behind a pellet in front of it, the same way race cars draft one another. You can’t rely on that happening, but when it does, the second pellet into the hole will penetrate almost twice as deeply as the rest.
Premium buckshot put roughly 13 percent more pellets on target. Whether that’s worth double the cost is a personal decision.
6. Which is Better for Turkeys: Lighter, Faster Loads or Heavier, Slower Loads?
 The trend to lighter, faster turkey loads made me wonder if heavy and slow loads would perform better. Theoretically, a lower-velocity load will pattern tighter than a faster load because the lower launch speed deforms fewer pellets, leaving more of them round to fly true. But at the same time, a lighter load should pattern tighter than a heavier load for the same reason: the more lead pellets on top of one another in a shell, the more pellets deform when that shell is fired.
Test Loads:
– 12-gauge, 3-inch, 13⁄4-ounce loads of Mag-Shok Lead High Velocity No. 5 shot at 1300 fps (Modified choke)
– 12-gauge, 3-inch, 2-ounce loads of Mag-Shok Lead No. 5 shot at 1150 fps (Modified choke)
Results: The 13⁄4-ounce load patterned more efficiently, putting 70.2 percent of its charge in a 30-inch circle at 40 yards, compared to 61.4 percent for the 2-ounce load. It also outpenetrated the 2-ounce load in gelatin at 30 yards, 4 inches to 3.65 (though the latter is certainly adequate to kill a turkey). In number of hits, however, the 2-ounce load narrowly won, 216 pellets to 209. Recoil is about the same.
The Takeaway: Essentially the test resulted in a tie, although the heavier load snuck a few extra pellets into the target area. Recoil from both shells was almost identical. I would favor the lighter load because more penetration, while it may not help, can’t hurt, either.
Looking at these results, however, I can’t help but wonder if a slower 13⁄4-ounce load wouldn’t pattern better than either of these. Unfortunately, “slow” is a tough sell to the American public, so unless you handload your own turkey ammo, you may never find out. It’s a tie, so choose the one that patterns best in your gun.
BONUS: Does Shot String Length Matter?
It matters some, but not for the reasons we think. During these tests, Federal engineers Erik Carlson and Adam Moser measured shot strings at 20 yards and extrapolated lengths for 40 yards. The longest shot string in our tests, the 66-inch .410 string, would be about 10 feet long at 40 yards. Match that against a bird flying 40 mph at 40 yards, as Brister simulated in his tests, and you will lose only a small percentage of pattern density, perhaps about 5 percent, not the 30 percent loss Brister saw with some 1976-era lead waterfowl magnums.
Brister believed long shot strings were more forgiving of error than short strings. If you were to overlead a target, he thought, the trailing pellets might still break it, so the longer the string, the greater the margin for error. In theory that is true, but practically speaking, the chance is very slim of a trailing pellet breaking a target. The disadvantage is that the longer the string, the slower the trailing pellets, and the less energy they’ll have on target.
Follow our FISHING BLOG
WEB RATES FISH HUNT CABINS PHOTOS
TESTIMONIALS BROCHURE HUNT BOOKLET


