RSS

Tag Archives: Wawang Lake

On Target: How to Make Your Own Arrows

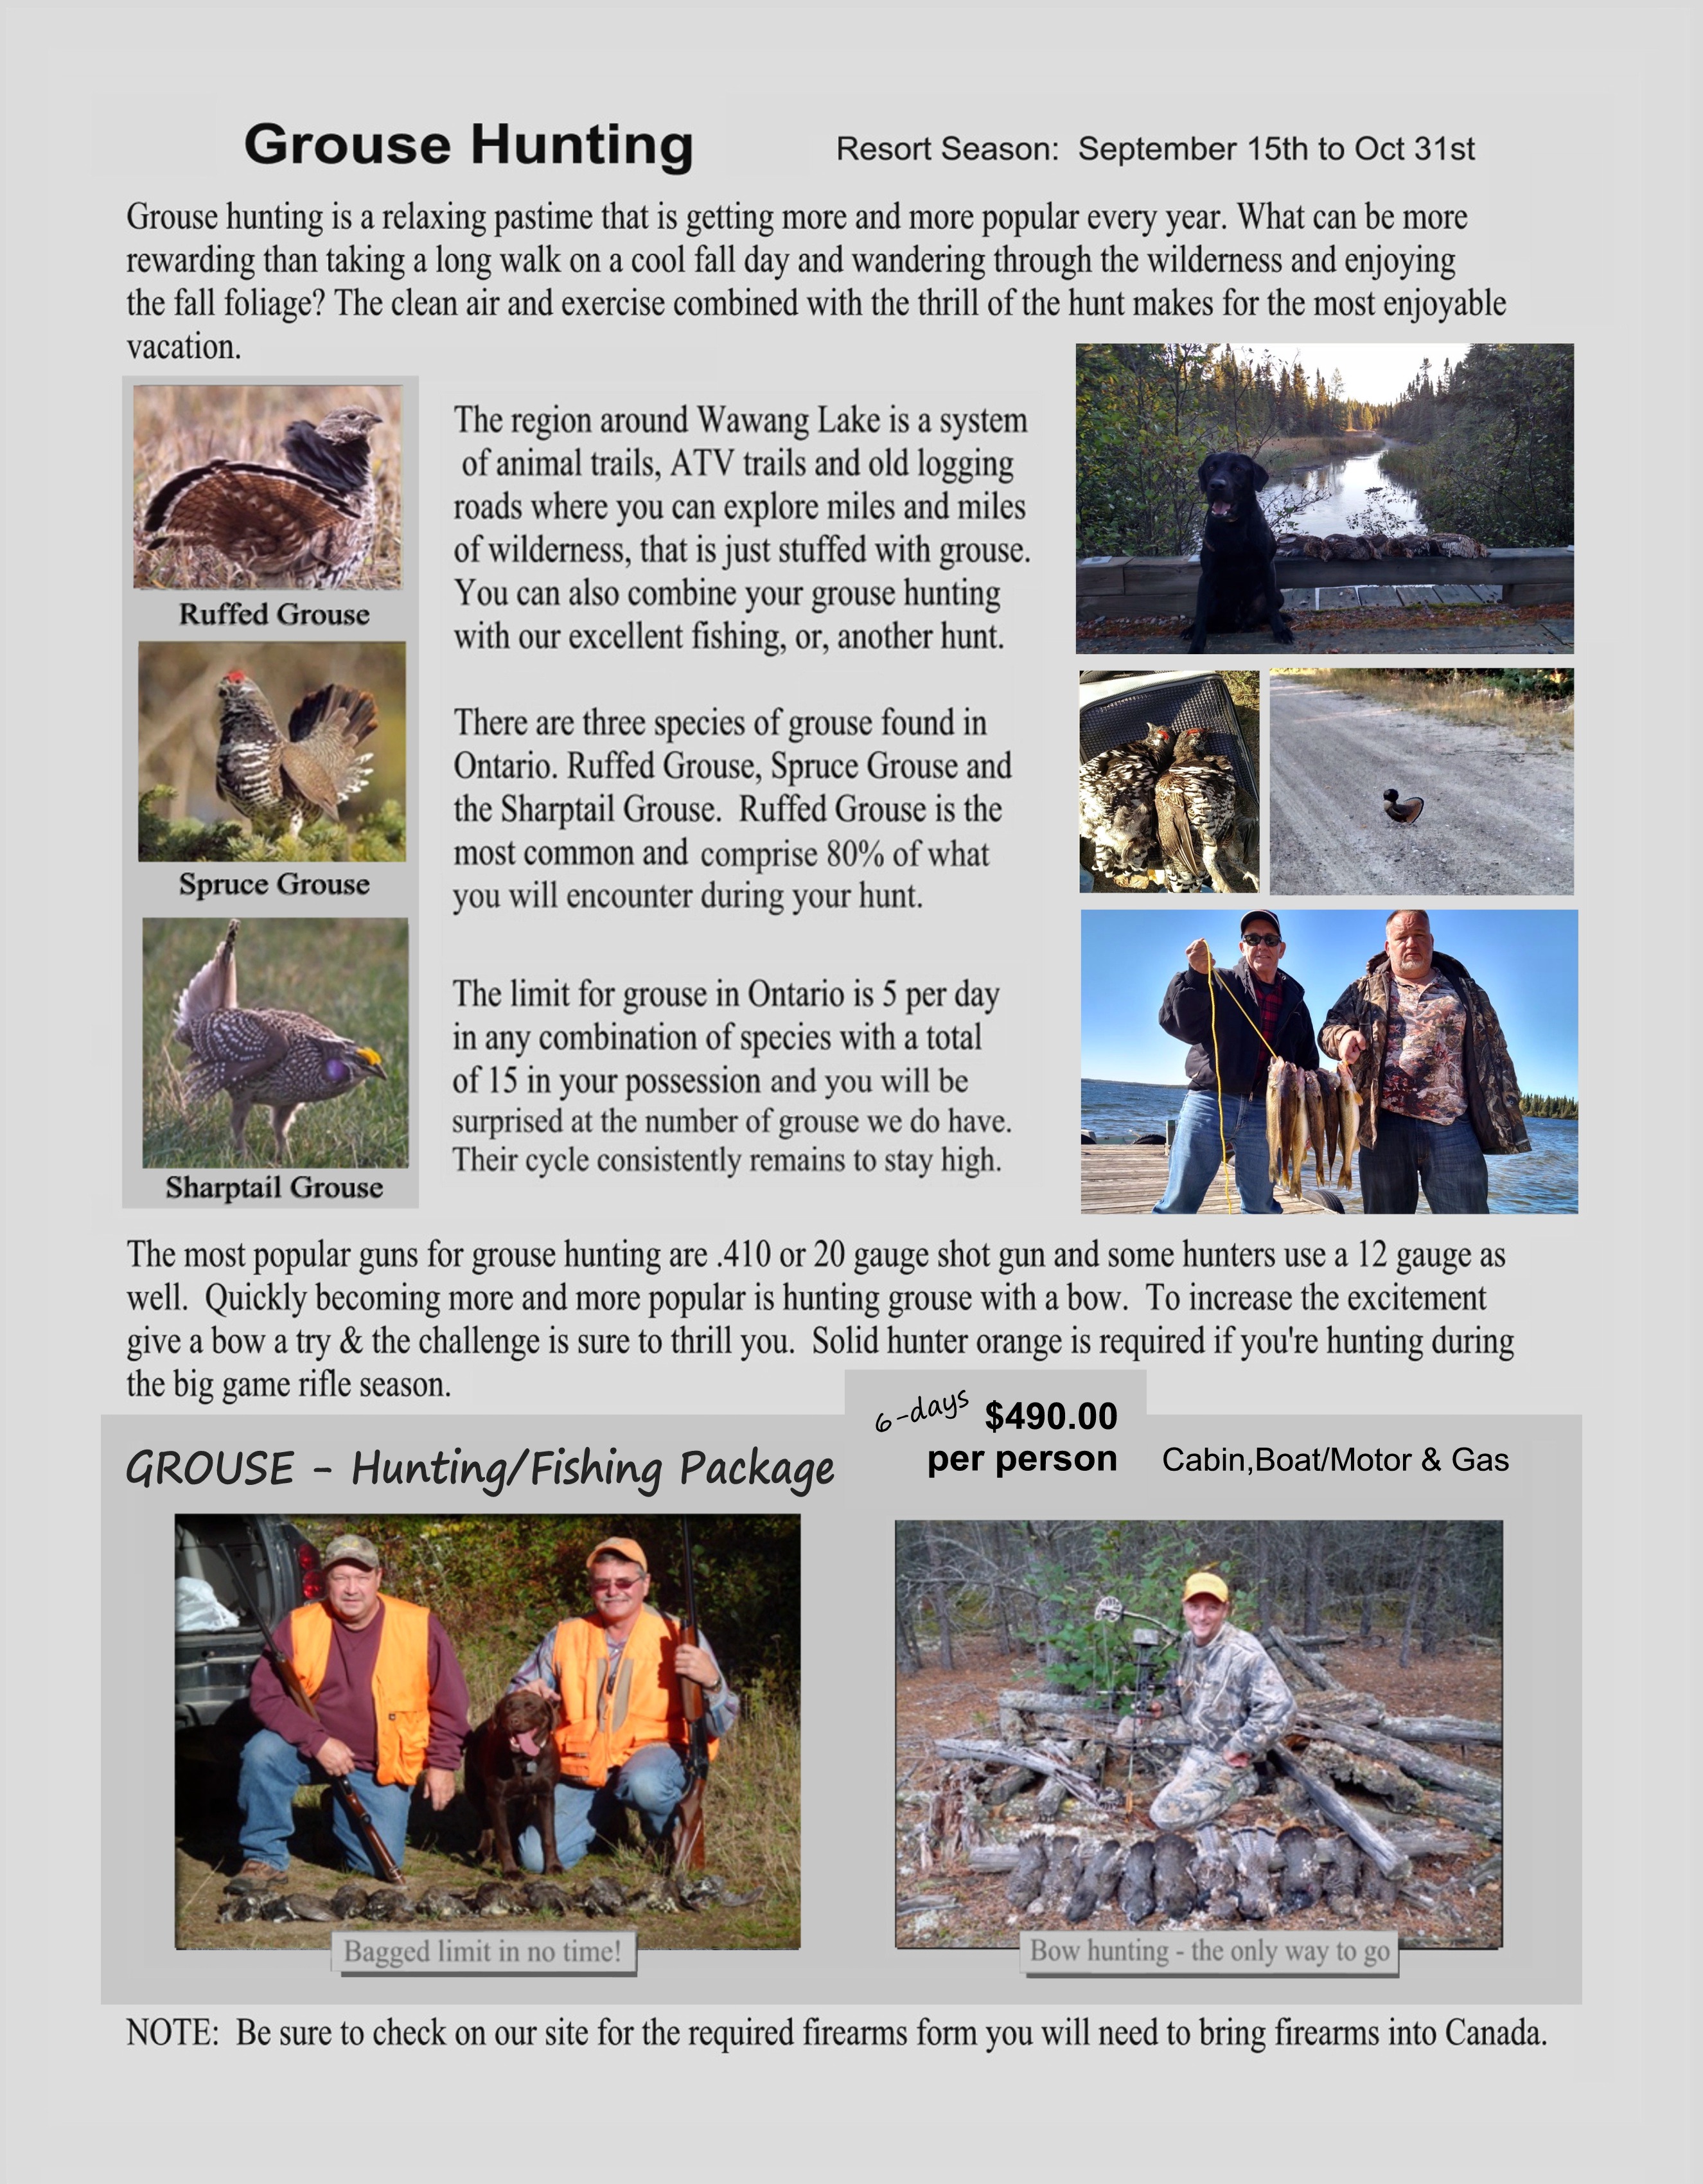
While doing some of my own research, we came across a fantastic article for all of you archers out there that have wondered about manufacturing your own arrows.

This article is reproduced from Edersbows.com, take some time to check them out 🙂 

arrows

Building your own arrows allows you to save about 5 to 1 0 dollars per dozen, but there’s an even better reason for building your own. You can experiment with all the components, with the various fletching styles and shaft sizes until you find the perfect arrow for your bow and your hunting or 3-D shooting requirements.

Building arrows is easy and fun, not to mention the satisfaction you’ll gain from taking game with arrows you’ve crafted yourself. Anyone can do it – and do it well. Armed with only a few basic tools and the information offered here, you’ll have no problem turning raw shafts into top-quality hunting arrows.

Nock Installation

nock
Year’s ago nocks were all glued on, now most arrows offer pressure-fit nocks that fit snugly but are turnable. Tunable nocks are definitely the way to go. These systems will make tuning a lot easier, and they hold up to more hard shooting than will glue-on nocks.

Assuming you aren’t going to paint (crest) your arrows, nock installation is the first step in the arrow building process. Use hot melt glue or epoxy when installing bushings into aluminum. When installing them in (or over) carbon shafts, use a rubber-based epoxy such as that available from Beman or Arizona Archery Enterprises (AAE).

Regular glue-on nocks should be pressed firmly into place (without glue) until after the fletching has been attached. When the arrow is finished you can rotate the nocks to the proper orientation so the fletching clears your rest and then glue them in place. Bohning Fletch- Tite works fine for this.

Apply The Fletching

fletching
You need a fletching jig, but it doesn’t have to be fancy. I’ve had good luck with the $20 plastic Martin jig I bought more than 10 years ago. Other good ones are made by Bohning, Bitzenburger and Grayling. You have three clamp options: left helical, right helical and straight

(no helical). For hunting and 3-D shooting, right helical is the most popular choice. If you’ll be using feathers, make sure to order feathers from the same wing as the clamp (right helical takes right wing). Vanes are manufactured straight and can be used with any clamp, so you don’t have to specify left or right when ordering.

One of the best fletching adhesive I’ve used for vanes is Fast-Set Gel made by AAE. This is a super-glue product that sets up in only 10 seconds allowing you to use a single-clamp jig and still fletch a dozen arrows in mere minutes. Fast-Set Gel will work on all shaft styles except AFC’s film-dipped carbon arrows, which require a traditional cement such as Bohning’s Fletch-Tite. Of course, Fletch-Tite will also work on aluminum arrows but takes about 10 minutes per fletching to set-up before you can remove the clamp. Fletch-Tite is still the best choice for feather fletching, however.

Place your fletching in the clamp so that its back edge will be about 3/4 inch ahead of the nock taper or nock bushing on your arrow. Adjust the back of the magnet on your jig (the magnet holds the clamp in place while the glue dries) inward or outward until the tail of the fletching sits squarely on top of the arrow. Next, adjust the forward end of the magnet to achieve the desired amount of helical. Easton’s technical representatives recommend four to five degrees of helical. I use a bit more myself – probably closer to seven degrees – but this is only on large diameter aluminum arrows. On smaller diameter carbon arrows I stay closer to Easton’s standard.

When using a straight clamp, (as opposed to a helical clamp) you don’t have as much lee-way and must either install your fletching perfectly straight or with a very slight off-set.

After your fletching is installed, apply a small dab of adhesive to both ends of each for a little added insurance against tearing loose.

You have more freedom to experiment with your fletching style and degree of helical than with any other aspect of arrow building, but it’s still best to observe a few general ground-rules. When making aluminum arrows for hunting, stick with four to five inch fletching. Five inch is a bit better because (in theory at least) it offers a small amount of added stability which can make a difference when shooting broadheads.

Carbon arrows, because of their smaller diameter, work best with shorter fletching (four inch is a good starting point) or you can run into a contact problem when trying to pass long helical fletching through the narrow gap in your rest. You can also experiment with various fletching orientations, such as 70/110 degree four-fletch, (you make this change by inserting a different indexing template into your fletching jig). But the basic 120 degree, three-fletch will do just fine under almost every shooting situation.

Cutting Arrows To Length
Draw an arrow and have someone mark it about a half to 3/4 inch in front of the rest. Cutting arrows is easy with the right equipment, but with the wrong equipment it can be a real headache. For limited quantities of aluminum arrows you can get by with a small rotating pipe cutter. I’ve done it a few times, but I’ve also made some pretty rough cuts, and basically ruined some arrows, in the process. You’re far better off pooling your money with a couple of buddies and getting an electric cut-off tool. You can also take your arrows to a pro shop (that’s equipped with an electric cut-off tool) to have them sized – usually for a price.

Installing Inserts and Outserts
Inserts and outserts (outserts are used with some types of carbon arrows) shouldn’t be taken for granted. Consistent accuracy with broadheads can be difficult to achieve when these components fit loosely. Inserts and outserts should install without any free-play. Usually you don’t have too many options with outserts – you get what the arrow maker offers – but you do have options with inserts. I’ve had good luck with aluminum inserts from Easton and Saunders and composite inserts from AAE. Inserts should have a light press-fit with the inside of the shaft so that each broadhead you screw in will line up perfectly with the shaft.

Aluminum inserts used in aluminum or ACC carbon arrows should be installed with hot-melt glue. Composite inserts in aluminum work best with a rubber-based epoxy, and the same applies for aluminum into carbon (Beman ICS or Gold Tip Graphite XT arrows) or when installing metal outserts on conventional all-carbon shafts. When you’re finished you can install a broadhead and spin test your arrows to make sure the inserts are properly aligned.

Take some time to visit http://www.eders.com/ to view their catalogue of parts and equiptment to assist you in your build.

lead_materials

Armed with the information above, you could now have a weekend hobby 🙂


Follow our FISHING BLOG

WEB   RATES     FISH    HUNT    CABINS    PHOTOS
TESTIMONIALS    BROCHURE    HUNT BOOKLET

Enter your email address to subscribe to this blog and receive notifications of new posts by email.

← Back

Thank you for your response. ✨

Email Me....


Tags: , , , , ,

8 Ways to Harness Solar Energy

So much energy, so few solutions

1

The sun is the biggest source of renewable energy.

Solar power has become fairly pedestrian since the first photovoltaic cells came out of the lab in the 1950s. Today, utility-scale solar farms soak up the sun and photovoltaic panels dot rooftops across the world. The power generation is finding its way into transportation, too, alongside other clean-burning fuels like hydrogen. Just a few years ago, the Solar Impulse prototype plane flew nonstop without any fuel from San Francisco to New York. And companies like Toyota are looking to bring hydrogen cars mainstream.

Crazy Solar Power Plants

Crazy Solar Power Plants

“The U.S. was really the pioneer of the whole global solar photovoltaic industry,” said Juris Kalejs, an IEEE member and CTO of the Lowell, Massachusetts-based solar developer American Capital Energy. Having worked in photovoltaic technology development for more than 30 years, Kalejs has seen wild ideas come and go. The energy crisis of the 1970s spurred dozens of pie-in-the sky ideas, he said. But that hasn’t stopped people from innovating. Here’s his grounded take on highly unusual ways to harness solar power today.

Andre Broessel designed glass spherical lenses filled with water that act like solar concentrators.

The Los Angeles-based startup V3Solar made the news rounds last year with its literal spin on solar. Slick renderings showed a design for deep blue solar cells in a cone shape that could rotate. The company says they want to take photovoltaics from flat and static to 3-D and dynamic. A new video V3Solar put out this summer had more details about how its spinning mechanism could maximize energy generation.

Kalejs said he said he thought the setup could work but he was skeptical about the complexity. “It looks like something that’s a nice decorative piece you might find in a fountain,” he said. The company said it would show its prototypes to potential investors with a non-disclosure agreement.

Other designers are imagining different shapes for traditionally flat solar panels. Going rounder could mean capturing sunlight from every possible direction. Last year the Japanese optics company Kyosemi launched Sphelar Power to manufacture micro-spherical solar cell beads from discarded silicon and electrodes that are wired into a mesh. André Broessel, an architect at solar architecture company Rawlemon in Barcelona, designed glass spherical lenses filled with water that act like solar concentrators both large and small.

Kalejs called Broessel’s idea a neat one that would appeal to consumers but pointed to companies attempting a similar technology with 20-foot-diameter solar concentrators. “It’s a very tricky system to make and you need to make it on a large scale to make it cost effective,” he said.

Minuscule solar panels placed on microbes could create a chemical reaction akin to artificial photosynthesis

Minuscule solar panels placed on microbes could create a chemical reaction akin to artificial photosynthesis

Scores of scientists are working on artificial photosynthesis by developing systems that chemically convert sunlight, water and CO2 into oxygen and plant fuel. Unfortunately, photosynthesis has less than a percent efficiency versus 20 percent to 30 percent for regular solar cells, Kalejs pointed out. The risks with artificial plants and microbes are also quite high because a disease or fungus could wipe everything out.

British researchers from the University of East Anglia announced earlier this year that they’re working on artificial photosynthesis by placing minuscule solar panels on microbes in an effort to create hydrogen for fuel. Kalejs said he found their approach interesting and added that he’s attended National Science Foundation meetings where attendees discussed putting photosynthetic material on top of a solar cell. “Everybody’s been looking for a boost,” he said.

 Reusable peel-and-stick solar cells can be made easily and affixed to just about anything solid.


Reusable peel-and-stick solar cells can be made easily and affixed to just about anything solid.

Effective transparent and thin-film solar cells have been on the technology wish list for a long time. Several companies have already started manufacturing flexible solar panels but rigid ones remain more affordable and easier to produce, resulting in high quality. Earlier this year Stanford University and the U.S. National Renewable Energy Laboratory came up with reusable peel-and-stick solar cells that can be made easily and affixed to just about anything solid: toys, helmets, transistors and even business cards. The resulting power is still relatively small, though.

Kalejs cautioned that sunlight breaks down materials made with polymers, making the technology unstable. “It’s a short-life product right now,” he said. “The organic solar cells probably wouldn’t last more than a year or two, if that long.”

Bottle Charger is a way to recharge cell phones using a water bottle filled with boiling water and a mini-turbine

Bottle Charger is a way to recharge cell phones using a water bottle filled with boiling water and a mini-turbine

One person’s trash represents solar tech treasure for someone else. Last year blogger and tech writer Ryan Matsunaga posted step-by-step instructions on how to convert a water bottle into a solar lantern for $2. In February, Kenyan designers launched a Kickstarter campaign around the Bottle Charger, a way to recharge cell phones using a water bottle filled with boiling water and a mini-turbine. Although the initial prototype simply required a temperature differential, the designers hoped to integrate a small solar dish that could heat water with sunlight continuously during the day.

“I have no idea how cheap or stable it is,” Kalejs said of the Bottle Charger idea. “I guess you’d say, well if it works, use it.”

Solar-powered wearables will need to get more durable if they're going to be practical.

Solar-powered wearables will need to get more durable if they’re going to be practical.

Solar technology’s sleek lines and deep colors are tempting to designers who have incorporated solar cells into purses, necklaces, jackets and mini-dresses. That technology tends to be more high fashion than high function. Charging a phone in a jacket that has a solar power component can take hours. Solar-powered clothing companies have come and gone. Kalejs said that organic solar cell material wears out in a few years so even if the fashion looks timeless, the tech isn’t. He remembered seeing a company that turned spherical solar beads into jewelry and said he can still see how it would appeal to consumers.

Solar arrays could be installed in the open land than runs alongs roads. Oregon Department of Transportatio

Solar arrays could be installed in the open land than runs alongs roads.
Oregon Department of Transportatio

Roads and highways are a natural lure for solar technology innovators. Asphalt does a great job at absorbing and storing heat. Plus there’s so much of it around already — the infrastructure is there. Several years ago engineers and chemists at the University of Rhode Island created a project to develop ideas for harvesting solar heat from roads. Their suggestions included placing flexible photovoltaic cells on concrete highway dividers and installing water pipes in asphalt. At the same time, the company Solar Roadways wants to embed solar panels directly into roads.

Kalejs was highly skeptical of that, calling it a poor use of solar modules. However, solar modules could be put in conventional arrays beside the road, he said, as they’ve done in Oregon. There’s no shortage of land for that.

Follow our FISHING BLOG

WEB   RATES     FISH    HUNT    CABINS    PHOTOS
TESTIMONIALS    BROCHURE    HUNT BOOKLET

Enter your email address to subscribe to this blog and receive notifications of new posts by email.

← Back

Thank you for your response. ✨

Email Me....


Tags: , , , , , , , , ,

Sharpen Your Bow Skill During the Off Season!

bow-hunting-wawang-lakeWe practice with our bows all summer long, but after opening day its easy to get wrapped up in the hunting and forget about practicing. But even if you’re spending your time in the field and can’t hit the archery range every day, you can still keep your edge. Shooting in hunting situations is obviously different from target shooting. In the real world, weather conditions, shot angles, brush and other obstacles can impact your shot. Also, when the time comes to take a shot during a hunting situation you’re usually either stiff and cold from sitting in a treestand or sucking wind from running up a hill. All this combined with the fact that you must make a clean shot with the first arrow makes it all the more important to keep your shooting skills sharp. Here are a couple tips.

Practice Drawing
One of the biggest challenges to making a “cold shot” is that often the muscles I use for properly drawing my bow are stiff. The simplest way to cure this is to periodically pick a target, draw your bow, aim, hold, and let down your draw. This keeps you loosened up, plus drawing and aiming without actually shooting helps you focus on the target.


Practice Shooting

Although just drawing and aiming will help a lot, the single biggest help is to actually shoot while out hunting. A common practice among traditional shooters is to carry one or two blunt pointed arrows in your quiver so that you can stump shoot in your down time. Stump shooting is fantastic for keeping you warmed up, but unlike just drawing, actually completing your shots will bring your release into play, as well as give you all sorts of angles and situations to practice.

Small game is even better than stumps (grouse and rabbits taste a lot better too). Grouse can be deceivingly tough to hit. You want to aim for the base of the neck or the head. Sometimes they flush at the shot, but grouse will go in the direction that their head is pointing, so if you use a snaro point, you can either take their head off or hit them in the body as they flush. The best thing about grouse is they often give you extremely challenging shots, and if you can become consistent at taking them, you will be ready for the big game (make sure to check your local regulations before taking any small game with a bow).

grouseandy

Follow our FISHING BLOG

WEB   RATES     FISH    HUNT    CABINS    PHOTOS
TESTIMONIALS    BROCHURE    HUNT BOOKLET

Enter your email address to subscribe to this blog and receive notifications of new posts by email.

← Back

Thank you for your response. ✨

Email Me....


Tags: , , , , , , , , ,

Tips on Choosing The Best Field Knife

It doesn’t matter how many knives you have at home. The one you reach for when you’re in the woods—to gut a deer, cut brush, carve a fuzz stick—that’s your field knife, your everyday companion. There’s no one perfect model, but here’s how to pick the ideal features for you.
1) Fixed or Folder?

Field-Knife-2 Field-Knife-5
The traditional choice, a fixed-blade knife is stronger than most folders. With no moving parts, it’s virtually fail-safe, and cleaning is as easy as wiping off grime and wiping on oil. If you need a deep belly for skinning big game, fixed is the primary choice due to the challenge of storing a wide folding blade inside its handle. A folder, on the other hand, makes everyday carry simple: Just pop it in your pocket. The increasing popularity of pocket-clip folders has spawned huge innovation in materials and designs, so the options are breathtaking. Bottom line: Fixed or folder, you can’t lose. But you have to choose.
2) Steel Yourself

Field-Knife-3_0
Basic steel is just iron and carbon. But there are hundreds of alloys. The least you need to know is that the more carbon, the harder the blade and the better it holds an edge—but too much can make a blade brittle. Also, adding chromium prevents rust (stainless steel usually has at least 12 percent), but it can soften the steel. It’s a balancing act. Here’s a breakdown:

Non-Stainless Steel: It rusts easily but makes a great blade if you take care. High-carbon examples (1095, D2) really hold an edge. A few are both hard and tough (A2, CPM 3V, 8670M).

​Stainless Steel: If you want low maintenance, this is the way to go. But low-carbon versions (18/8, 420, 440, 440A, AUS-6) can be too soft to get or keep a fine edge. More carbon or a harder alloy is better (440B and C, AUS-8 and 10, 8Cr14MoV, 154CM).

Powdered Steels: The newest stainless alloys (S30V, Elmax, M390) are made of powderlike granules that are heated to form very hard steels that take a wicked edge. They pretty much have it all—​­corrosion resistance, hardness, and strength. Naturally, you pay for it.

3) Get the Point

Field-Knife-4
Most field knives have a drop point or clip point, either of which may be combined with a deeper belly for skinning. The drop point is ideal for field dressing game without slicing innards. Its thicker tip also helps with separating joints and with heavy camp chores. If your hunting knife will double as a fish cleaner and camp-kitchen slicer, the finer clip point is the better choice, and it’s fine for gutting game as long as you’re careful with the tip.

4) Find the Grind

Field-Knife-5
Likewise, most field knives hew to one of two grinds: hollow or flat. A hollow-ground blade has a concave shape, as if material has been scooped out of the blade’s thickness. It’s easy to resharpen and best for shallow cuts, such as field dressing, cutting hide, and simple camp chores. A flat-ground blade is the more common choice; it is tougher, holds its edge better, and excels at deeper cuts, working around sinew and bone, and chopping food at camp.

Now that you know what to look for, check out our field knife gear test to see which brands of fixed and folder blades are worth their metal.

Follow our FISHING BLOG

WEB   RATES     FISH    HUNT    CABINS    PHOTOS T
ESTIMONIALS
    BROCHURE    HUNT BOOKLET

Enter your email address to subscribe to this blog and receive notifications of new posts by email.

← Back

Thank you for your response. ✨

Email Me....


Tags: , , , , , , ,

Field Dressing a Black Bear

With the bear hunt just around the corner, we will cover the basics 🙂  Pictures have been withheld due to graphic nature.

Instructions

imagesFG3W4IGS 
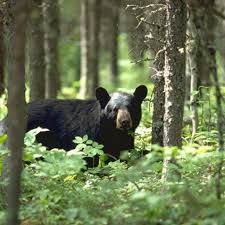
1. Clear an area surrounding the black bear. Make the area large enough to allow room to move around and roll the animal away from the entrails. The lowest part of the ground should be reserved for the entrails. Move the bear onto its back. Spread the rear legs and either have your partners hold them apart or secure them with ropes. Repeat with the front legs.

  1.  2. Insert one of your knives in the cavity at the base of the bear’s throat. Cut the blood vessels with a deep, crosswise motion to open the jugular vein and bleed the animal. Move the bear so the blood will flow away from it and clear the ground as needed.
  2. Cut the skin in a straight line from the breastbone — located just below the rib cage — to the base of the bear’s jaw. Cut the muscles along this area to the bone to expose the throat and windpipe. From the same starting point, cut the skin in a straight line down to the anus. Some areas require hunters to leave the genitals for sex identification; cut around the genitals slightly to preserve them.
  3. Split the breastbone.  This can be done with a bone saw, hack saw or a couple of axes.  If you choose to use axes, hold one axe against the breastbone and hammer it with the other axe; this will break the bone from the base of the rib cage up to and through the top ribs. Open the chest by pulling the front legs apart. Cut the windpipe and gullet close to the head. Lay them in the chest cavity for later.
  4. Cut through the abdominal muscles; start at the base of the rib cage. Take care not to puncture the intestines, the stomach or the bladder; doing so could taint the meat. Sever the muscles down to the pelvic bone. Enlist your partners to hold open the bear so you can work more smoothly.
  5. Break the pelvic bone by using the same technique implemented the breastbone. Do not cut the urinary tract as it may contaminate the meat. Start on one side of the chest cavity and use your knife to cut the diaphragm from the chest wall. Start at the base of the ribs and slice as far back into the cavity as possible. Have your partners pull the organs to the side so you can see and cut more easily. Repeat the process on the other side of the black bear.
  6. Cut the intestines and rectum from the split pelvic bone to where the rectum meets the muscle tissue at the anus. Cut a circle in the skin at the base of the tail; cut 1 to 2 inches from the anus. Cut the muscles to the top of the pelvic bone to free the anus and rectum. Pull the lower intestine, rectum and anus away from the cavity and hold clear. You must not puncture or cut the urinary tract or intestines.
  7. Hold the parts, roll the black bear away and allow the intestines and stomach to spill onto the ground. Grab the windpipe to pull the lungs and heart out onto the ground. Cut any remaining diaphragm tissue to free the organs. Complete the field dressing by draining as much blood from the bear as possible and wiping the body cavity with cloth rags to clean. Do not use water. At this point your main concern becomes to cool the cavity and prepare for transport which can be done by propping the cavity open with a tree branch.
    2 bear sized 

    Proper field care will ensure less weight and trouble with removal and transportation from the hunt site.

     For more information on black bear hunting, visit us at http://www.wawangresort.com

    Follow our FISHING BLOG

    WEB   RATES     FISH    HUNT    CABINS    PHOTOS
    TESTIMONIALS    BROCHURE    HUNT BOOKLET

    Enter your email address to subscribe to this blog and receive notifications of new posts by email.

    ← Back

    Thank you for your response. ✨

    Email Me....


Tags: , , , , , , ,

GROUSE Hunting Rates

Bookonline
pg 4 grouse

Bookonline

Follow our FISHING BLOG

WEB   RATES     FISH    HUNT    CABINS    PHOTOS
TESTIMONIALS    BROCHURE    HUNT BOOKLET

Enter your email address to subscribe to this blog and receive notifications of new posts by email.

← Back

Thank you for your response. ✨

Email Me....


Tags: , , , , , , , , ,

A Moose Hunt Review

So our 2015 moose hunt has come and gone again with fantastic results!  Due to reduced tag number across the province, we were concerned that the hunt would be sparse.  It couldn’t have been further from the truth.  This year we harvested 1 mature bull, 1 cow and a calf, 2 cows and 2 other calves spotted!  There was sign evident everywhere around us and made for and excellent year of hunting that excited all our hunters!

emms moose

With both new groups in camp and some are Wawang Veterans.  It’s great to see how groups work together to help the overall success of each other on the  whole.  As usual, the hunt was a complete community effort and a great outdoor experience for all.

We are proud to keep our tradition of excellence strong and look forward to 2016!

Cow_Moose_4 (3)

We have limited availability for 2016.
Reserve your spot early for great accommodations during your next moose hunt in 15A or 15B.

Moosehuntersjpg

Book Now

Follow our FISHING BLOG

WEB   RATES     FISH    HUNT    CABINS    PHOTOS
TESTIMONIALS    BROCHURE    HUNT BOOKLET

Enter your email address to subscribe to this blog and receive notifications of new posts by email.

← Back

Thank you for your response. ✨

Email Me....

 
Leave a comment

Posted by on April 11, 2016 in moose, Wawang Lake Resort


Tags: , , , , , ,

Backpackers Checklist

backpack2 

The Means of A Check List

Packing a backpack seems like an easy task, until you are on the trail and forget one of the most essential items. We have prepared this infographic as well as the corresponding text to help you always pack exactly what you need. So go ahead and check it out. If you want to put it on your site there is code at the bottom as well.
2

backpack

Follow our FISHING BLOG

WEB   RATES     FISH    HUNT    CABINS    PHOTOS
TESTIMONIALS    BROCHURE    HUNT BOOKLET

Enter your email address to subscribe to this blog and receive notifications of new posts by email.

← Back

Thank you for your response. ✨

Email Me....


Tags: , , , , , , , ,

Shoot it! : A picture is Worth a Thousand Words!

Shoot it! : A picture is Worth a Thousand Words!

Wawang has always been synonymous with great trophies.  We have also be recognized as one of the most photographed filled brag book holders amongst our peers.  Believe me, when you have this much to be proud of, you want the world to see it 🙂

This slideshow requires JavaScript.

It is for this reason that we announce that we can now be found on Instagram!  With so many photos of successful fishing and hunting, it just makes sense to share it with the world.

We have always lived by a principal here: Show me, don’t tell me!
Join us and see what we can show you…..because remember, what you show, shows what you know!


Follow our FISHING BLOG

WEB   RATES     FISH    HUNT    CABINS    PHOTOS
TESTIMONIALS    BROCHURE    HUNT BOOKLET

Enter your email address to subscribe to this blog and receive notifications of new posts by email.

← Back

Thank you for your response. ✨

Email Me....


Tags: , , , , , , , , , , , ,

Shot-Gunning

One of the consolations of getting older is getting better at some things, like shooting a shotgun, for instance. On the other hand an older person would lose a game of one-on-one basketball or a footrace with 30-year-old person, and we all know who would win the shooting contest.

imagesAV9NQ04Y

What that means is, if you’re a shot-gunner, you probably have a list of days gone by you wish you had back for a do-over. You know, those days in the field when everything was perfect, the stars aligned, and . . .  you couldn’t hit a thing.

In those days we shot only traps for target practice and we hunted a lot of upland birds.  We were good shots on flushing game, but we had no clue how to lead birds when it came to pass-shooting. They are two very different shooting skills.

imagesA0ZB103T2We were setting up in a snowy field with a small spread of full-body decoys. Layout blinds hadn’t become universally popular yet and we were sitting in popup blinds that were square and about the size of a washing machine. Across the road from us was a mass of 50,000 geese that are called the Glob.  In the morning the whole Glob rose up in a seething ball, and as it whirled around like the flakes of a snow globe, strings of geese would split off from it on their way out to feed. At first, geese ignored our spread. The rest of our party grew impatient and went off to try somewhere else, leaving just one and the guide to guard the decoys.

Then the geese started flying over us. They didn’t want in to the decoys, but we were right on the flightline. The snows came in a near endless stream of ones, twos and little bunches about 35 yards up and directly over us. It didn’t even bother them if we left the lids of our popup blinds open. It was as perfect a setup as a pass-shooter could hope for.   We both shot as the guide, Dave, tried to coach on the right leads.  We went through the first box without cutting a feather and was into the second when finally a lone goose came by about ten feet off the ground. That shot had to made, and at the end of the morning, that one bird was all to show for the big pile of empty cartridges on the ground.

imagesE3PFZUR7

We had been on quite a few snow goose hunts and of course,  all of them unsuccessful. This was the best chance to shoot a bunch of them and can still see those geese clearly, flying at us in line. We yearn to go back and have that day over again, knowing what we know now.

Follow our FISHING BLOG

WEB   RATES     FISH    HUNT    CABINS    PHOTOS
TESTIMONIALS    BROCHURE    HUNT BOOKLET

Enter your email address to subscribe to this blog and receive notifications of new posts by email.

← Back

Thank you for your response. ✨

Email Me....


Tags: , , , , , ,