RSS

Tag Archives: diy

How to Make Your Own Scent-Free Deodorant

Think organic deodorant isn’t for you? It’s actually perfect for deer hunters, because it battles sweat and odor, and gives off no unnatural scent of its own. Buy ingredients in bulk and make three 2.5-ounce sticks—a season’s worth—for only $2 each. Here’s how.

scentstick

What You’ll Need

● 1⁄4 cup coconut oil
● 2 Tbsp. shea butter
● 2 Tbsp. cocoa butter
● 1⁄4 cup beeswax pellets
● 3 capsules 400-IU Vitamin E
● 21⁄4 tsp. baking soda
● 1⁄4 cup organic arrowroot powder
● 2 capsules Vitacost Probiotic 10-20

The Brew 
Heat a small saucepan of water and remove just before boiling. Combine coconut oil, shea butter, cocoa butter, and beeswax pellets in a mason jar, and place it in the hot water, double-boiler style, until melted. (Warning: If you’ve ever had a severe reaction to a bee sting, don’t handle beeswax.) Leave the jar in the bath and add the Vitamin E capsules, baking soda, arrowroot powder, and probiotics, which introduce good bacteria into the skin to battle the bad stuff that causes BO Stir gently until mixed well.

The Cure
Pour the warm mixture into empty, used stick-deodorant containers, new containers (sold online), or lined muffin tins, and let harden overnight. Then, perform your own sniff test: The only scent noticed is a trace of beeswax.

Follow our FISHING BLOG

WEB   RATES     FISH    HUNT    CABINS    PHOTOS
TESTIMONIALS    BROCHURE    HUNT BOOKLET

Enter your email address to subscribe to this blog and receive notifications of new posts by email.

← Back

Thank you for your response. ✨

Email Me....


Tags: , , , , , , ,

Backpackers Checklist

backpack2 

The Means of A Check List

Packing a backpack seems like an easy task, until you are on the trail and forget one of the most essential items. We have prepared this infographic as well as the corresponding text to help you always pack exactly what you need. So go ahead and check it out. If you want to put it on your site there is code at the bottom as well.
2

backpack

Follow our FISHING BLOG

WEB   RATES     FISH    HUNT    CABINS    PHOTOS
TESTIMONIALS    BROCHURE    HUNT BOOKLET

Enter your email address to subscribe to this blog and receive notifications of new posts by email.

← Back

Thank you for your response. ✨

Email Me....


Tags: , , , , , , , ,

Make A Vault From PVC

Whether you’re storing beans, bullets, or bars of gold, you’ll need a secure place to keep these potential survival currencies. For a quick solution, you could purchase some expensive olive-drab burial vaults, but does it really matter what color they are if they’re buried in the ground? Follow these easy steps, and you can put together a PVC pipe vault for $15 or less.

pcv1

Materials
First, you’ll need a length of PVC drain pipe. Many stores sell pre-cut two-foot sections, but, if you’re planning to make several of these, it’s cheaper to buy an eight footer and cut it down. For each vault you’ll also need an end cap, a female threaded coupling, and a plug, plus some primer and PVC cement. Four-inch pipe and fittings give you a lot more interior room than three-inch line, but the cost of four-inch fittings is roughly double that of three-inch material.

Construction

Apply your purple primer around each end of the pipe, inside the cap, and inside the female fitting (but not on the threads!). The primer dries very quickly. Once dry, wipe the cement around one end of the pipe and inside the end cap. Do this quickly, it sets up fast! Slide the cap on and press it onto the ground to force the cap on tightly. If you don’t apply pressure for 10 to 15 seconds, the reaction from the cement, primer, and plastic will actually push the fitting apart. Repeat this process with the female fitting, but push on it with the threaded section facing upward (solid cap on the ground again). This keeps cement from running down into the threads.

pcv2

Let the fumes clear out for a day before storing any food in the vault. Otherwise, wait a few hours for the cement to dry. Once you have filled your vault, screw the plug in place tightly. If you’re burying it in a damp area, use a little Teflon tape around the threads. Use pipe dope compound on the threads if you are burying it in a wet location. Use a permanently glued cap on each end if you are submerging the vault in water.

Burial
After you fill your prepper-style treasure chest with loot, bury it in a smart, secure, and memorable location. Fake pet graves, flower beds, and under a mean dog’s doghouse are a few of my top recommendations. You can either bury it horizontally or, if you have a post hole digger, drive a hole straight down and drop it in. The vertical option means minimal surface disturbance and a smaller profile if someone comes along with a metal detector. Just make sure you can find it!

Follow our FISHING BLOG

WEB   RATES     FISH    HUNT    CABINS    PHOTOS
TESTIMONIALS    BROCHURE    HUNT BOOKLET

Enter your email address to subscribe to this blog and receive notifications of new posts by email.

← Back

Thank you for your response. ✨

Email Me....


Tags: , , , , ,

ID the Morel – Spring’s Best Mushroom

When the spring gobbler season and shed hunting is in full swing, you’ll probably spending a lot of time in the woods looking at the ground for antlers and turkey sign. Something else you ought to be on the lookout for is a weird little pitted thing that looks like a small, lumpy, brown brain. This time of year, that organism is most likely a common morel mushroom, a popular item of spring foragers. Here’s how to properly identify this delectable fungus.

mush

ID a Morel
The common morel (Morchella esculenta) is a prized wild mushroom that grows in forests and shady areas, primarily in April and May. These mushrooms are usually 2 to 4 inches tall. The tan, gray, or brownish colored head with irregular pitting is well camouflaged against leaf litter. If you cut the mushroom completely in half, it should be entirely hollow inside. Look carefully for the cone-shaped head to be fully fused to the stalk at the lower end.

mush2If the head is only attached at the top, and hangs like a skirt, you are probably looking at a false morel, which can be very poisonous. False morels (the genera Verpa and Gyromitra) usually grow in the summer and fall, which are great times to avoid anything resembling a morel. Another way to properly ID an edible morel is to make a spore print, which, for a common morel is yellowish. Here’s how do that.

Make a Spore Print
1. Handle your foraged mushrooms carefully, and assume that any unidentified mushroom is deadly. Get the whole thing if possible, but the cap is the part you need for spore prints.

2. Wrap each individual mushroom in wax paper or a piece of aluminum foil for transport. Plastic bags will make them sweat, and putting multiple mushrooms in a bag can create confusion.

3. Place the mushroom cap gills-down on a piece of white paper and set a cup or bowl over it. Allow it to sit several hours or, better yet, overnight.

4. Remove the cover and lift the mushroom cap. Observe the color of the spores that were deposited, and use that color for identification. Some mushrooms deposit white spores, which are hard to see on the white paper. Set a strong flashlight beside the paper, shining across the surface, to assist in your identification of pure white spores. Check this color against several guides, and double-check the mushroom’s structures against similar mushrooms to ensure that you have the right mushroom ID.

How is the morel hunting in your area so far this spring? Have you ever had a bad run-in with a misidentified mushroom?

Follow our FISHING BLOG

WEB   RATES     FISH    HUNT    CABINS    PHOTOS
TESTIMONIALS    BROCHURE    HUNT BOOKLET

Enter your email address to subscribe to this blog and receive notifications of new posts by email.

← Back

Thank you for your response. ✨

Email Me....


Tags: , , , , , , ,

Wild Plants to Cure the Flu and Common Cold

Can’t make it to the drug store right now? Whatever the reason, you do have some natural medicinal options in the winter season. Look for these three plants to lessen the symptoms and shorten the duration of your next case of the cold or flu. All you need is a sharp eye and a patch of wild growth to find these common and potent medicinal’s.

Mullein 
Mullein is a native plant, which favors dry, rocky soil and full sunlight, and is found throughout North America. An easy way to spot patches of this plants in cold weather is to look for the chocolate brown skeletons of the second-year plants. Look for 4- to 6-foot-tall stalks, which often have branching flower heads that resemble the arms of a saguaro cactus.

images2KI75GRG

The part you want for medicine are the velvety green leaves, which can still be found in winter growing in basal rosettes on one-year-old plants. Treat head colds by crushing the leaves into boiling water and breathing the steam. This medicated vapor acts as a decongestant.
barberryBarberry
The little red berries of barberry contain a compound called berberine. This acts as an immune system booster, helping your body fight off viral attacks like the common cold and the flu. The bitter taste of the berries isn’t very inviting, but eating a handful each day you’re feeling sick can shorten the illness, much like elderberry and Echinacea will. Look for small bushes with small dangling red berries. The two native varieties of the shrubs will have thorns in sets of three growing all over the twigs. The introduced Japanese species will have single thorns growing around the twigs. All three species can be used medicinally. As an additional point of identification, check the seeds in the red berries. Each berry should contain dark, slender seeds—typically two per berry.


Yarrow

This non-native plant grows from coast to coast on sunny open ground, although it’s originally nativeyarrow to Europe. Its most common use is as a poultice for cuts and other wounds. But you can fight colds and flu with it by making a tea from the leaves. Chop up the fresh leaves and add one tablespoon to one cup of scalding hot water. Soak the leaves for 10 to 15 minutes. You can sweeten the drink if you need to, or drink it commando-style. The anti-viral compounds help your immune system through its battle, while the diaphoretic compounds will get a sweat going to help break fevers.

Just make sure you use a field guide or guidance from an expert for positive identification of these plants. The last thing you need to do is poison yourself while you’re already ill.

rosehipsRose Hip Benefits
A Rose hip is the fruit of a rose. The wild dog rose is the type of rose most often cultivated for their hips. This plant grows up to ten feet tall and bears a white, very fragrant flower. Once the flower has bloomed, and all the petals have fallen off, the hip is picked and used in a wide variety of preparations. Rose hips are the best source of vitamin C; they contain 50% more vitamin C than oranges.
A single tablespoon of the pulp gives an adult more than the recommended daily allowance of 60 mg. They can be eaten raw, after being put through a blender, or soaked in water overnight and then cooked in the water for about half an hour. Because of the high vitamin C content they are an excellent immune system booster, and are often used as a supplement to prevent or treat a cold. The pulp from rose hips may be used in sauces or made into jelly.

Have you made medicine from wild plants?

Follow our FISHING BLOG

WEB   RATES     FISH    HUNT    CABINS    PHOTOS
TESTIMONIALS    BROCHURE    HUNT BOOKLET

Enter your email address to subscribe to this blog and receive notifications of new posts by email.

← Back

Thank you for your response. ✨

Email Me....


Tags: , , , , , , ,

Making Waterproof Matches

When it comes to matches, waterproof ones are best, especially in dire circumstances like a flood. Since they’re much more expensive than their pedestrian cousins, you might want to make your own.

cabdle

Use the Candle Technique
Burn a candle long enough for a pool of wax to form around the wick. Blow it out, then dip the head of your match into the wet wax, about of an inch (3 mm) up the stick. Remove the matchstick and allow the wax to dry, pinching it closed to form a water-tight seal.

Deploy the Nail Polish Ploy
Coat your matches with clear nail polish to waterproof them. Dip the head of the match and a bit of the matchstick itself into the polish, then rest the match on a counter with the head hanging off the edge to dry. Survive any wilderness situation with these critical tips.

Try the Turpentine Trick
The easiest way to waterproof your matches is simply to drop them in turpentine. Allow the matches to soak for five minutes before placing them on newspaper to dry. After twenty minutes or so, you’ll have waterproof matches that will last several months.

Follow our FISHING BLOG

WEB   RATES     FISH    HUNT    CABINS    PHOTOS
TESTIMONIALS    BROCHURE    HUNT BOOKLET

Enter your email address to subscribe to this blog and receive notifications of new posts by email.

← Back

Thank you for your response. ✨

Email Me....


Tags: , , , , , , , , ,

How to Make a Quick CAN Stove

If you suffer sticker shock after shopping for wood-burning camping stoves, you’re not alone. Why pay $60 to $100 for a titanium backpacking wood stove when you can make one out of a bean can for nothing. Sure, you could build a fire without any containment at all, but the low weight, efficiency, and minimal set-up time of a tin-can stove could make you a believer. And as long as there are sticks to burn, your stove will have fuel. Follow these easy steps, and you’ll have a lightweight bug-out-ready survival stove in no time.

1

The Gear List
To create a bean can stove, you’ll certainly need the empty can. You’ll also need a pair of tin snips. If you don’t have a pair in your tool box, borrow a pair. You’ll also need a tape measure, a pencil or marker, a drill with a ½-inch (or similar size) drill bit, and a file to remove sharp edges when you’re done. Gloves are a good idea, too,  since you’ll be working with a lot of sharp metal.

2

The Procedure
Remove the can lid completely from a 40-ounce (or similar sized) food can. You could use a smaller can, but the 40-ounce size because one-quart water bottles will nest inside the finished stove. Next, make a mark all the way around the can about 1 ½ inches below the open top. Use your tin snips, spiraling in, to cut this ring off the top of the can, but before you start, determine whether you are using right- or left-hand snips. It will be easier if you cut in the correct direction. You could leave the can full height, but I wouldn’t recommend it. A shortened stove has better balance, and the last thing you need is for your stove to tip over.

3

Next, make four equidistant marks around the mouth. Each mark will be the centerline for the four “teeth” on the top of your stove. Mark a line half an inch on either side of each of the four centerlines and draw a line around the can 1 inch down from the mouth. Using the tin snips again cut out the lines,  leaving four 1×1-inch teeth at the top of the can.

Next, drill eight equally-spaced holes around the bottom of the can wall. These will be the air intake vents. File off any sharp or rough edges from your metal work. Finally, before you start cooking food or boiling water over this stove, burn a few twigs for about ten minutes to get rid of the plastic can lining.

4

The Effectiveness
Once your stove is complete, set some tinder in the bottom and some broken twigs on the top of that. Place it in a stable, level spot and light the tinder through one of the vent holes. Place your cooking pot over the top of the stove and cook away. You will have to remove the pot every time you need to add fuel, but this is far better than trying to create stove doors for adding fuel. It also forces you to set the dangerously hot pot out of the way when refueling. This stove can burn twigs, paper, cardboard and any other solid fuel that’ll fit inside; and it boils one quart of water in about eight minutes. The finished stove weighs only 2 ½ ounces.

Follow our FISHING BLOG

WEB   RATES     FISH    HUNT    CABINS    PHOTOS
TESTIMONIALS    BROCHURE    HUNT BOOKLET

Enter your email address to subscribe to this blog and receive notifications of new posts by email.

← Back

Thank you for your response. ✨

Email Me....


Tags: , , , , , , ,

Winter Camping For Beginners

Winter Camping
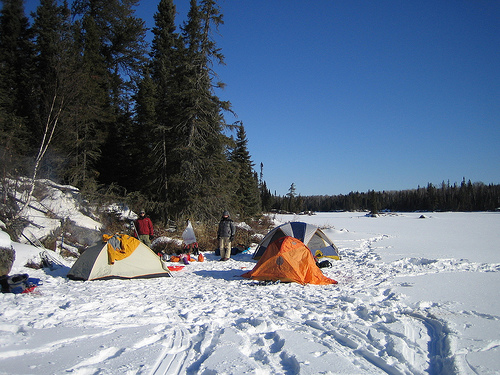
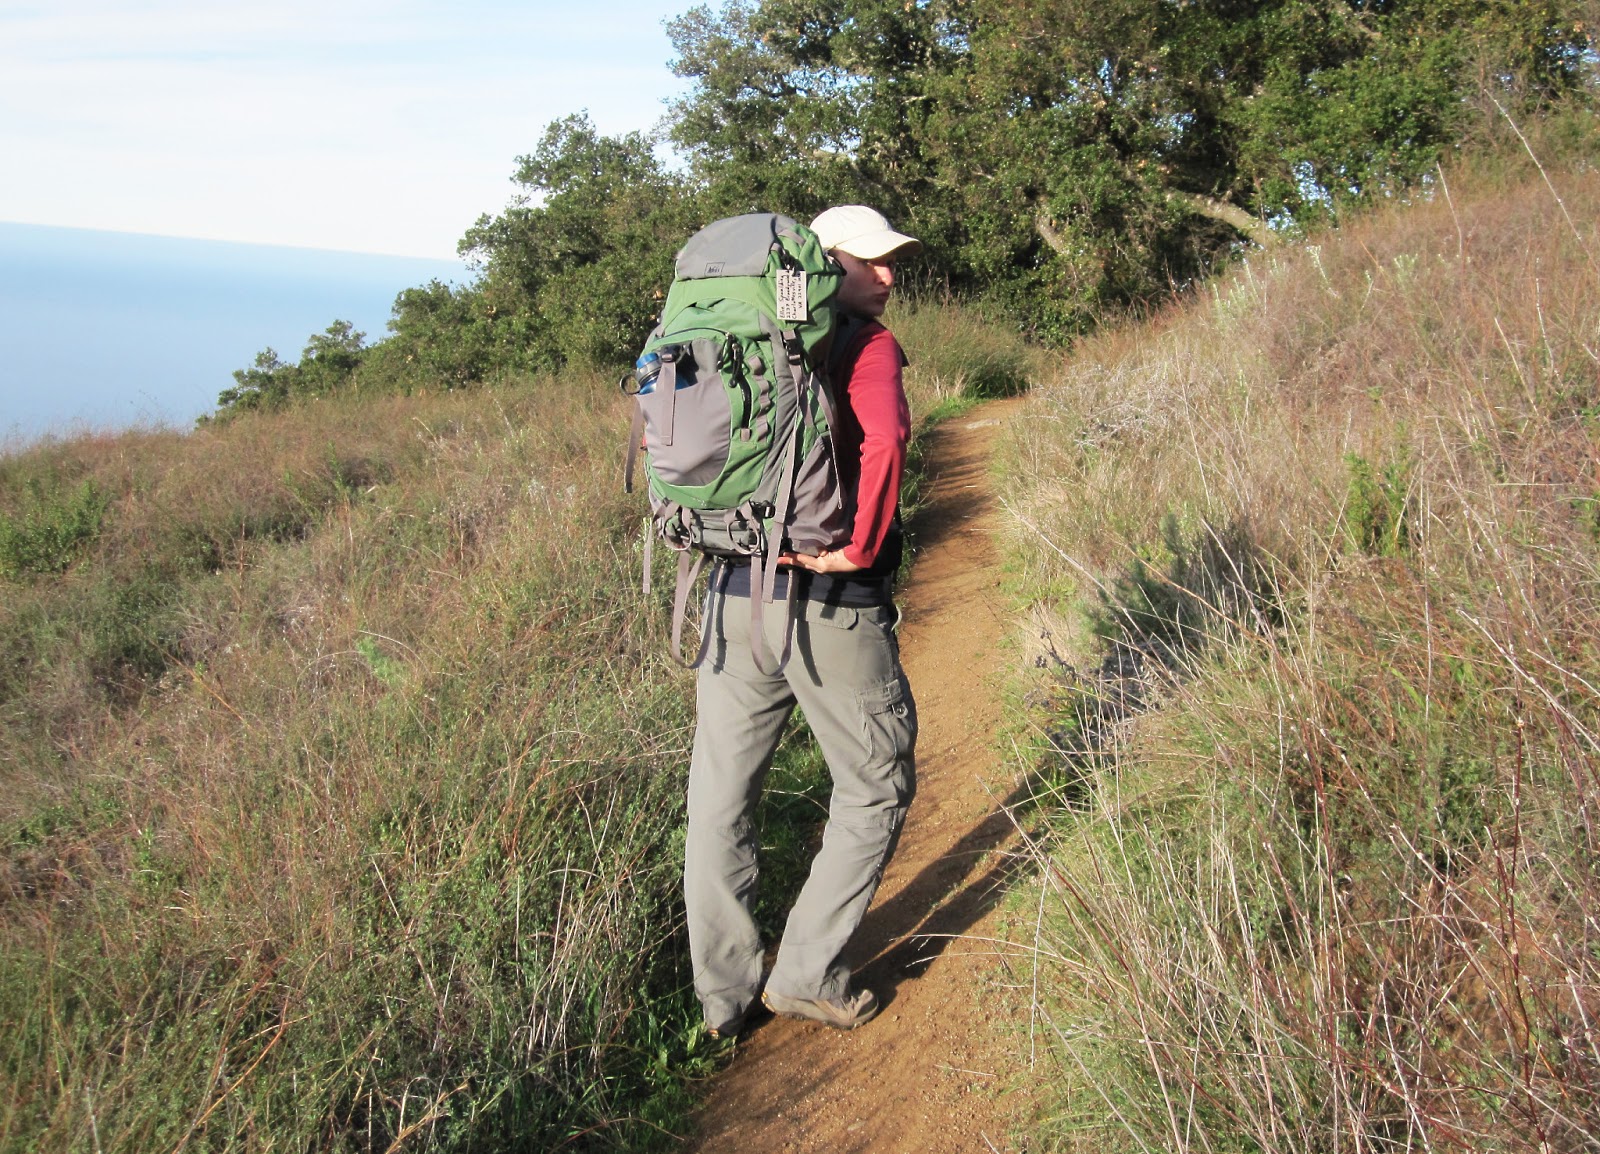
Winter camping can mean different things to different people.  For some, it means renting a cabin heated by a wood stove. For oth­ers, it means pack­ing snow­mo­bile trail­ers to the brim. For the more adven­tur­ous, it means grab­bing a pack and haul­ing in all the neces­si­ties to a remote loca­tion. No mat­ter how you win­ter camp, the fol­low­ing tricks are useful.

WEAR A FIRE­PROOF SHELL
If you are going to build camp­fires, either for the sake of cook­ing, warmth, or morale, make sure that your outer layer of cloth­ing is less likely to end up ruined if struck by an errant ember.  Wool is one of the best, most fire-resistant nat­ural mate­ri­als and is great for this.  Down jack­ets are down­right (no pun intended) awful, and you can lose tons of feath­ers this way.

PACK THE SNOW
Before set­ting up your tent, pack down your camp­site. If you have skis or snow­shoes, that means tramp­ing around hard until all the snow is packed.  If you’re shod only in boots this will take some time, but if you don’t do this, you run the risk of step­ping into a soft bit of snow in your tent and tear­ing the floor.

PACK AN EXTRA HAT AND GLOVES
Always carry a spare hat and a set of mit­tens. No mat­ter how dili­gent you are, no mat­ter how reli­gious you are about using idiot strings and keeper cords, you will lose a hat, and you will lose a glove.  Keep a cheap spare, or be pre­pared for frost­bite or a fore­short­ened trip.

EMBRACE THE PEE BOT­TLE.
Being cold can cause you to want to uri­nate more fre­quently, and we all know how incon­ve­nient it is to dis­robe and undo your sleep­ing bag at 0 degrees F.  For women, I highly rec­om­mend look­ing into the var­i­ous acces­sories that allow you to pee whilst stand­ing, and for both gen­ders a WELL-MARKED pee bot­tle will keep you warm and sim­plify your nightly con­ti­nence. For the love of god, don’t con­fuse your water bottle—color is not enough, make sure your bot­tle is well-marked and maybe wrapped in some duct tape.

USE THOSE STAKES
If there is snow, you can stake out your tent.  You can always make dead­men out of sticks or fallen trees, stuff sacks full of snow, buried skis, snow­shoes, poles, ice axes, or what have you.  There is no excuse for a poorly staked-out tent.  If you expect no snow and frozen con­di­tions, plenty of com­pa­nies make hard tent stakes meant to push through frozen ground, either out of tita­nium, steel, or 7075-t6 aluminum.

BRING THE RIGHT SLEEP­ING PAD
As Bear Grylls says, two lay­ers on the bot­tom are worth one on the top.  That is, you lose more heat through con­duc­tive heat loss when sleep­ing than any­thing else, so win­ter is no time to skimp on your sleep­ing pad.  Make sure you have a pad with an r value of four or more, and if you have one, throw a closed-cell foam pad under­neath. If you feel like your pad isn’t cut­ting it, stuff extra cloth­ing under­neath you, and toss your down jacket on top of your sleep­ing bag.

BOIL THE SNOW
Leave your water fil­ter at home.  Chem­i­cal fil­ters take longer to work in the cold, and mechan­i­cal fil­ters can crack and fail. Your best bet for water fil­tra­tion is boil­ing your water, as you prob­a­bly have to melt snow any­way. Don’t be suck­ered into think­ing glacial melt or fresh snow is sterile–it isn’t. Snowflakes often form around small bits of dust (nucle­ation sites) which can be bac­te­ria or viruses float­ing in the upper atmosphere.

SLEEP WITH YOUR BOOTS
Use boots with remov­able lin­ers, so you can put those lin­ers at the bot­tom of your sleep­ing bag to keep them warm.  If you only have single-layer boots, put them in a water­proof stuff sack at the bot­tom of your sleep­ing bag.  Noth­ing means morn­ing hypother­mia more than frozen boots!

CAMP BY CAN­DLE­LIGHT
A can­dle lantern safely hung on the inside of your tent (far enough away from you and the ceil­ing so as not to be a fire haz­ard) does won­ders to both warm your tent and reduce con­den­sa­tion.  Despite this, a towel for scrap­ing off con­den­sa­tion is always welcome.

EMBRACE LITHIUM
Use lithium bat­ter­ies in all your win­ter elec­tron­ics.  Not only does lithium per­form con­sis­tently down to much colder tem­per­a­tures than alka­line or NiMh bat­ter­ies, but they are lighter, last three times as long, and have a flat decay curve.
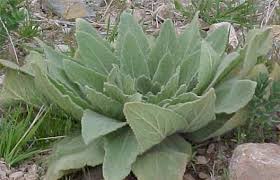
WIPE WITH CARE 
In the sum­mer, comfy leaves or soft river stones abound, but in the win­ter they’re few and far-between. While many have picked up pinecones in des­per­a­tion, the best read­ily found alter­na­tive is just plain old snow. It’s effective, ubiquitous, and leaves behind lit­tle residue.  If you do bring TP, please either pack it out or burn it. The ground is too hard for catholes and for those who have hiked along the Appalachian Trail dur­ing the first spring thaw, a mound of TP gen­er­ally sig­ni­fies a poorly hid­den scat stash.

FIGHT CON­DEN­SA­TION WITH A VBL
If you’re out more than a week, use a VBL, or vapor-barrier-liner for your sleep­ing bag.  Con­den­sa­tion from your own body can freeze within the upper layer of your sleep­ing bag where the warm air meets the freez­ing air, and over time your sleep­ing bag can become frozen solid.  While they are not as com­fort­able to sleep in, it beats hit­ting your sleep­ing bag with a ham­mer every night like some polar explor­ers have had to do.

FLIP YOUR BAG
If it’s not snow­ing, turn your sleep­ing bag inside out on top of your tent to dry dur­ing the day.  This is a great rea­son to choose win­ter sleep­ing bags with a black interior–it absorbs more solar energy and dries out faster.

FLIP YOUR WATER
If you have a large water stor­age con­tainer, turn it upside-down when stor­ing it overnight.  Ice forms from the top down, so keep­ing the spout/opening of your con­tainer fac­ing down keeps it from get­ting frozen up. This can be com­bined with insu­lat­ing the con­tainer, of course.

VASE­LINE
Cover exposed skin in Vase­line or ani­mal fats. Inuit have been doing this for years–simply slather any exposed or poten­tially exposed skin on your face, ears, neck, wrists, or hands in a thick oil and they’ll be less prone to wind­burn and frostbite.

Stay warm!
winter-camping-uintas

Follow our FISHING BLOG

WEB   RATES     FISH    HUNT    CABINS    PHOTOS
TESTIMONIALS    BROCHURE    HUNT BOOKLET

Enter your email address to subscribe to this blog and receive notifications of new posts by email.

← Back

Thank you for your response. ✨

Email Me....


Tags: , , , ,

DIY – Solar Generator


wawang-lake

Follow our FISHING BLOG

WEBSITE    RATES     FISH    HUNT    CABINS    PHOTOS
TESTIMONIALS    BROCHURE    HUNT BOOKLET

Enter your email address to subscribe to this blog and receive notifications of new posts by email.

← Back

Thank you for your response. ✨

Email Me....


Leave a comment

Posted by on December 20, 2015 in Off the Grid, Wawang Lake Resort


Tags: , , , , , , ,