RSS

Tag Archives: Bow Hunting

Bear Facts to Success

imagesS12UAEG6
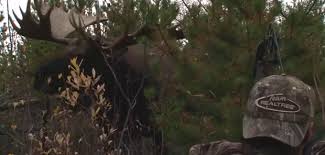
Simple Fact: The more effort you put into masking your scent, the bigger the Black Bears coming into your target zone will be.

All experienced Black Bear Outfitters have their little tricks to make their bear hunters hunt more enjoyable and also help with their success. If you are new to bear hunting you should know what you are up against. Every hunter wants a big trophy bear and this article should bring you a little closer to that goal, but remember, to thoroughly follow the advice of your outfitter, if you’ve chosen one, and, above all else:  DO NOT DEVIATE from the routine they have already established.

Black Bear hunting to the outfitter is about luring bears to a target zone for their hunting guests by baiting with food the bears like such as high-carbohydrate foods. Bread, pasta and other high starch content foods are rare in nature but it’s what the bears want most so they can quickly store fat for the winter. It’s also about setting up stands at strategic spots where big bears have been scouted. Black Bear hunting for the hunter is all about stealth, with the two biggest factors being sound and most of all, smell.

Black Bear’s Sense of Smell: Olfactory Receptors

imagesN9DAOG1VThe Black Bear has the best sense on smell of any land walking mammal on Earth. It’s really hard for a human to comprehend how well a bear can smell as we basically have to stick our nose in the pot to smell the sauce. Comparing the amount of Olfactory Receptors between a human and a Black Bear is mind boggling.

Olfactory Receptors are microscopic bulbs on the end of nerves in a mammal’s nose. The more you have the better your sense of smell is.

  • Humans:
    6,000,000 Olfactory Receptors (6 million)
  • Blood Hounds:
    1,800,000,000 Olfactory Receptors (1.8 billion)
  • Black Bear:
    12,600,000,000,000 Olfactory Receptors (12.6 Trillion)

A Black Bear can smell 2100 times better than a human. In addition the Jacobson’s organ in their mouth can taste the air, adding to their brains perception. A mature Black Bear can smell your breakfast from 20 miles away if the wind is right. Big mature bears can smell better than smaller younger bears as their noses are larger and more developed. Bears also know what unnatural smells are and associate them with a human presence. This can explain why Black Bear hunters that are not fanatical about the way they smell rarely see big trophy bears. There are procedures you can do to minimize unnatural smells to keep the bears concentrating on the bait that the outfitter has put out for them.  It is wise to check with your outfitter before applying anything new to the bait station that they normally don’t use.

1) Before your bear hunting trip; pick a couple of sets of clothes that you will only wear at the tree stand while hunting. Wash your clothes with scent-free detergent and when done, run them though the wash twice again with no detergent so they are well rinsed. This will ensure your clothes are scent free. If you live in the city and have chlorinated city water then go to a pet store and buy a small bottle of Aquarium Water Conditioner and add ½ oz. to the last rinse cycle you do with your clothes. The water conditioner will neutralize the chlorine in the water and keep the chlorine smell out of your clothes. Remember, they can smell 2100 times better than you so don’t feel silly getting fanatical. Then pack the clothes in a plastic bag to keep them scent free. If you consistently use fabric softener in your clothes dryer it’s best to hang your clothes up to dry because residual clothes softener might go on your clothes. If you are a smoker, do not smoke while wearing your hunting clothes.

Before we go to the next points you should be aware that Black Bears love the smell of mint. If you go on a camping trip in any of Ontario’s provincial parks the wardens will tell you not to keep mint toothpaste or mint gum in your tent because the bears will smell it and go after it. The bears craving for mint can be used to your advantage.

2) Think Mint: Go to one of those hippy tree-hugger heath stores and buy mint soap. The morning before the hunt take a shower using the mint soap. Brush your teeth with mint toothpaste. Chew mint gum while in the tree stand and if you really want to go all the way, have a glass of mint tea before the hunt and even keep a few bags of mint tea in your pockets. This will help cover up any scent.

3) Smoking: If you are a smoker and you smoke in the tree stand you are basically wasting your time if you expect a big trophy bear to come within sight. Wind direction can give you a little luck but it’s not something you should count on. It’s best to wear a nicotine patch while in the tree stand and if you need to; chew mint gum to keep your mind off smoking. Remember to brush your teeth and wash your hands and stop smoking before you put your scent free hunting clothes on.   This would also apply to cigars and chewing tobacco as well.

Black Bear Hearing:

The shape of Black Bear’s ears is mainly responsible for their great hearing. When detecting sound based on volume a bear’s hearing is about four times that of a human. However, a bear can hear a much broader frequency range; both higher and lower frequencies. Rubbing of cloth or twisting of your tree stand can produce sounds that the bear can hear and the hunter cannot. Big old male bears develop a crowned head and their ears move out to the sides giving them stereoscopic hearing, which allows them to pinpoint the origin of the sounds they hear. This is another reason why big old bears are harder to get.

With this in mind try to stay absolutely still. If you have to move; move very slowly. Take some nose drops before the hunt and if you have a cold or allergies. If your throat is dry and itchy bring some mint flavored lozenges with you. You can also oil the joints of your tree stand to make them a little quieter.

Black Bear Sight:

During the day a Black Bear basically has the same site as a human but older bears tend to be near sighted. As a result they cannot focus on things from a long distance. When one of an animal’s senses becomes diminished their brain rewires itself to compensate by making other senses more acute. This is known as neural placidity. As a bear gets older they become near sighted so the brain compensates by being more sensitive to color differentiation. If the bear sees colors it thinks are unnatural and he sees those colors move the game is up. Bears cannot see the same range of colors as a human. Hunter orange looks gray to them. But they can see dull reds and yellows as well into the blue/green cool color spectrum. This is why there are many different forms of camouflage clothing.

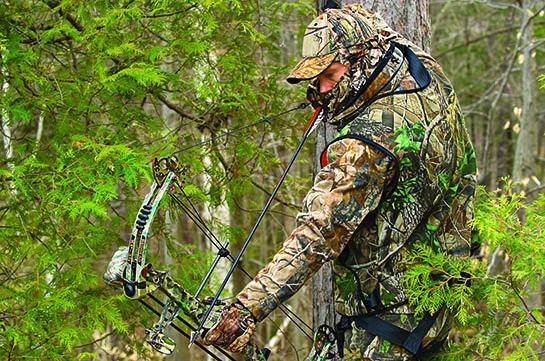
Picking the right Camouflage:

You need to talk to the outfitter when you book your hunt and ask what kind of plants will be at the tree stands. If the hunt is taking place in the southern range of Ontario’s bear hunting country during the fall you may have a mix of coniferous and deciduous trees, thus you will need a camouflage that represents pine needles, pine bark and colored fall foliage. If you are father north in an area with only pine trees you will need a camouflage that represents pine bark and pine needles, which means dark brown and green. You need to blend into the scenery so their bear cannot see any unnatural color pattern.

Black Bears are nocturnal. They have a reflective layer in the back of the eye called the tarpetum lucidum. Just because you can’t see them does not mean they cannot see you. Since dusk is the hottest bear hunting time it’s also when you should concentrate the most on being quiet and motionless.
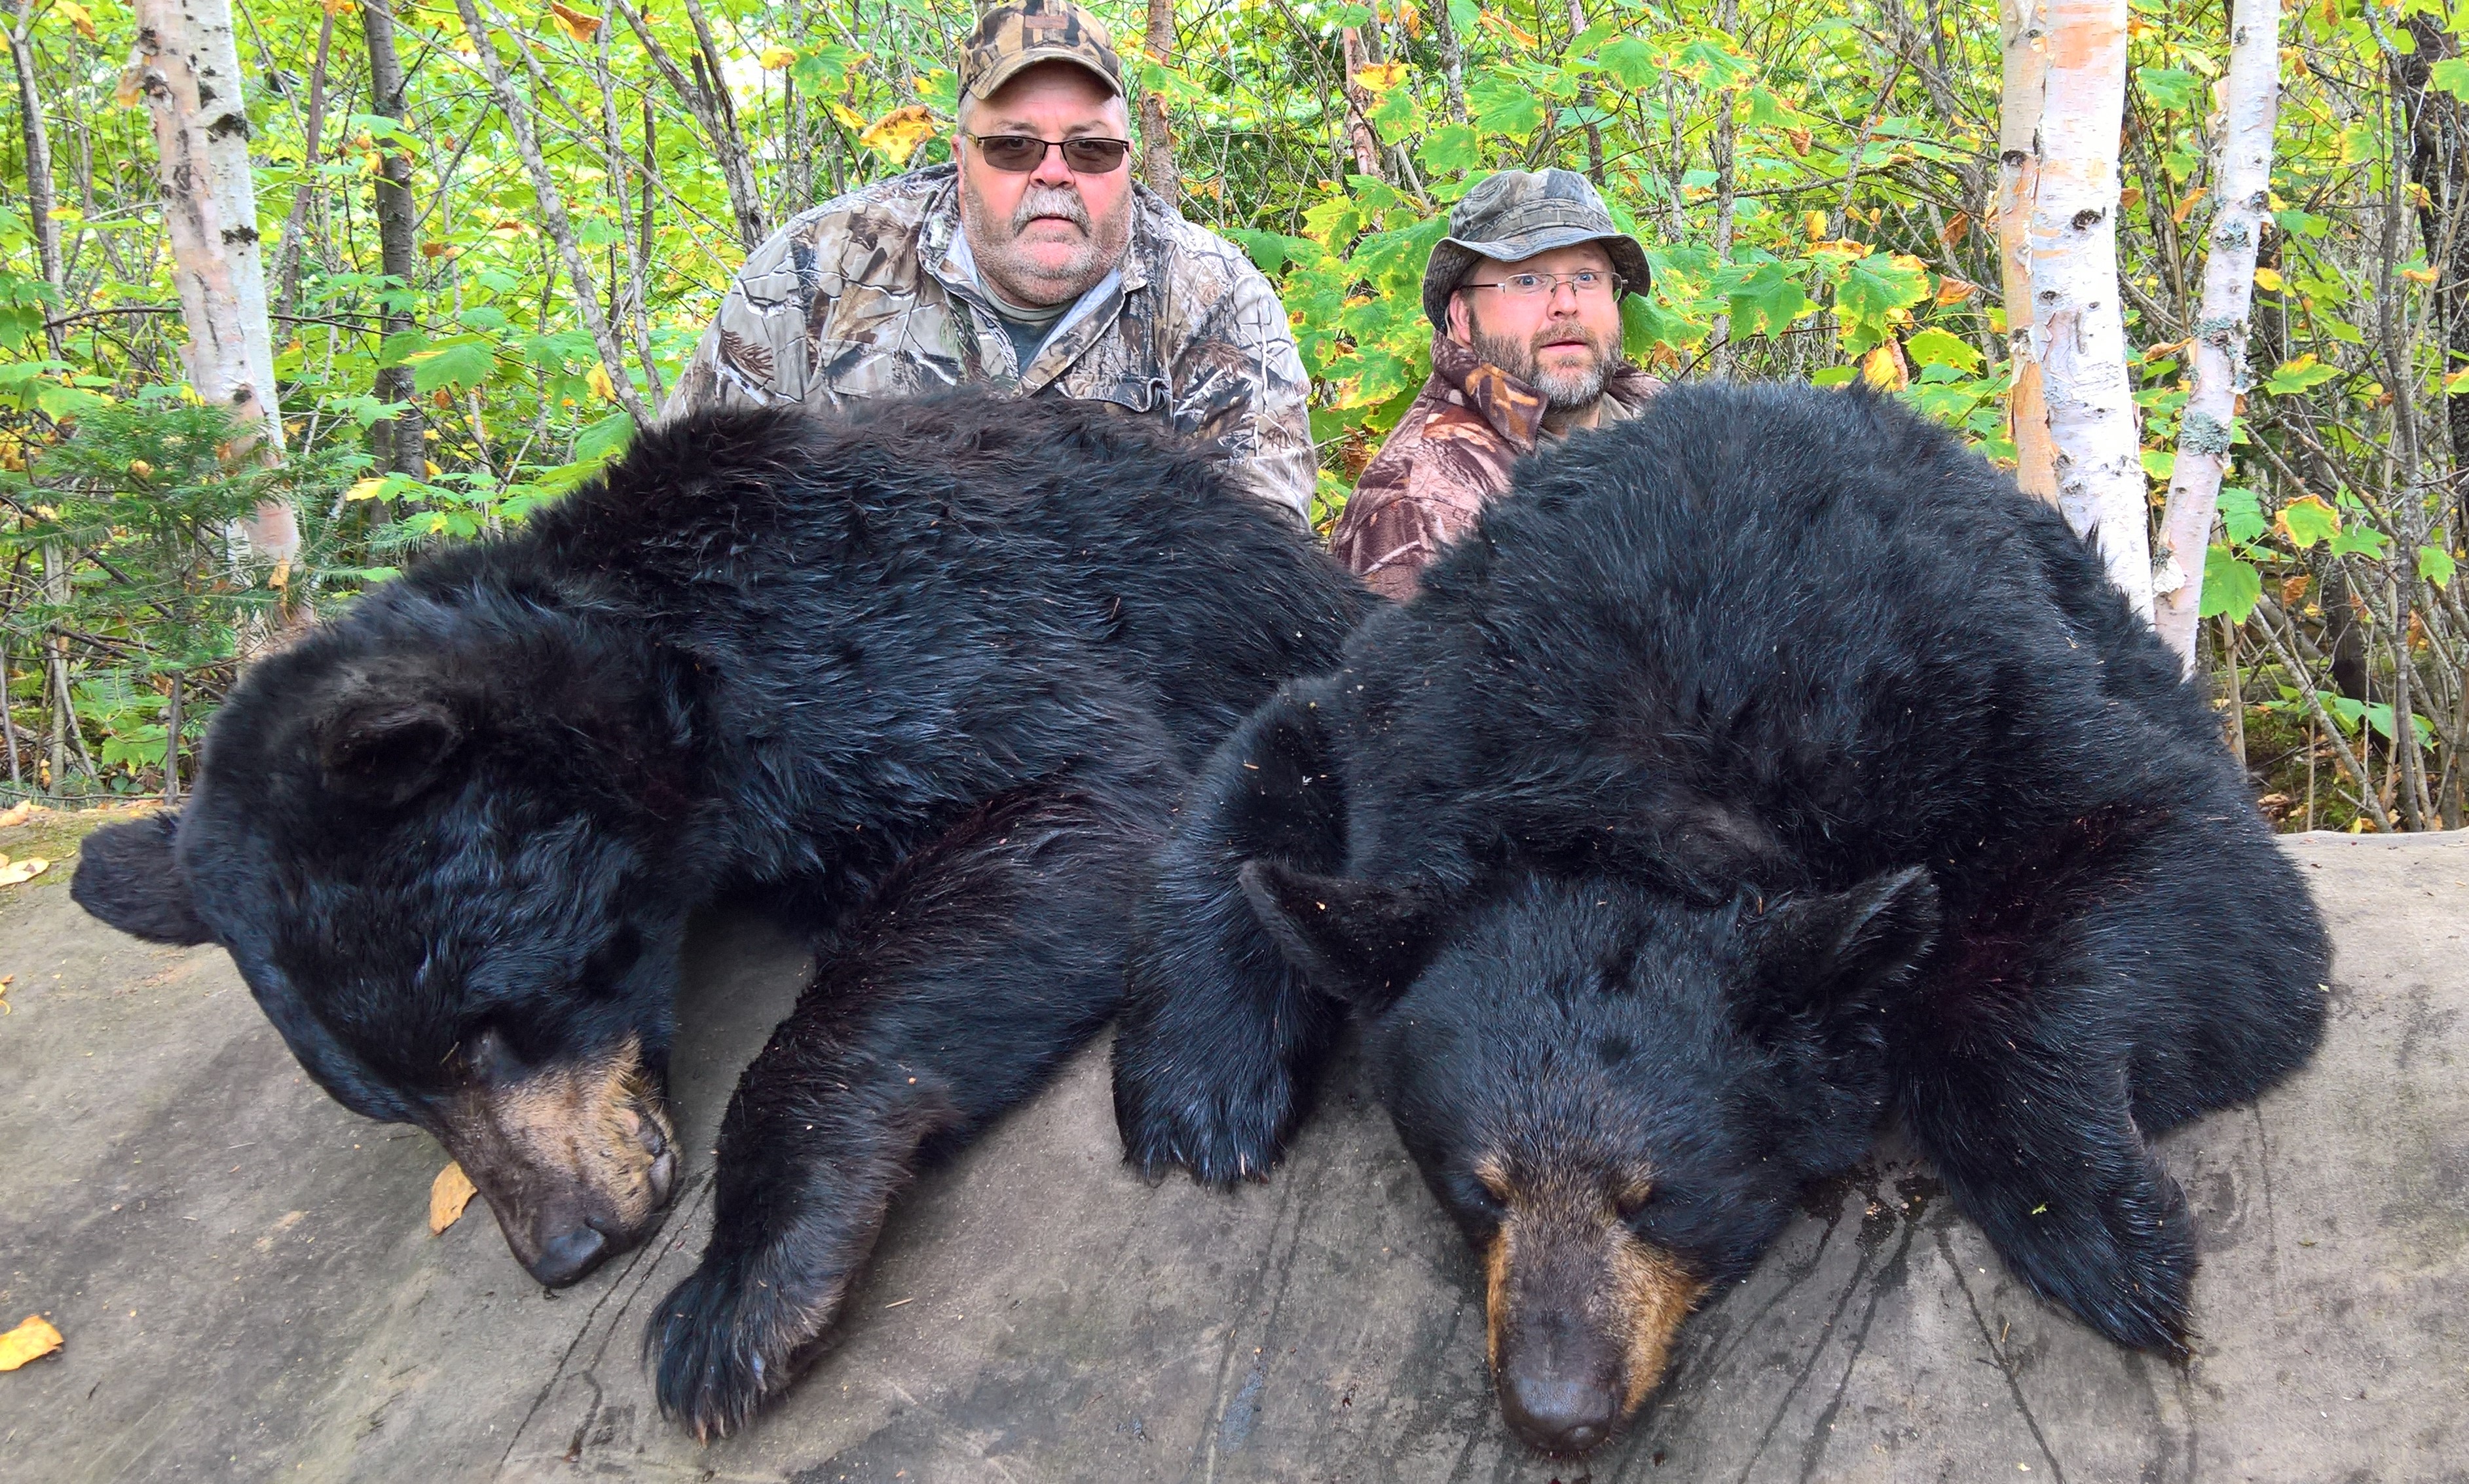
Bear Size:

In most cases, big ears mean a smaller bear. A small ear is usually a bigger bear. Once a bear reaches three years old (approx. 100 lbs.), the bear starts to grow into its ears. The ears and eyes don’t grow as much as they do in the first three years. Sometimes if a bear has a hard year with food, the ears will look bigger because the bear is thinner. Read our article:  How to Size a Black Bear

Cubs:

When a sow is with cubs, 90% of the time the cubs are in the lead. The cubs will make more noise than a single bear. Most of the time, adult bears make little or no noise.

Sow:

You can’t shoot a sow with cubs in the Ontario spring hunt, and in the fall we continue this policy on our BMA – DO NOT SHOOT SOWS with cubs.. So make 100% sure you know what you are shooting at. Take a really good look around to make sure there are no cubs. A sow’s ears are usually closer together, as a male bear’s cranium grows wider on top and the ears look farther apart. They also look smaller, which is really an illusion.

These tips and techniques are just a guide line for some things to consider and think about. Ultimately the outfitter is the person you need to discuss the different factors with. Bear hunting can be quite different in different regions.

CHECK OUT OUR FISHING BLOG

WEBSITE    RATES     FISH    HUNT    CABINS    PHOTOS
BROCHURE    HUNT BOOKLET

Enter your email address to subscribe to this blog and receive notifications of new posts by email.

← Back

Thank you for your response. ✨

Email Me....


Tags: , , , , , , , , , ,

Maximizing Your Hunting Time With Trail Cameras

cameraOver the last five years, probably no other “gadget” has changed the way we scout more than the trail camera. For many of us, running trail cameras is a hobby in itself, bringing a whole new excitement to our deer hunting efforts. Much more than just something to pass time, however, running trail cameras can give you a unique insight into the patterns of deer on your hunting properties and really tip the odds in your favor for harvesting a mature whitetail. Let’s take a look at the features to look for when purchasing a trail camera, and how to get the maximum benefit from the camera once you have made your purchase.

As the popularity of these scouting tools has grown, so has the number of companies offering their own line of cameras. The features on these cameras cover such a wide spectrum that choosing the right one for you can be a daunting and sometimes confusing task. While this article isn’t meant to tell you WHICH camera to buy, it IS meant to help you sort through some of the most common differences among the various trail cameras to help you narrow down your search.

RESOLUTION
The resolution of a trail camera is a measure of the image size that the camera creates. So a 5.0 megapixal trail camera will give you a much larger image – and therefore more detail – than one with 3.0 megapixals. Which resolution you choose really depends on how important it is to have a large, crisp image. If you are only concerned with having a general idea of what deer are in the area and when they are traveling through, then about any resolution offered on today’s cameras will suffice. If you want a larger, more detailed image to print off for your friends, then you may want to shoot for something with at least 3.0 megapixels.

BATTERY TYPE & LIFE
In my mind, this is one of the most important considerations when choosing a trail camera, as it will have a huge effect on the cost of maintaining the camera. I have seen some “cheap” trail cameras that burn through six C-sized batteries in a week, and suddenly the “cheap” camera gets VERY expensive! Others claim to operate up to a year on eight AA batteries. So before you go buying a camera based on price alone, keep in mind the battery life, as it may be the most expensive choice you could make in the long run.

TRIGGER SPEED
Another important feature is the trigger speed of the camera, which is simply how long it takes the trail camera to shoot a picture once something has “triggered” the motion sensor. A faster trigger speed can be the difference between having a great shot of that trophy buck and just having a picture of a deer’s butt as it walks out of the frame. If you plan on placing your trail cameras over feeders or a mineral lick, then trigger speed will not be as much of an issue as it would if hung along a trail.

FLASH TYPE
This is almost a moot point, since most trail cameras today have gone to infrared flash. An infrared flash, as opposed to the incandescent flash found standard on most consumer cameras, is less likely to spook deer, uses less battery life, and is less likely to be detected by other humans (i.e. thieves!). While I’ve gotten plenty of pictures of big, mature whitetails with an incandescent flash trail camera, there is no doubt that some animals are spooked by the bright flash. If you can afford the infrared flash, the benefits certainly outweigh the small increase in cost.

OTHER FEATURES
While we have covered some of the most important features to consider when buying a new trail camera, there are many more options that could impact your decision. One of these options is the size of the unit. Size varies greatly amongst trail cameras, and some companies are now producing models that are as small as your hand. Other models go as far as being able to send the pictures it takes directly to your email or cell phone, so the only time you have to check them is when the batteries need replacing. How’s that for convenience?

Before you head out to buy your next trail camera, take a minute to think about how it will be used and what features are most important to you. This will make the task of narrowing down your choices much easier when you start the shopping process.

camera2

MAXIMIZING TRAIL CAMERA USE
Once you have waded through all the details, made your decision and laid down your hard earned money on a trail camera, all that’s left is to hang that thing on a tree, right? Let’s take a look at some ways you can be sure you are using your camera to its potential this season and getting the most bang for your buck.

DRAW THEM IN
One of the easiest ways to maximize the effectiveness of your trail camera and insure that you see a good representation of what is in your hunting area is to use some type of attractant to lure the deer into camera range. Probably the most common attractant used across the country is shelled corn – it’s cheap, readily available, and the deer love it. For the purpose of getting trail camera pictures, there is no need to invest in an expensive feeder; just simply spread 100 pounds on the ground in an eight to ten-foot circle area where you want to hang your camera. For safety reasons, do not place the corn in large piles or in an area that holds moisture, as this can result in molding that can cause disease in both deer and turkey. Depending on deer density and other available food sources, this should get you five to ten days worth of pictures. Be patient, as it may take a few days for the deer to really key in on the corn and for you to start getting good pictures. Once they find it, though, it won’t last long!

Before you start dumping corn on your favorite hunting property, check your local game laws regarding baiting. If corn or other “feed” is prohibited, but would still like to attract deer to your camera location, then you may want to consider creating a mineral lick. You can buy one of the many commercial mixes available today, or simply create your own by mixing 50 lbs of trace mineral, 50 lbs of feed mix salt, and 10 lbs of dicalcium phosphate. Break the soil up with a shovel in the area where you want to create your lick and work your mix into the soil. Once the lick gets a good rain on it, it shouldn’t take long for the deer to find it and start paying regular visits.

KEEP IT MOBILE
Unless you are hunting a really small property, or you have the money to invest in lots of trail cameras, then you are going to need to move your cameras around to really get a good idea of what the deer are doing on your hunting property. Don’t get caught in the trap of leaving your camera in the same spot all season. This will not only limit your ability to pattern the deer, but it may keep you from discovering that trophy buck that could be hanging out on the other side of the property!

images40V5Z2FA2By experience, two weeks seems to be enough time to get a good representation of what deer are in the area, without your camera spending too much time in one location. You can always bring the camera back to the same spot at a later time, but the idea is to cover as much of your hunting area as possible.

KEEP GOOD RECORDS
Once you have moved your camera around your property and gotten plenty of pictures to look at, the real work has just begun. Now is the time to sort through the pictures, identifying as many unique animals as you can, analyzing what camera sites each deer is visiting and the times that they were there. This should start to give you an idea of the travel patterns on the property, as well as potential stand locations.

This season, make sure you use these tips to get the most out of your trail cameras, and the next picture you get of that monster buck may be the one with you behind him holding his antlers, OR, even that BIG bear 🙂

Follow our FISHING BLOG

WEB   RATES     FISH    HUNT    CABINS    PHOTOS
BROCHURE    HUNT BOOKLET

Enter your email address to subscribe to this blog and receive notifications of new posts by email.

← Back

Thank you for your response. ✨

Email Me....


Tags: , , , , , , , , , , ,

STAY CALM

If you’ve had any trouble in the past “keeping it together” when shooting at game,
right now is the time to find a cure.

bow-hunting-wawang-lake

Countless of hunters who practice shooting regularly, months before the season opens, and they still have trouble closing the deal when Mr. Big shows himself. Getting excited is fine — excitement is a big part of why we hunt — but there is a big difference between getting excited and falling apart. We owe it to ourselves to perform under pressure. Even more, we owe it to the game we hunt to stay calm enough to make good shots and clean kills.

Below are six steps that have helped hunters stay cool at the moment of truth.

  1. Practice, Practice, Practice Nearly all bow hunters practice their shooting, but many fail to practice properly. To many average bow hunters, practice means flinging 20 to 30 arrows once or twice a week. This is not considered practice. When preparing for a hunt, practice every possible shot sequence, just as if you were actually hunting. That means shoot a 3D target from every possible angle while wearing camouflage, and shoot from any position that might become a possibility during the hunt. You want to be prepared for all contingencies.

Also practice at distances considerably farther than you will shoot on animals. A typical whitetail shot is closer than 30 yards, but practice regularly to shoot out to 80 and even 100 yards. That kind of practice will leave you very confident for any shots closer than 40 yards.

Lack of confidence is the biggest reason some people get shaken at the shot. They just keep thinking they may not make that shot. There are two things to offer those who lack confidence. One, restrict shots to your comfortable shooting range. Two, practice enough different scenarios that when an animal steps into your shooting lane, you’ll have no doubts about making the shot because you’ve already done it dozens of times in practice.

  1. Run & Shoot Now that sounds kind of dangerous, but it’s not meant in a literal sense.  During practice sessions, sprint anywhere from 60 to 100 yards, then pick up your bow and try to put a kill shot on a 3D target. This simulates the adrenaline rush you get when shooting at game. Some people may think it sounds crazy, but, it builds confidence like no other drill. You don’t have to do this every time you practice, but do it often enough to build confidence in your ability to shoot accurately when your heart is racing — whether from running or from watching a buck walk within range.
  2. Flex Those Muscles! When you see a big buck coming down the trail and your heart rate skyrockets, tense every muscle in your body while holding your breath. Then, after five or six seconds, let your muscles relax, and exhale. Do this several times as needed.

This is especially helpful during frigid hunts, when your muscles are stiff and your circulation is poor. It helps improve blood flow, regulate body temperature, settle your heart rate, and relax your muscles, all of which will calm you down to make a good shot. This muscle-tensing tactic has will help keep your cool on numerous animals.

  1. Focus On The Sweet Spot Once you decide to shoot an animal, you have no need to look anywhere other than the hair, scale, or feather you want to hit. Keying in on that certain spot keeps you calm and focused.   Some people miss when they focus on the headgear because they are looking with their mind’s eye at a beautiful shoulder mount gracing the wall above the fireplace. Don’t worry about the headgear while the critter is alive. You will have years to stare at it — if you focus on the vitals before and during the shot.

bow-hunting-wawang-lake (5)

You tend to aim where you are looking. Look at those wide antlers coming your way, and you might put an arrow right through the center of them. Instead, concentrate on the vitals, and that’s where you’ll put your arrow.

  1. Close Your Eyes This isn’t always an option, but when it is, it works. The longer some people look at an animal they want to shoot, the more stage fright they develop. If that’s you, closing your eyes or looking up at the sky will allow you to clear your mind and reorganize your thoughts.

Some people can perform on a moment’s notice, but, others prefer to have some time to evaluate the situation and to analyze every move before actually making it.   If too much time transpires and the nerves start taking over, close your eyes to regain focus before the animal gets within bow range.

  1. The Inner Voices Although you might not have demons and angels on your shoulders taunting you one way or the other, you certainly have inner voices that control your mind when you’re face to face with your prey. Listen to the positive voices and let them build you up.   Feeding your mind with positive thoughts will weed out the negative ones that flow through the minds of so many bow hunters. Doubt is where many archers fail at crunch-time. To eliminate doubt, talk to yourself — positively.

bow-hunting-wawang-lake (2)

WEBSITE    RATES     FISH    HUNT    CABINS    PHOTOS
BROCHURE    HUNT BOOKLET

Enter your email address to subscribe to this blog and receive notifications of new posts by email.

← Back

Thank you for your response. ✨

Email Me....


Tags: , , , , , , , , ,

Black Bear Hunting at Wawang Lake

Working hard to provide active baits for each individual hunter is how we operate our hunts, and is what keeps our sportsmen coming back year after year.

BLACK BEAR HUNT RATES

2-bear

We have a very large bear hunt area (1,200 sq miles) surrounding our resort with a good healthy bear population due to years of black bear management.

Our hunts usually begin the Saturday on or after August 15th and continues for three weeks. Since we have consistently managed our bear population for several years we determine the number of hunters we will take according to the bear population we observe the previous year. We average 14 hunters per year.

What We Need to Know Upon booking, please inform us of each party members contact information, weapon (archery or gun) and will they be bringing a tree or ground stand. We need to know what type of weapon each member in the hunt party will be hunting with and whether they will be hunting from tree stand or would prefer a ground stand. More on our website

Days to Hunt (7 days) – Arrive Saturday and depart the following Saturday. Arrive Saturday and depart the following Saturday. If you would like to hunt upon your arrival, please check in between 11am-12pm (EST) and have all of your equipment prepared in advance (tree stands as assembled as possible, weapons/ammunition cased)

Transportation Requirements Since most of our baits are very remote, groups should anticipate driving their members to and from the sites. Most of our baits are road access and we provide private areas for each hunting group so that

dropping members off and picking them up will be systematic and easy. We advise to have 1 vehicle per every two hunters (three max) to ensure as little disruption to each party member’s hunt.

Rates
For a complete list of our Bear Hunt Rates please visit our website at:

BLACK BEAR HUNT RATES A $500.00  non-refundable deposit is required at the time of reservation to guarantee a hunt.

Other Costs Hunting license Canadian Funds (approximately). It’s MANDATORY to provide a current or prior hunting license FROM YOUR HOME STATE, or a hunter safety certificate, as qualification to obtain a hunting license in Ontario. Export Permit – $35.00 Canadian Funds (available at designated locations in the area)

Things to Remember Bring your own tree stand as we do not provide them. Comfortable climbers are the most popular and screw in peg types are acceptable, however, whatever type you bring bear in mind that our trees have very loose bark.

What is Included in our Bear Hunts

  • Modern Housekeeping Cottage for 7 nights
  • Pre-baited Sites & all baiting supplies during your stay & Freezer Service
  • Orientation trip to bait site
  • Experienced guide’s knowledge and advice (use it!)
  • Canadian Firearms Regulations All Firearms (does NOT include bows) being brought into Canada must be registered at the Canadian Customs at the time of entry into Canada. A one- year permit costs $50.00 Canadian, or there is a long term permit as well. If you would like further information, you can visit the Canadian Firearms Website through the link on our website or call toll free, 1-800-731-4000

Passport Cards (similar to a Passport) Information can be obtained at this website: http://www.travel.state.gov/passport/ppt_card/ppt_card_3926.html

Our season begins Saturday on or after August 15th

For further information, or, to book your next bear hunt please contact us at:
1-888-534-9217 or EMAIL

 WEBSITE    RATES     FISH    HUNT    CABINS    PHOTOS
 BROCHURE    HUNT BOOKLET

Enter your email address to subscribe to this blog and receive notifications of new posts by email.

← Back

Thank you for your response. ✨

Email Me....


Tags: , , , , , , , , , ,

HOW SCENT ACTUALLY WORKS

scent2Scent is a mysterious  and often grossly misunderstood aspect amongst those who not only pursue game with hounds or other hunting dog breeds, but all hunters in general.

Scent is simply comprised of micro parti­cles of disturbed vegetable matter and/or released dead body cells drifting from the targeted subject. Vegetable matter can be crushed plant material or even minute surface dwelling bio-material living upon hard surfaces like concrete or rock.  Dead body cells consist of drifting dead skin, fur or feather cells eventually falling to the ground.  This may also include fluids, oils and vapors the body expels.

How long does a scent trail last?  That depends on given environmental conditions. The trail won ‘t exist very long if it has been hot and windy over dry surfaces.  In contrast, it will sur­vive much longer in cool, moist conditions upon grassy areas with no wind exposure.

Here are some Myths about scenting:

1.
“Animals can’t smell me when I apply scent-free products like special soaps, sprays or even wear scent free clothing.’   If you are liv­ing and breathing, you are giving off scent.  Although these products may lessen the scent intensity from your person, a Bloodhound can find you in the woods within minutes.  It is impossible for any human to be scent free.

2.
“Hounds can’t run a scent trail in the rain.”  Scent parti­cles tend to be hydrophilic, meaning they readily soak up moisture and create an effluvium of scent for the canine olfactory system.  Hounds have successfully found humans and animals in the pounding rain.  Any good hunting breed should be able to trail game in light to moder­ate rain.

3.
“My dog sometimes ground scents and other times he air scents.”  I suppose if your dog’s nose is on the ground, you can call that ground scenting and if it’s in the air, you can call that air scenting. Is it called water scenting if he sniffs a running creek or tree scenting if he barks up a tree?  Scent is scent!

imagesY2AQPWJMThe canine’s nose is attracted to the strongest scent source available at that moment during trailing.  The canine has thousands more scent receptors than humans. A roaming nose is a hunting nose; let it be.

If you want to see how your dog scents, ignite a brightly colored smoke bomb outdoors with plenty of room to observe and follow the pock­ etc. of floating smoke. Watch how clouds of smoke slowly break apart, climb high into tree tops, sink down into ravines or just lazily snake over the high grass. Wind, atmospheric pressure, humidity, temperature, etc. ….all affect the smoke as it does with scent. That is why your trailing dog runs, stops, circles around, runs again ….. Let him work it out without interference from you. Scenting is his world, not yours.

You can improve your game scent trailing by taking advantage of the best environmental conditions available, as well as staying away from proven scent killers, i.e…..hot and dry surfaces, vehicle exhaust fumes or petroleum products. Trying to scent a hound on a fresh track next to a chugging hunting rig is like us trying to smell a rose over a smoky camp fire.

bait

As much as we now know about scent, there is still plenty of scientific work to be done. As a hunter, you must understand how scent works whether you use a canine partner or not.  Whether hunting birds or bear, scent is always there.

Keep the wind on your face, the sun to your back and hunt like a predator!

Follow our FISHING BLOG

WEB   RATES     FISH    HUNT    CABINS    PHOTOS
BROCHURE    HUNT BOOKLET

Enter your email address to subscribe to this blog and receive notifications of new posts by email.

← Back

Thank you for your response. ✨

Email Me....


Tags: , , , , , , , , , , , , ,

Black Bear Hunting – SIT Until Dark

450_ashley

We hear tales of bear hunters not sitting until dark and instead stand in time to get back to camp before it gets too late. CRAZY!

Here are some 2016 successful hunters:

This slideshow requires JavaScript.

Just like in most types of hunting, “just before dark” is usually the best time for the mature animals to arrive. Sometimes the big ones will be there well before dark, but usually the last 30 minutes of legal shooting light is the best. Carry a flashlight; the bear usually won’t eat you. They are just as afraid of you after dark as they are in the daylight.

sunset bear

Follow our FISHING BLOG

WEB   RATES     FISH    HUNT    CABINS    PHOTOS
BROCHURE    HUNT BOOKLET

Enter your email address to subscribe to this blog and receive notifications of new posts by email.

← Back

Thank you for your response. ✨

Email Me....


Tags: , , , , , , , , ,

Black Bear – Shooting the 1st Bear You See

Often, the number one of objective of a spring bear hunt is to simply bring home a bear.

330

The first bear you see, however, will most likely be a juvenile or a lesser bear. You can shoot that bear and have the rest of the week to relax at camp, but why not wait for a more mature bear that will achieve more of the management goals of the region and make you happier in the long run?

154

Don’t shoot the first bear you see. Take the chance that you’ll get another opportunity.

Follow our FISHING BLOG

WEB   RATES     FISH    HUNT    CABINS    PHOTOS
BROCHURE    HUNT BOOKLET

Enter your email address to subscribe to this blog and receive notifications of new posts by email.

← Back

Thank you for your response. ✨

Email Me....


Tags: , , , , , , , ,

Art of Archery – A Timeline through Ages Infographic

ODL0814_HUN02

Here’s an interesting read Infographic on the evolution of archery
art-of-archery-a-timeline-through-ages-infographic-by-global-gear

Follow our HUNTING BLOG

WEB   RATES     FISH    HUNT    CABINS    PHOTOS
BROCHURE    HUNT BOOKLET

Enter your email address to subscribe to this blog and receive notifications of new posts by email.

← Back

Thank you for your response. ✨

Email Me....

 
Leave a comment

Posted by on February 9, 2017 in archery, Wawang Lake Resort


Tags: , , ,

Hunting Bears With Bows – Decoy Tactics

Trophy boars are smarter than your average bear. But even the savviest old bruin has a few chinks in his armor. Using a decoy is an exciting way to exploit them. Even weary old black bears will come in spoiling for a fight. Here are three strategies for drawing a dominant, hungry bruin into bow range.

 1

The Intruder
Big boars are solitary animals and will claim a food source as their own, commonly defecating along entrance trails to warn other bears away. To get this bear’s attention, stake a small bear decoy near the food source, positioned with its head down and its backside facing the direction you expect a boar to approach. Attach a few strips of black cloth to the decoy’s ears and tail for added realism and collect some bear scat from another area—preferably from a boar—and with a plastic bag, transplant it on the entrance trails.

Now sit back. Any wise old boar that might otherwise camp just off the food until nightfall is almost sure to investigate when he sees your “intruder.” Keep in mind that a boar may visit a food site daily or stop by every second or third day while patrolling his home turf. Be patient, and don’t let your guard down.

2

The Easy Meal
Black bears are fond of fresh meat and will drop their guard to capture an animal in distress. Any small, furry decoy, like those used for foxes and coyotes, wiggling about in plain sight is sure to catch a passing bear’s attention. With a little luck, the bruin will move in quickly to finish off what he thinks is hapless prey. If he hangs up, though, add a few squeals from a dying-rabbit call to entice him.

If whitetail deer are prevalent in your area, a fawn decoy can be too much for any hungry black bear to ignore. Try a few fawn contact bleats, and if that fails, go to a fawn-in-distress call. Nock a broadhead and get ready. The bear will come in fast, so be prepared to shoot pronto.

3

The Feeding Female
You’ll have to wait a few months to use this setup, but it’s a good one to have in your arsenal. Black bears rut in late spring and early summer and will visit bait sites, looking for a sow in heat. If baiting is legal in your area, position a small black bear decoy with its head in the bait barrel, and hang a few scent canisters soaked with sow-in-heat urine 3 or 4 feet off the ground nearby.

Big boars are ultracautious around bait, so odor control is critical. As you’re setting up, wear rubber gloves and spray the decoy down liberally with a quality scent remover. The boar will approach the decoy warily. Don’t rush the shot. As he investigates, you should have plenty of time to draw.

Follow our FISHING BLOG

WEB   RATES     FISH    HUNT    CABINS    PHOTOS
BROCHURE    HUNT BOOKLET

Enter your email address to subscribe to this blog and receive notifications of new posts by email.

← Back

Thank you for your response. ✨

Email Me....


Tags: , , , , , , , , , ,

The Best Shot Placement for Black Bear

SO, you’ve opted for a lung shot. Good choice. But where exactly you should place your bullet depends on your quarry, as the following tips reveal. (Please refer to the organ legend) Sometimes you only get one chance to bring down a big-game animal. Here are 7 ways to help make sure it truly counts.

  • Avoid the head-the target is too small and you’ll ruin the best part of your fireplace rug. You’ll also render your bear ineligible for official scoring.
  • As for spine or neck shots, it can be difficult to visualize exactly where to find the spinal column thanks to the bear’s long hair and thick body.bear-target

Again, lung shots are your best bet. Trace the back of the front leg up to about one-third of the way into the chest. The lungs on a bear are positioned a little more forward than on an ungulate, so you don’t have as much leeway if you shoot back of your aiming point. For the shoulder/heart shot, which is popular for anchoring bears in their tracks, follow the centerline of the front leg up to the one-third point of the body. Be careful not to shoot low or forward, or you’ll quickly have a wounded animal on your hands.

WOUNDED and lost big game animals are part of the somber side of hunting. None of us is comfortable with the subject, but if you have any measurable hunting experience, you’ve undoubtedly seen examples. Maybe you’ve even lost an animal or two yourself.

It’s a certainty that as long as there’s hunting, game will be wounded and not recovered. In such situations, it’s just as certain that the bullet didn’t hit the animal in the right place. Why exactly can be blamed on any number of variables, but in most cases it’s safe to say the shot should never have been taken in the first place.

As hunters, our most important priority is to do everything possible to ensure a clean, quick, humane kill-it’s our moral obligation every time we head afield. Here are some important considerations in making that happen.

BULLET PLACEMENT
Much has been written and discussed about selecting the best rifle, cartridge, bullet and optics for hunting specific species under various conditions. Most of this advice is sage indeed, helping hunters learn about and understand the limitations of their equipment. But when it comes to a quick kill, the single most important factor is bullet placement. A .243 in the heart or lungs of even the largest big-game animal, for example, is more certain to result in its demise than a .500 Nitro Express in its leg. Just think of hunting legend Karamojo Bell. It was his fanaticism over bullet placement coupled with an understanding of his quarry’s anatomy-that allowed him to tale down so many elephants with his meager .275 Rigby, a cartridge equivalent to today’s 7×5 7.

wawangbear2 (550x417)

MARKSMANSHIP
The first step in ensuring accurate bullet placement comes with the decision to squeeze the trigger. Before you hit the switch, you must have an extremely high expectation of putting the bullet right where you want it, and that means understanding your own limitations as a marksman. I’ve never been much impressed by tales of 450-yard kill shots on deer or other game. While such shots are possible, not many hunters can make them with any consistency. With few exceptions, I shudder when I hear hunters talking about their long shots-much like a gambling addict bragging about his one win, for each tale of success there are likely tenfold as many unspoken failures.

The longest shot I’ve ever taken was with a 7mm Rem. Mag. on a five-point bull elk in B.C.’s Muskwa Valley. It was 360 yards away. I had a solid rest, a reasonable amount of time and a mild, though gusting, wind. The bull was dead when we got to him, having never moved. Despite that, I’m not sure I’d take the same shot today if it were presented. Perhaps I no longer feel the need to, as I might have back when I was a much less seasoned hunter. Experience has taught me that too much can go wrong in such a situation-not to mention the fact few animals can travel as far, or as quickly, as an ells can when wounded.

Jon Hanson - Tiffin, IA 440 lb. black bear

Jon Hanson – Tiffin, IA 440 lb. black bear

No, I’m far more impressed by the hunter who tells me he snuck in to within 75 yards of a herd of elk, or never shoots at running game or at any animal beyond 150 yards. This is the hunter I admire, for he clearly understands that undisturbed game and cool-handed marksmanship should be the rule, not the exception. This is the hunter who believes that 20 bullets can equal 20 deer, and he’ll wait to shoot only when he’s extremely confident of accurately placing a bullet.

HEAD & NECK SHOTS
So, where on an animal should we try to place our bullet to ensure a one-shot, clean kill? There’s no denying the surest fatal shot is to the brain or spinal column. Either will put an animal down almost instantly, and result in very little ruined meat. Under most circumstances, however, this is not a shot I would recommend. For starters, the brain is a relatively small target, and even a narrow miss can result in a broken jaw, lost eye or other similar wound that condemns an animal to a most unpleasant, slow death. I once shot an antelope sporting a fresh bullet wound through the bridge of its nose. Whether the hunter who first hit it was aiming for the brain, I can’t say for sure, but the buck was clearly laboring, almost choking on blood, and would have suffered considerably had I not come across it.

Neck shots are equally uncertain, as the spinal cord must be severed to ensure instant death. Miss by even a little bit, and you’ve probably got an animal with a muscular wound from which it will likely recover, but not without considerable agony. In the worst-case scenario, you may sever the trachea-the animal will likely escape, but suffer a lingering demise. When neck shots don’t connect directly with the spinal column, an animal will often drop to the ground almost immediately but quickly recover and run off. If you shoot an animal in the neck whether by design or by accident-it’s therefore important to keep a close eye on it until you’ve confirmed it’s down for keeps.

Head and neck shots do have their place in the right circumstances, but they should only be taken at close range by capable shooters who know their quarry’s anatomy. They’re also acceptable in the rare event of an emergency, when a dangerous animal needs to be brought down in a hurry.

SHOULDER SHOTS
Some hunters prefer shoulder shots because they will disable game while also inflicting fatal damage to the heart or lungs. Even when no collateral damage occurs, a broken shoulder, or two, will bring down an animal, rendering it helpless. In my opinion, this shot should be reserved for dangerous game, particularly bears. While some hunters use shoulder shots on larger animals such as moose and elk, I find the resulting dispersal of bullet and bone fragments ruins too much meat. Having shot a whitetail through the shoulder last year, I can speak first-hand of the meat that was wasted. Another thing to keep in mind when considering the shoulder shot is that if you shoot too high or too far in front, you’ve got either a clean miss or an animal with agonizing wounds. And if you shoot too low, you’ve got an animal with a broken leg that can still escape, only to later succumb to its wounds or predators.

images539SD7BZHEART SHOTS
The heart shot gets a lot of attention, though I suspect most hunters don’t actually realize just how low in the chest the heart lies in big game. While no doubt fatally damaged if hit, the heart offers a small target, and is often covered by the upper leg. There’s little room for error: too far forward and you’ve got a non-fatal brisket shot; too low and you’ve hit muscle or broken a leg, with no expectation of quickly recovering the animal. And if your bullet strikes too far back, you’ve got a gutshot animal. The only practical room for error is if you shoot high and take out the lungs. While many believe the heart shot is almost instantly fatal, most experienced hunters will tell you that a heart-shot animal typically travels farther before collapsing than one that has been lung-shot.

LUNG SHOTS
I believe the lung shot is the appropriate shot for 90 per cent of the big-game hunting situations in Canada. First and foremost, a bullet through the lungs results in an almost certain one-shot kill. In most cases, the animal won’t drop on the spot, but seldom will it travel more than 100 yards or so before falling over; the damage a modern bullet does to the lungs is that devastating.

images5VJ79DJ0The lungs also offer a relatively large target, bigger than any other assuredly fatal zone on a game animal. This allows for a fair margin of error. Shoot low, and you’ll take out the heart; a bit high and you’ll sever the spinal column. Too far forward and you have a debilitating shoulder shot. Only when you shoot too far back do you have a problem-animals shot in the paunch typically suffer lingering deaths, and if you do happen to recover one, you’ve got a heckuva mess on your hands when it comes to field-dressing it. If you shoot just a little too far back, however, you may get lucky and strike the liver. Animals hit in this vital organ tend not to go too far before lying down.

The lungs on a game animal generally cover about two-thirds of its chest area when viewed broadside, more or less in the centre and a little toward the bottom. A professional hunter in Africa once told me he thought North American hunters tended to shoot dead centre in the chest of an animal; he believed the more effective shot was to the top of the lower third of the chest. He may well have been right, but 1 still maintain that allowing as much room for error as possible is the wisest thing most of us can do. As such, when my quarry is broadside, I generally aim for the centre of the chest, just behind the shoulder. Often, an animal will not react immediately to a lung shot, causing some hunters to think they’ve missed when they’ve actually made an excellent shot. I remember one moose I shot three times in the span of about 10 seconds. It didn’t take two steps during that time, and I couldn’t understand how I could be missing such a big target. The animal dropped soon after the third shot, however, and when I skinned it out, a salad plate would have covered all three holes in its chest and lungs. (For species-specific tips on lung shots, see “Top targets” on page 48.)

SHOOTING ANGLES
While we all prefer broadside shots, as often as not we face shooting opportunities from an angle. You still want your bullet to enter the chest cavity, however, so it’s important to visualize the path your bullet must take. With an animal quartering toward you, your target should be somewhere between the base of the neck and the point of the facing shoulder. If an animal is facing you directly, the centre base of the neck is the preferred target. The more difficult shot to visualize is when an animal is quartering away. Take your shot with the intention of breaking the far side shoulder and you’ll generally send your bullet through the desired lung region. Be aware that the tendency in this situation is to shoot too far back, resulting in an unwanted paunch shot. I recommend not shooting when animals are quartering away at extreme angles or facing directly away from you. While we all know the old “Texas heart shot” through the behind can be fatal, the odds are your bullet will break up or deflect on contact with bones, impeding its ability to get into the vital organs. I know some may disagree, but this is one shot I simply won’t take, and I advise others to follow suit. If you absolutely must tale this shot, at least be sure to use a well-constructed bullet designed for maximum weight retention and penetration. Remember, when it comes to shot placement, the goal isn’t simply a freezer full of meat it’s also to get the job done quickly and efficiently.

Follow our FISHING BLOG

WEB   RATES     FISH    HUNT    CABINS    PHOTOS
BROCHURE    HUNT BOOKLET

Enter your email address to subscribe to this blog and receive notifications of new posts by email.

← Back

Thank you for your response. ✨

Email Me....


Tags: , , , , , , , , , , , ,