RSS

Monthly Archives: April 2016

Training Your Retriever

Attach a 6-foot lead or cord to a scent-infused training dummy or the wing of a bird. (Freeze wings during hunting season and thaw them out when ready for training.) Use this to create “drags” of scent the dog will follow.

66

Start with 10-yard straight-line retrieves on short grass. Gradually increase the challenge: curved drag lines, taller grasses, abrupt turns, short gaps in the scent trail by lifting the dummy off the ground for a foot or two.

88

To stay on track, some dogs need reinforcement in the form of small bits of dog treats dropped along the trail. Use treats if you need to keep your dog excited, but sparingly. The point is to find the big payoff at the end of the trail, not the little goodies along the way.

55

Once your dog is trailing enthusiastically, dial up the difficulty. Run the scent trail over a log, make a sharp turn, and drag it along the log as if the wounded bird ran down the log. Run the scent trail in and out of the water along a creek or pond edge. Run it across a creek and continuing on the other side. Create longer and longer gaps.

777

To really hone a dog’s tracking skills, make a dragging pole. This is a particularly good drill for dogs that will hunt in the heavy cover of beaver ponds and thick timber. Cut a piece of PVC pipe about 5 feet long. (The diameter doesn’t matter—use whatever is cluttering up your basement.) Run a 10-foot section of parachute cord or other cordage through the pipe, and tie a slip loop to one end.

Attach the loop to a bird wing or training dummy treated with duck scent. Hold the pipe out from your body, and drag the wing or dummy along a scent trail through yard. The pipe prevents your own foot scent from contaminating the trail.

Follow our FISHING BLOG

WEB   RATES     FISH    HUNT    CABINS    PHOTOS
TESTIMONIALS    BROCHURE    HUNT BOOKLET

Enter your email address to subscribe to this blog and receive notifications of new posts by email.

← Back

Thank you for your response. ✨

Email Me....


Tags: , , , , , ,

Calling in Coyotes & Wolves

Thanks to the prevalence of electronic calling devices, anyone can become a decent coyote caller with the press of a few buttons. But if you really want to step up your game, you need to first understand what makes these animals tick.

coyote-hunting

Prey Distress
Coyotes are nature’s great omnivores. Studies of stomach contents have found that coyotes will swallow almost anything that they can get in their mouths, including rocks, plastic packaging, harness buckles, and even the occasional rabbit. Knowing this, it doesn’t matter much which sort of prey distress call you use—most modern electronic callers offer everything from a whitetail fawn to a house cat—as long as you set up within a coyote’s earshot.

The manner in which a coyote approaches a distress call depends on its security level, which is influenced by its latest experiences. An unpressured coyote will often come in quickly and boldly to almost any distress sound. A pressured coyote, however, will take much longer to approach a call. He’ll wait downwind of the sound before slowly slinking in, wary nose to the air.

Upon hearing the initial prey distress cries, the test coyotes would usually run to a downwind position without exposing themselves and remain there until we left. They would later approach our stand area to investigate. One wary old alpha pair (the male was 10 years old) waited 17 hours before approaching the calling location, and then spent 45 minutes at our stand site sniffing around.

The takeaway? One of the biggest mistakes you can make with a distress call is leaving a location too soon. Spend at least 30 to 45 minutes on stand.

Another important factor is the time of day you target coyotes. Only 10 percent of respondents in a recent poll of about 1,400 coyote callers said dawn was best. More than half the hunters chose 8 a.m. to 10 a.m., followed by 11 a.m. to 2 p.m., and then dusk, each of which got about 20 percent of the vote.

Whines & Yelps
These nonaggressive vocalizations—often made by pups—are probably the most effective sounds in a coyote caller’s repertoire because they trip so many behavioral triggers at once. With the press of a button you can target social interaction, territorial instincts, and protective maternal/paternal instincts. At certain times of the year, a case could probably be made that you’re appealing to their hunger, too, since several studies have documented coyotes cannibalizing pups.

Before switching to a different sound, we’ll increase the volume and intensity of the whines and yelps for three or four series in order to reach out to distant coyotes. This has proven extremely effective in all seasons and geographic locations, and at any time of day.

Challenge Howl
The challenge howl is a misnomer. A challenge is an invitation to fight, to do battle, such as a monarch bull elk bugling at a satellite bull. Coyotes don’t do that. Biologists call this vocalization the threat-bark howl because it more accurately describes the intent of the coyote: to threaten and demand that the intruder leave. Now. Field observations have shown that coyotes (unlike wolves) will avoid fights whenever possible. A wolf pack will run down an intruder and kill it. A pack of coyotes will run down an intruder, make him submit, and then let him leave the territory.

coyote_snarl

For these reasons, callers should use this vocalization only if they know they are set up in a pack’s core territory. If a caller sets up near a den during whelping or denning season, the results can be spectacular. Having resident coyotes charge in on a close, loud, aggressive call rivals any approach of a rutting buck or strut of a spring gobbler. However, if you set up in overlapping home ranges and demand that every coyote within hearing distance leave, they probably will.

The key to locating a pack’s core area is to home in on their group-yip howls. Listen for a pack’s group howl night after night. If you are able to pattern their howling with some regularity, you should be able to determine their core area. Once you’ve plotted that on a map or GPS, study the terrain. Coyotes will typically hide out in the thickest, most secluded cover in the area. Make an educated guess and move in close before threatening the pack.

Many callers will break off a stand when a coyote bark-threat howls in response to their distress calls because they believe that it means the coyote has busted them and will not approach. That’s not always the case. The coyote may simply be protesting the source of the sound even if it hasn’t identified it. You can often get a barking, threat-howling coyote to expose himself for a clear shot if you wait him out and weaken your return howls, keeping them less aggressive than the coyote’s. Another tactic is to retrace your steps and then circle around to a different location. If the coyote doesn’t see or scent you, you can call him in to the new setup with whines and whimpers.

130

Group and Solo Howls
Coyote calling is a numbers game. You want to offer sounds that appeal to the largest number of coyotes without alarming or intimidating them. The most effective howl to draw them in is a lone howl that is low frequency, high pitched, and long. It announces the presence of an unknown, young, small, nonaggressive coyote that any other dog within hearing distance will be willing to investigate.

Louder, long-range howls are more likely to get howls in return, but they are less likely to draw a coyote in to your stand.


Knowing that, here’s a simple formula for success: Locate coyotes with a group-yip howl (the collective yowling that you have undoubtedly heard on calm evenings) and call them in to gun range with a lone howl.

0cf5707bbfce2588fddf51ff630fbe1c

Most of those vocalizations are aggressive in nature. This is important to know because such vocalizations will alarm and/or intimidate most coyotes. Submissive coyotes will often retreat to their core areas after howls are broadcast and remain there until joined by another group member or until enough time has passed for them to call back or investigate. That’s the exact opposite of what you want your howls to do.

It is important to remember that coyotes will sometimes investigate the source of your group-yip howls, so don’t get caught unprepared.

Follow our FISHING BLOG

WEB   RATES     FISH    HUNT    CABINS    PHOTOS
TESTIMONIALS    BROCHURE    HUNT BOOKLET

Enter your email address to subscribe to this blog and receive notifications of new posts by email.

← Back

Thank you for your response. ✨

Email Me....


Tags: , , , , , , , , , ,

How to Make Your Own Scent-Free Deodorant

Think organic deodorant isn’t for you? It’s actually perfect for deer hunters, because it battles sweat and odor, and gives off no unnatural scent of its own. Buy ingredients in bulk and make three 2.5-ounce sticks—a season’s worth—for only $2 each. Here’s how.

scentstick

What You’ll Need

● 1⁄4 cup coconut oil
● 2 Tbsp. shea butter
● 2 Tbsp. cocoa butter
● 1⁄4 cup beeswax pellets
● 3 capsules 400-IU Vitamin E
● 21⁄4 tsp. baking soda
● 1⁄4 cup organic arrowroot powder
● 2 capsules Vitacost Probiotic 10-20

The Brew 
Heat a small saucepan of water and remove just before boiling. Combine coconut oil, shea butter, cocoa butter, and beeswax pellets in a mason jar, and place it in the hot water, double-boiler style, until melted. (Warning: If you’ve ever had a severe reaction to a bee sting, don’t handle beeswax.) Leave the jar in the bath and add the Vitamin E capsules, baking soda, arrowroot powder, and probiotics, which introduce good bacteria into the skin to battle the bad stuff that causes BO Stir gently until mixed well.

The Cure
Pour the warm mixture into empty, used stick-deodorant containers, new containers (sold online), or lined muffin tins, and let harden overnight. Then, perform your own sniff test: The only scent noticed is a trace of beeswax.

Follow our FISHING BLOG

WEB   RATES     FISH    HUNT    CABINS    PHOTOS
TESTIMONIALS    BROCHURE    HUNT BOOKLET

Enter your email address to subscribe to this blog and receive notifications of new posts by email.

← Back

Thank you for your response. ✨

Email Me....


Tags: , , , , , , ,

Turn Shipping Containers Into Cabins

Every hunter, fisherman, and all outdoor-minded individuals dream of having their own cabin in the woods.

shipping container cabin
We each have an iconic image of what that subtle shelter looks like, yet here’s a twist that’s very obtainable. And it was achieved by, well, thinking outside the box.

Shipping containers are the “glass bottles” of old; eventually, they need to be replaced. Why not re-use one of these large cubicles as a cabin?

American Pride does just that. Check out this video demonstration.

Follow our FISHING BLOG

WEB   RATES     FISH    HUNT    CABINS    PHOTOS
TESTIMONIALS    BROCHURE    HUNT BOOKLET

Enter your email address to subscribe to this blog and receive notifications of new posts by email.

← Back

Thank you for your response. ✨

Email Me....


Sharpen Your Bow Skill During the Off Season!

bow-hunting-wawang-lakeWe practice with our bows all summer long, but after opening day its easy to get wrapped up in the hunting and forget about practicing. But even if you’re spending your time in the field and can’t hit the archery range every day, you can still keep your edge. Shooting in hunting situations is obviously different from target shooting. In the real world, weather conditions, shot angles, brush and other obstacles can impact your shot. Also, when the time comes to take a shot during a hunting situation you’re usually either stiff and cold from sitting in a treestand or sucking wind from running up a hill. All this combined with the fact that you must make a clean shot with the first arrow makes it all the more important to keep your shooting skills sharp. Here are a couple tips.

Practice Drawing
One of the biggest challenges to making a “cold shot” is that often the muscles I use for properly drawing my bow are stiff. The simplest way to cure this is to periodically pick a target, draw your bow, aim, hold, and let down your draw. This keeps you loosened up, plus drawing and aiming without actually shooting helps you focus on the target.


Practice Shooting

Although just drawing and aiming will help a lot, the single biggest help is to actually shoot while out hunting. A common practice among traditional shooters is to carry one or two blunt pointed arrows in your quiver so that you can stump shoot in your down time. Stump shooting is fantastic for keeping you warmed up, but unlike just drawing, actually completing your shots will bring your release into play, as well as give you all sorts of angles and situations to practice.

Small game is even better than stumps (grouse and rabbits taste a lot better too). Grouse can be deceivingly tough to hit. You want to aim for the base of the neck or the head. Sometimes they flush at the shot, but grouse will go in the direction that their head is pointing, so if you use a snaro point, you can either take their head off or hit them in the body as they flush. The best thing about grouse is they often give you extremely challenging shots, and if you can become consistent at taking them, you will be ready for the big game (make sure to check your local regulations before taking any small game with a bow).

grouseandy

Follow our FISHING BLOG

WEB   RATES     FISH    HUNT    CABINS    PHOTOS
TESTIMONIALS    BROCHURE    HUNT BOOKLET

Enter your email address to subscribe to this blog and receive notifications of new posts by email.

← Back

Thank you for your response. ✨

Email Me....


Tags: , , , , , , , , ,

Tips on Choosing The Best Field Knife

It doesn’t matter how many knives you have at home. The one you reach for when you’re in the woods—to gut a deer, cut brush, carve a fuzz stick—that’s your field knife, your everyday companion. There’s no one perfect model, but here’s how to pick the ideal features for you.
1) Fixed or Folder?

Field-Knife-2 Field-Knife-5
The traditional choice, a fixed-blade knife is stronger than most folders. With no moving parts, it’s virtually fail-safe, and cleaning is as easy as wiping off grime and wiping on oil. If you need a deep belly for skinning big game, fixed is the primary choice due to the challenge of storing a wide folding blade inside its handle. A folder, on the other hand, makes everyday carry simple: Just pop it in your pocket. The increasing popularity of pocket-clip folders has spawned huge innovation in materials and designs, so the options are breathtaking. Bottom line: Fixed or folder, you can’t lose. But you have to choose.
2) Steel Yourself

Field-Knife-3_0
Basic steel is just iron and carbon. But there are hundreds of alloys. The least you need to know is that the more carbon, the harder the blade and the better it holds an edge—but too much can make a blade brittle. Also, adding chromium prevents rust (stainless steel usually has at least 12 percent), but it can soften the steel. It’s a balancing act. Here’s a breakdown:

Non-Stainless Steel: It rusts easily but makes a great blade if you take care. High-carbon examples (1095, D2) really hold an edge. A few are both hard and tough (A2, CPM 3V, 8670M).

​Stainless Steel: If you want low maintenance, this is the way to go. But low-carbon versions (18/8, 420, 440, 440A, AUS-6) can be too soft to get or keep a fine edge. More carbon or a harder alloy is better (440B and C, AUS-8 and 10, 8Cr14MoV, 154CM).

Powdered Steels: The newest stainless alloys (S30V, Elmax, M390) are made of powderlike granules that are heated to form very hard steels that take a wicked edge. They pretty much have it all—​­corrosion resistance, hardness, and strength. Naturally, you pay for it.

3) Get the Point

Field-Knife-4
Most field knives have a drop point or clip point, either of which may be combined with a deeper belly for skinning. The drop point is ideal for field dressing game without slicing innards. Its thicker tip also helps with separating joints and with heavy camp chores. If your hunting knife will double as a fish cleaner and camp-kitchen slicer, the finer clip point is the better choice, and it’s fine for gutting game as long as you’re careful with the tip.

4) Find the Grind

Field-Knife-5
Likewise, most field knives hew to one of two grinds: hollow or flat. A hollow-ground blade has a concave shape, as if material has been scooped out of the blade’s thickness. It’s easy to resharpen and best for shallow cuts, such as field dressing, cutting hide, and simple camp chores. A flat-ground blade is the more common choice; it is tougher, holds its edge better, and excels at deeper cuts, working around sinew and bone, and chopping food at camp.

Now that you know what to look for, check out our field knife gear test to see which brands of fixed and folder blades are worth their metal.

Follow our FISHING BLOG

WEB   RATES     FISH    HUNT    CABINS    PHOTOS T
ESTIMONIALS
    BROCHURE    HUNT BOOKLET

Enter your email address to subscribe to this blog and receive notifications of new posts by email.

← Back

Thank you for your response. ✨

Email Me....


Tags: , , , , , , ,

Field Dressing a Black Bear

With the bear hunt just around the corner, we will cover the basics 🙂  Pictures have been withheld due to graphic nature.

Instructions

imagesFG3W4IGS 
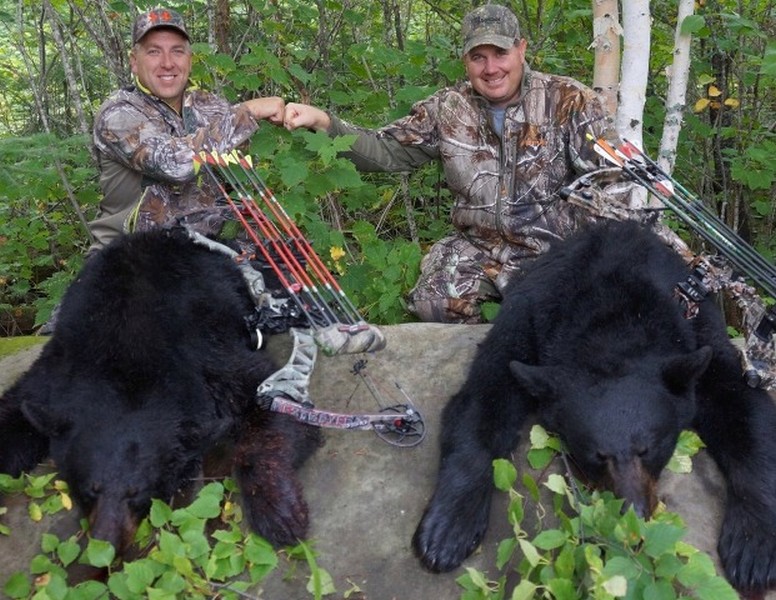
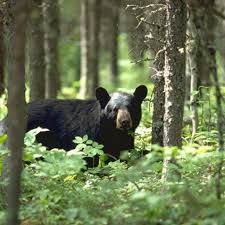
1. Clear an area surrounding the black bear. Make the area large enough to allow room to move around and roll the animal away from the entrails. The lowest part of the ground should be reserved for the entrails. Move the bear onto its back. Spread the rear legs and either have your partners hold them apart or secure them with ropes. Repeat with the front legs.

  1.  2. Insert one of your knives in the cavity at the base of the bear’s throat. Cut the blood vessels with a deep, crosswise motion to open the jugular vein and bleed the animal. Move the bear so the blood will flow away from it and clear the ground as needed.
  2. Cut the skin in a straight line from the breastbone — located just below the rib cage — to the base of the bear’s jaw. Cut the muscles along this area to the bone to expose the throat and windpipe. From the same starting point, cut the skin in a straight line down to the anus. Some areas require hunters to leave the genitals for sex identification; cut around the genitals slightly to preserve them.
  3. Split the breastbone.  This can be done with a bone saw, hack saw or a couple of axes.  If you choose to use axes, hold one axe against the breastbone and hammer it with the other axe; this will break the bone from the base of the rib cage up to and through the top ribs. Open the chest by pulling the front legs apart. Cut the windpipe and gullet close to the head. Lay them in the chest cavity for later.
  4. Cut through the abdominal muscles; start at the base of the rib cage. Take care not to puncture the intestines, the stomach or the bladder; doing so could taint the meat. Sever the muscles down to the pelvic bone. Enlist your partners to hold open the bear so you can work more smoothly.
  5. Break the pelvic bone by using the same technique implemented the breastbone. Do not cut the urinary tract as it may contaminate the meat. Start on one side of the chest cavity and use your knife to cut the diaphragm from the chest wall. Start at the base of the ribs and slice as far back into the cavity as possible. Have your partners pull the organs to the side so you can see and cut more easily. Repeat the process on the other side of the black bear.
  6. Cut the intestines and rectum from the split pelvic bone to where the rectum meets the muscle tissue at the anus. Cut a circle in the skin at the base of the tail; cut 1 to 2 inches from the anus. Cut the muscles to the top of the pelvic bone to free the anus and rectum. Pull the lower intestine, rectum and anus away from the cavity and hold clear. You must not puncture or cut the urinary tract or intestines.
  7. Hold the parts, roll the black bear away and allow the intestines and stomach to spill onto the ground. Grab the windpipe to pull the lungs and heart out onto the ground. Cut any remaining diaphragm tissue to free the organs. Complete the field dressing by draining as much blood from the bear as possible and wiping the body cavity with cloth rags to clean. Do not use water. At this point your main concern becomes to cool the cavity and prepare for transport which can be done by propping the cavity open with a tree branch.
    2 bear sized 

    Proper field care will ensure less weight and trouble with removal and transportation from the hunt site.

     For more information on black bear hunting, visit us at http://www.wawangresort.com

    Follow our FISHING BLOG

    WEB   RATES     FISH    HUNT    CABINS    PHOTOS
    TESTIMONIALS    BROCHURE    HUNT BOOKLET

    Enter your email address to subscribe to this blog and receive notifications of new posts by email.

    ← Back

    Thank you for your response. ✨

    Email Me....


Tags: , , , , , , ,

GROUSE Hunting Rates

Bookonline
pg 4 grouse

Bookonline

Follow our FISHING BLOG

WEB   RATES     FISH    HUNT    CABINS    PHOTOS
TESTIMONIALS    BROCHURE    HUNT BOOKLET

Enter your email address to subscribe to this blog and receive notifications of new posts by email.

← Back

Thank you for your response. ✨

Email Me....


Tags: , , , , , , , , ,

Bow Shooting – Stance and Grip

Bow Shooting – Stance and Grip

a3ec154f78392339882e90b6cb5ae210

Follow our FISHING BLOG

WEB   RATES     FISH    HUNT    CABINS    PHOTOS T
ESTIMONIALS
    BROCHURE    HUNT BOOKLET

Enter your email address to subscribe to this blog and receive notifications of new posts by email.

← Back

Thank you for your response. ✨

Email Me....


Tags: , , , , , , , , , , ,

A Moose Hunt Review

So our 2015 moose hunt has come and gone again with fantastic results!  Due to reduced tag number across the province, we were concerned that the hunt would be sparse.  It couldn’t have been further from the truth.  This year we harvested 1 mature bull, 1 cow and a calf, 2 cows and 2 other calves spotted!  There was sign evident everywhere around us and made for and excellent year of hunting that excited all our hunters!

emms moose

With both new groups in camp and some are Wawang Veterans.  It’s great to see how groups work together to help the overall success of each other on the  whole.  As usual, the hunt was a complete community effort and a great outdoor experience for all.

We are proud to keep our tradition of excellence strong and look forward to 2016!

Cow_Moose_4 (3)

We have limited availability for 2016.
Reserve your spot early for great accommodations during your next moose hunt in 15A or 15B.

Moosehuntersjpg

Book Now

Follow our FISHING BLOG

WEB   RATES     FISH    HUNT    CABINS    PHOTOS
TESTIMONIALS    BROCHURE    HUNT BOOKLET

Enter your email address to subscribe to this blog and receive notifications of new posts by email.

← Back

Thank you for your response. ✨

Email Me....

 
Leave a comment

Posted by on April 11, 2016 in moose, Wawang Lake Resort


Tags: , , , , , ,