RSS

Tag Archives: Wawang Lake

Frugal Scent Free Ideas

So obviously there is a multimillion dollar market out there dedicated to every type of scent free product out there.  From sprays to wipes, shampoo to soaps, it is all out there and available.
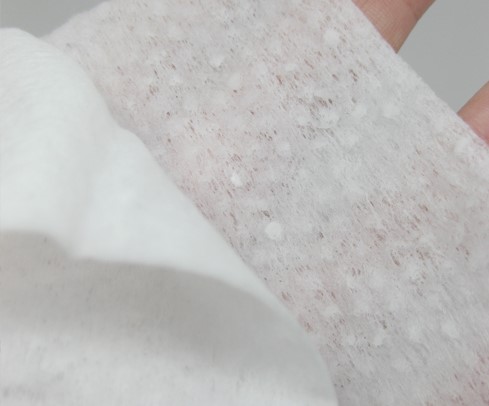
Scent Free Wipes

Use scent free baby wipes for scent free hunting wipes. These are readily available at the grocery store and packaged perfectly for transport. They don’t say “odor eliminating” but seem to do a bang up job of cleaning up after a child while still being safe on the skin 🙂

homemade towelette

Scent Free Spray and Wipes (Homemade Version)

Ingredients for Scent Killer:

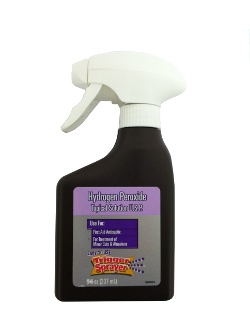
• 16 oz. (2 cups) Peroxide ( yes, I use the brown bottled stuff)

• 16 oz. (2 cups) Distilled Water or water from a dehumidifier

• ¼ cup baking soda 

1 oz. On non-scented shampoo (I use Hunters Specialties green shampoo) 
(Or adjust amounts to whatever size you make accordingly)

Directions:

Let sit for several days (a 1 gallon milk jug works good with lid loose). This recipe is also good for removing blood from your hands in the field after dressing your critter! No dried blood, presents a better photo image!

Homemade Scent Free Wipes

Mix up a batch of scent killer per instructions above. Next, take a roll of heavy duty paper towels (The blue shop towels work great!) 

cut the roll in half with an electric knife or saw so you have 2 short rolls of paper towels (don’t try a regular knife… it doesn’t work). Pull the cardboard tube from the middle of the half roll then 
find a coffee container big enough to hold the 1/2 roll of paper towels (and with a good sealed lid). 

Put one of the 1/2 rolls of paper in the container, pour in the scent killer, let the wipes soak up the scent killer, keep covered tight so they don’t dry out. Because the inner cardboard tube is out, pull the paper towels out the from the middle like a Kleenex!

Scent Free Soap

OK, how many bottles of scent free body wash have we all bought over the years? That liquid soap sure does not seem to last very long, and gets to be expensive after a while, especially if you have multiple hunters in the family. After spending a lot of money on this myself, I decided to look for fragrance free bar soaps, and finally I found that Dove makes one – Dove Fragrance Free Senstive Skin Unscented Bar.  Dove brand prides itself on being sensitive and the claim to being scent free is stringent.  Great value for the price!

soap

Scent Free Deodorant

Like the bar soap, there are many traditional brands of scent free/fragrance free deodorants out of the market. Next time you are at the drugstore browse the deodorant section and you will find many brands that have these scent /fragrance free products in both gel and solids. Ensure you buy a brand that you know will protect you from perspiring as that will be half the battle.  Use the deodorant for a few days in day to day activities prior to using it in the field to ensure a successful outcome.

Scent Free Laundry Soap

Ok, I am sure most of you have heard of this one, but I use plain old baking soda! Again, I can attest that it seems to work just fine, I buy a large box of this at my local super store (Costco) and, for me, and it lasts all season long. I use it to wash all my hunting clothes in. Speaking of washing, always use cold water, and turn your camo inside out to help lengthen the life of your favorite camo garments. I have had the same set for over 5 years now, and they still look new, and work just fine. Another note about using baking soda, put it into the water first, and make sure it is dissolved before you put your clothes in, if you put it over top of your clothes, it may not dissolve, and your clothes will come out with white powder or lumps still on them 😦  For an extra boost of clean, add Oxy powder to the cycle as it will remove staining without adding additional scents 🙂

2 bear sized

Follow our FISHING BLOG

WEB   RATES     FISH    HUNT    CABINS    PHOTOS
TESTIMONIALS    BROCHURE    HUNT BOOKLET

Enter your email address to subscribe to this blog and receive notifications of new posts by email.

← Back

Thank you for your response. ✨

Email Me....


Tags: , , , ,

Muscle Exercises for Archery

Archery is a sport that involves the use of a bow and arrow, This sport is hundreds of years old and is even featured in the Olympics. The actions in archery utilize several main muscle groups in the body, including the triceps, which sit at the back of your upper arm, the deltoid muscles in your shoulders and the latissimus dorsi muscles in the lower back. To improve your archery skills, include exercises that target these muscles in your workout.

archery123

Raise One Arm to Boost Arm Strength

Dumbbell one-arm lateral raises strengthen the deltoid muscles, which are used to provide strength and power for holding and pulling back the bow in archery. Stand straight with your feet shoulder-width apart, your right hand holding onto a stationary object on your right and your left hand holding a dumbbell straight down so it’s resting in front of your pelvis. Slowly raise your left arm up to the side, continuing until your elbow is at shoulder-level. Lower it back down, repeat and then switch arms.

Row, Row, Row Your Muscles

Spending time on the rowing machine is well worth it if you want to improve muscles for archery, because it works all of the primary muscles used in the sport including the deltoids, latissimus dorsi and triceps. Sit on the seat with your feet strapped in securely. Keep your back straight and hold onto the handle. Slowly push off with your feet, sliding back until your legs are almost fully extended. Return to your starting position and repeat.


resistancebandsexercises

Go Overhead for Strong Triceps

The overhead triceps extension is one of the most effective exercises for the triceps muscles. Stand straight up with your feet close together, one slightly in front of the other and both flat on the floor. Extend your arms fully above your head, grasping the top of a dumbbell with both hands. While keeping your upper arms beside your head, slowly flex your arms, lowering your forearms behind you toward your back until you feel a light stretch in your triceps. Raise your arms back up above you to complete one rep. Repeat.

Get Big Results with the Barbell Pullover

The barbell pullover exercise targets the latissimus dorsi muscle in the back, but it also works the triceps and deltoids, making it an integral muscle exercise for archery. Lie your upper back perpendicular on a flat weight bench, your legs bent in front of you on a right angle with your feet flat on the floor. Grasp a barbell, position your arms so they’re extended straight above you and keep your hands aligned with your shoulders. While keeping your arms straight during the movement, move your arms back in a slow, controlled motion, until the barbell is directly behind your head. Then, return to your starting position. Repeat.

Why You Need the Lat Pulldown in Your Life

The latissimus dorsi is the largest muscle of the back and is one of the main muscles in the body used in archery, primarily during the drawing motion of the bow. Lat pulldown exercises are most effective for targeting this muscle, so try the cable close-grip pulldown. On the seat of a lat pulldown machine, place your feet flat on the floor below you and position your hands above you while grasping onto the parallel cable attachment. Engage your core, pull down on the cable attachment and then return it until your arms are fully extended. Repeat.

bow1

Weights, Reps and Sets

Even with all the right exercises, if you’re not using the right amount of weight or completing the proper number of sets and reps, you’re not going to get the results you’re hoping for. Start off with a weight you can manage, and only increase the amount of weight you’re using when you can complete a full set of 12 reps while maintaining proper form the entire time. Gradually work up to completing three sets of 12 reps.

Follow our FISHING BLOG

WEB   RATES     FISH    HUNT    CABINS    PHOTOS
TESTIMONIALS    BROCHURE    HUNT BOOKLET

Enter your email address to subscribe to this blog and receive notifications of new posts by email.

← Back

Thank you for your response. ✨

Email Me....


Leave a comment

Posted by on January 8, 2016 in archery, hunting, Wawang Lake Resort


Tags: , , ,

Art of Archery – A Timeline through Ages Infographic

ODL0814_HUN02

Here’s an interesting read Infographic on the evolution of archery
art-of-archery-a-timeline-through-ages-infographic-by-global-gear

Follow our HUNTING BLOG

WEB   RATES     FISH    HUNT    CABINS    PHOTOS
TESTIMONIALS    BROCHURE    HUNT BOOKLET

Enter your email address to subscribe to this blog and receive notifications of new posts by email.

← Back

Thank you for your response. ✨

Email Me....

 
Leave a comment

Posted by on January 7, 2016 in archery, Wawang Lake Resort


Tags: , , ,

Shoot it! : A picture is worth a thousand words!

Wawang has always been synonymous with great trophies.  We have also be recognized as one of the most photographed filled brag book holders amongst our peers.  Believe me, when you have this much to be proud of, you want the world to see it 🙂

This slideshow requires JavaScript.

It is for this reason that we announce that we can now be found on Instagram!  With so many photos of successful fishing and hunting, it just makes sense to share it with the world.

We have always lived by a principal here: Show me, don’t tell me!  Join us and see what we can show you…..because remember, what you show, shows what you know!

Come on over and see our page WawangResort  and tell us what you think!

Follow our FISHING BLOG

WEB   RATES     FISH    HUNT    CABINS    PHOTOS
TESTIMONIALS    BROCHURE    HUNT BOOKLET

Enter your email address to subscribe to this blog and receive notifications of new posts by email.

← Back

Thank you for your response. ✨

Email Me....

 
Leave a comment

Posted by on January 6, 2016 in black bear, moose, Wawang Lake Resort


Tags: , , , , , , , , , , , ,

Time to Start Planning Your Bear Hunt!

The season has come and gone with plenty of success.
Many people dream one day of harvesting that trophy bear but put it off for one reason or another….time to put the excuses on hold!

Bear Rates


For in depth hunting information check out our Hunt Booklet:  http://www.flipsnack.com/wawangresort/hunt-information-booklet-fdc8w9nxq.html

Follow our FISHING BLOG

WEB   RATES     FISH    HUNT    CABINS    PHOTOS
TESTIMONIALS    BROCHURE    HUNT BOOKLET

Enter your email address to subscribe to this blog and receive notifications of new posts by email.

← Back

Thank you for your response. ✨

Email Me....


Tags: , , , , , ,

Gear up: The Parts of Compound Bow

combowwawanglake


The lure of archery hunting has been an age old tradtion. From the evolution of spear to projectile, a sport was born!

Many people (including myself) have been daunted by the task of choosing their first bow. From draw length to pull pounds, this choice can be pivitol to a successful purchase.

There are many manufacturers and models being introduced yearly boasting a wide array of different accessories, colors, cam numbers and composites but in general, most compound bows come equipped with the same basics.

Study the image to the right to help learn the parts of the compound bow. Click on a compound bow part for glossary definition.

Parts of a Compound Bow

parts of a compound bow

  1. Arrow Rest
  2. Arrow Shelf
  3. Berger Hole
  4. Bow Sling
  5. Bow String
  6. Brace Height
  7. Cable(s)
  8. Cable Guard
  9. Cable Slide
  10. Cam(s)
  11. D-Loop
  12. Fletchings / Vanes
  13. Grip
  14. Limb(s)
  15. Nock
  16. Nocking point
  17. Peep Sight
  18. Quiver
  19. Riser
  20. Sight
  21. Silencing Aids
  22. Stabilizer
  23. String Vibration Arrester
  24. Tiller Measurement

With this basic outline, you can build your understanding and move forward into the purchasing stage.  Remember, before attempting to harvest any animal, practice practice practice!  More times than not, an amateur archery hunter will skip this step and either miss or wound an animal needlessly 🙂

If you are anxious to use your bow immediately, join an archery club…not only will you learn the skills needed, but you may even meet others that are looking forward to hunting and may request your company 🙂

Follow our FISHING BLOG

WEB   RATES     FISH    HUNT    CABINS    PHOTOS
TESTIMONIALS    BROCHURE    HUNT BOOKLET

Enter your email address to subscribe to this blog and receive notifications of new posts by email.

← Back

Thank you for your response. ✨

Email Me....

 
Leave a comment

Posted by on January 4, 2016 in archery, bow, Wawang Lake Resort


Tags: , , , , , ,

Quick Tips For Hunter Safety

While reading some great hunting articles last night, I came across a very overlooked topic.  This is an article written by Tyrrell Hearn and is a great quick snippet on basic hunter safety tricks!

climbing treestand

Over the years we have all heard of hunting accidents and how bad they can be. Hunting safety should be paramount in the mind on any hunter, especially those using high-powered rifles. It goes without saying that guns are designed to take life quickly and effectively, making it imperative that you treat them as such. If you are a hunter, here are a couple tips to keep you safe this season.

IMG_5703 (640x495)

Blind placement– Keep in mind that there are people around you who may also be hunting in the mornings and evenings. Be mindful of other known hunting groups in your area. Having a chat with them about the direction of their firing lanes so everyone is up to date on their neighbor’s new hunting spots is a great way to stay safe.

Less powerful bullets– It is always a draw to buy the highest grain bullet for your guns, however, higher grain equals a faster and longer bullet trajectory. Pick something a little smaller but effective for the game you are targeting.

Aviary Photo_130254763368957516

Hollow points– Buy hollow point bullets. Full Metal Jacketed bullets are not legal to hunt with in most areas anyway. Hollow or soft tipped bullets will break up even if they are only hitting brush and small trees. Lessening your chance of a bullet traveling way past your target.

P1040004

Safety orange– Wear your safety gear so that even at a distance, the most novice of hunter will not mistake you for an animal.

Stay safe, think ahead, and have a great hunting season!

Follow our FISHING BLOG

WEB   RATES     FISH    HUNT    CABINS    PHOTOS
TESTIMONIALS    BROCHURE    HUNT BOOKLET

Enter your email address to subscribe to this blog and receive notifications of new posts by email.

← Back

Thank you for your response. ✨

Email Me....

 
1 Comment

Posted by on January 3, 2016 in archery, black bear, grouse, moose, Wawang Lake Resort


Tags: , , , , , , , , ,

Geared Up: Cleaning Your Gun

Most know that cleaning a firearm is a necessity for ownership.  This not only helps prevent malfunction and missfire but can also help bullet path and accuracy.  What most don’t know is that the average gun owner does not clean their firearm correctly which can lead to major headaches down the road 🙂

Here are a few great tips to set you straight

Step 1: Clean barrel and metal parts
Step 1: Clean barrel and metal parts with good commercial solvent.
Step 2: Bore should be cleaned through breech end
Step 2: Bore should be cleaned through breech end where possible.
Step 3: Clean bore until dry patch comes through as clean
Step 3: Clean bore until dry patch comes through as clean as possible.
Step 4: Run oily patch through barrel
Step 4: Run oily patch through barrel.
Step 5: All metal parts should get light coat of oil
Step 5: All metal parts should get light coat of oil.
Step 6: Store in horizontal position
Step 6: Store in horizontal position, or with muzzle pointing down.
Step 7: After storage, run a clean patch through bore
Step 7: After storage, run a clean patch through bore before firing.
Step 8: Remove all excess grease and oil
Step 8: Remove all excess grease and oil.
Click to view pdf of this diagram
With clean gun in hand, enjoy the hunt!

Follow our FISHING BLOG

WEB   RATES     FISH    HUNT    CABINS    PHOTOS
TESTIMONIALS    BROCHURE    HUNT BOOKLET

Enter your email address to subscribe to this blog and receive notifications of new posts by email.

← Back

Thank you for your response. ✨

Email Me....


Tags: , , , , , , ,

Bear Down: Tracking and Tracking the One That Might Getaway

 Black bear are very hard to kill, and they are hard to track when wounded. Even a good heavy-caliber lung or heart shot may not keep the animal from getting off into the woods, and that same shot may not leave very much of a blood trail. Wounded bear bleed into the porous fat layers between hide and muscle, and their thick fur absorbs external bleeding like a sponge. As the bear runs and the fat moves, it appears to seal over most wounds and even a heavily bleeding animal may travel a great distance before its wound begins to leave a visible trail again.

SAM_0022 (640x480)

There aren’t many more upsetting situations a hunter can face in this country than to put a carefully aimed shot into a carefully selected bear at virtual point-blank range, see it stagger, then vanish into the brush in two steps before you can even recover from recoil. You sit there, with dark closing in by the minute, not able to see more than 20 feet, and a wounded bear extending the distance. You have to get down onto the ground and do something about it. No wonder now why your guide and other experienced bear hunters kept telling you how important it is to hit a bear hard and solid and put him down and keep on hitting him until there is no chance he will get up and get out of your sight.

First rule is to wait.  Be patient and slowly gather your wits and be prepared for the next steps.

Second: Look.  Observe the direction your bear exited.

Third: Listen.  Bears are commonly known to turn into the direction of their wound (more likely if mortally wounded) and can actually end up circling the bait.  Those that don’t will run with such ferocity that the normally silent creature can cause major disturbances to surrounding areas and make enough ruckus for you to gage the direction to begin tracking.

If you are lucky, a short time after your shot is made, you may hear a drawn out, breathy cry often referred to as the death moan.  This likely means your bear is down and is not getting back up.  Don’t worry if you don’t hear one, not all bears will give you this satisfaction.

After waiting at least 30 minutes in your stand, cautiously come down and look at the area where your shot connected.  Look for any sign of your shot: blood, tissue or even an arrow that carried through.

Start in the direction where you shot and look for any sign of blood in the direction you saw your prey evacuate from.  Take the time to bring and use marking tape to highlight your trail as you go, not only will it give you a general direction, but it will also make finding your way out much easier and stress free.

A good, clean shot should drop a bear within 40 yards but we have tracked bear that have gone up to a couple of miles away.

peroxide

On top of marking tape, I also suggest having a spray bottle with peroxide in your kit.  In the forest, leaves can often have brown marks that look an awful lot like blood and using the peroxide will help differentiate as it will bubble on contact with blood.  I often add the brightest yellow food coloring I can find to highlight the blood even further.  I also like to pack a small black light to use in conjunction with this mixture as it will illuminate if the natural lighting begins to fade.

It is not uncommon to spend a few hours searching if your bear has gone beyond the 40 yard mark but don’t lose hope.  Keep your eyes peeled for signs of foot prints, snapped twigs or torn leaves as this could be nature’s own way of marking your bear’s trail.

If the day ends and no bear can be found, ensure that you go back early the next day.  Look for any signs of scavengers in the area.  Turkey vultures are often a DEAD giveaway.  They feed in the daytime so be prepared to wait a bit for them to arrive.  We sometimes will suggest to our hunters to climb back in the stand and look over the area again from the original vantage point.

If on the second day there is no harvest found and no sign of scavengers, it is very unlikely you will find your bear and you will come away with one of the hardest experiences in hunting.  Disappointing for both sides.

So in closing, take time placing that shot and take time looking for any wounded animals you may have created.

Follow our FISHING BLOG

WEB   RATES     FISH    HUNT    CABINS    PHOTOS
TESTIMONIALS    BROCHURE    HUNT BOOKLET

Enter your email address to subscribe to this blog and receive notifications of new posts by email.

← Back

Thank you for your response. ✨

Email Me....


Tags: , , , , , ,

On Target: How to Make Your Own Arrows

While doing some of my own research, we came across a fantastic article for all of you archers out there that have wondered about manufacturing your own arrows.

This article is reproduced from Edersbows.com, take some time to check them out 🙂 

arrows

Building your own arrows allows you to save about 5 to 1 0 dollars per dozen, but there’s an even better reason for building your own. You can experiment with all the components, with the various fletching styles and shaft sizes until you find the perfect arrow for your bow and your hunting or 3-D shooting requirements.

Building arrows is easy and fun, not to mention the satisfaction you’ll gain from taking game with arrows you’ve crafted yourself. Anyone can do it – and do it well. Armed with only a few basic tools and the information offered here, you’ll have no problem turning raw shafts into top-quality hunting arrows.

Nock Installation

nock
Year’s ago nocks were all glued on, now most arrows offer pressure-fit nocks that fit snugly but are turnable. Tunable nocks are definitely the way to go. These systems will make tuning a lot easier, and they hold up to more hard shooting than will glue-on nocks.

Assuming you aren’t going to paint (crest) your arrows, nock installation is the first step in the arrow building process. Use hot melt glue or epoxy when installing bushings into aluminum. When installing them in (or over) carbon shafts, use a rubber-based epoxy such as that available from Beman or Arizona Archery Enterprises (AAE).

Regular glue-on nocks should be pressed firmly into place (without glue) until after the fletching has been attached. When the arrow is finished you can rotate the nocks to the proper orientation so the fletching clears your rest and then glue them in place. Bohning Fletch- Tite works fine for this.

Apply The Fletching

fletching
You need a fletching jig, but it doesn’t have to be fancy. I’ve had good luck with the $20 plastic Martin jig I bought more than 10 years ago. Other good ones are made by Bohning, Bitzenburger and Grayling. You have three clamp options: left helical, right helical and straight

(no helical). For hunting and 3-D shooting, right helical is the most popular choice. If you’ll be using feathers, make sure to order feathers from the same wing as the clamp (right helical takes right wing). Vanes are manufactured straight and can be used with any clamp, so you don’t have to specify left or right when ordering.

One of the best fletching adhesive I’ve used for vanes is Fast-Set Gel made by AAE. This is a super-glue product that sets up in only 10 seconds allowing you to use a single-clamp jig and still fletch a dozen arrows in mere minutes. Fast-Set Gel will work on all shaft styles except AFC’s film-dipped carbon arrows, which require a traditional cement such as Bohning’s Fletch-Tite. Of course, Fletch-Tite will also work on aluminum arrows but takes about 10 minutes per fletching to set-up before you can remove the clamp. Fletch-Tite is still the best choice for feather fletching, however.

Place your fletching in the clamp so that its back edge will be about 3/4 inch ahead of the nock taper or nock bushing on your arrow. Adjust the back of the magnet on your jig (the magnet holds the clamp in place while the glue dries) inward or outward until the tail of the fletching sits squarely on top of the arrow. Next, adjust the forward end of the magnet to achieve the desired amount of helical. Easton’s technical representatives recommend four to five degrees of helical. I use a bit more myself – probably closer to seven degrees – but this is only on large diameter aluminum arrows. On smaller diameter carbon arrows I stay closer to Easton’s standard.

When using a straight clamp, (as opposed to a helical clamp) you don’t have as much lee-way and must either install your fletching perfectly straight or with a very slight off-set.

After your fletching is installed, apply a small dab of adhesive to both ends of each for a little added insurance against tearing loose.

You have more freedom to experiment with your fletching style and degree of helical than with any other aspect of arrow building, but it’s still best to observe a few general ground-rules. When making aluminum arrows for hunting, stick with four to five inch fletching. Five inch is a bit better because (in theory at least) it offers a small amount of added stability which can make a difference when shooting broadheads.

Carbon arrows, because of their smaller diameter, work best with shorter fletching (four inch is a good starting point) or you can run into a contact problem when trying to pass long helical fletching through the narrow gap in your rest. You can also experiment with various fletching orientations, such as 70/110 degree four-fletch, (you make this change by inserting a different indexing template into your fletching jig). But the basic 120 degree, three-fletch will do just fine under almost every shooting situation.

Cutting Arrows To Length
Draw an arrow and have someone mark it about a half to 3/4 inch in front of the rest. Cutting arrows is easy with the right equipment, but with the wrong equipment it can be a real headache. For limited quantities of aluminum arrows you can get by with a small rotating pipe cutter. I’ve done it a few times, but I’ve also made some pretty rough cuts, and basically ruined some arrows, in the process. You’re far better off pooling your money with a couple of buddies and getting an electric cut-off tool. You can also take your arrows to a pro shop (that’s equipped with an electric cut-off tool) to have them sized – usually for a price.

Installing Inserts and Outserts
Inserts and outserts (outserts are used with some types of carbon arrows) shouldn’t be taken for granted. Consistent accuracy with broadheads can be difficult to achieve when these components fit loosely. Inserts and outserts should install without any free-play. Usually you don’t have too many options with outserts – you get what the arrow maker offers – but you do have options with inserts. I’ve had good luck with aluminum inserts from Easton and Saunders and composite inserts from AAE. Inserts should have a light press-fit with the inside of the shaft so that each broadhead you screw in will line up perfectly with the shaft.

Aluminum inserts used in aluminum or ACC carbon arrows should be installed with hot-melt glue. Composite inserts in aluminum work best with a rubber-based epoxy, and the same applies for aluminum into carbon (Beman ICS or Gold Tip Graphite XT arrows) or when installing metal outserts on conventional all-carbon shafts. When you’re finished you can install a broadhead and spin test your arrows to make sure the inserts are properly aligned.

Take some time to visit http://www.eders.com/ to view their catalogue of parts and equiptment to assist you in your build.

lead_materials

Armed with the information above, you could now have a weekend hobby 🙂


Follow our FISHING BLOG

WEB   RATES     FISH    HUNT    CABINS    PHOTOS
TESTIMONIALS    BROCHURE    HUNT BOOKLET

Enter your email address to subscribe to this blog and receive notifications of new posts by email.

← Back

Thank you for your response. ✨

Email Me....


Tags: , , , , ,